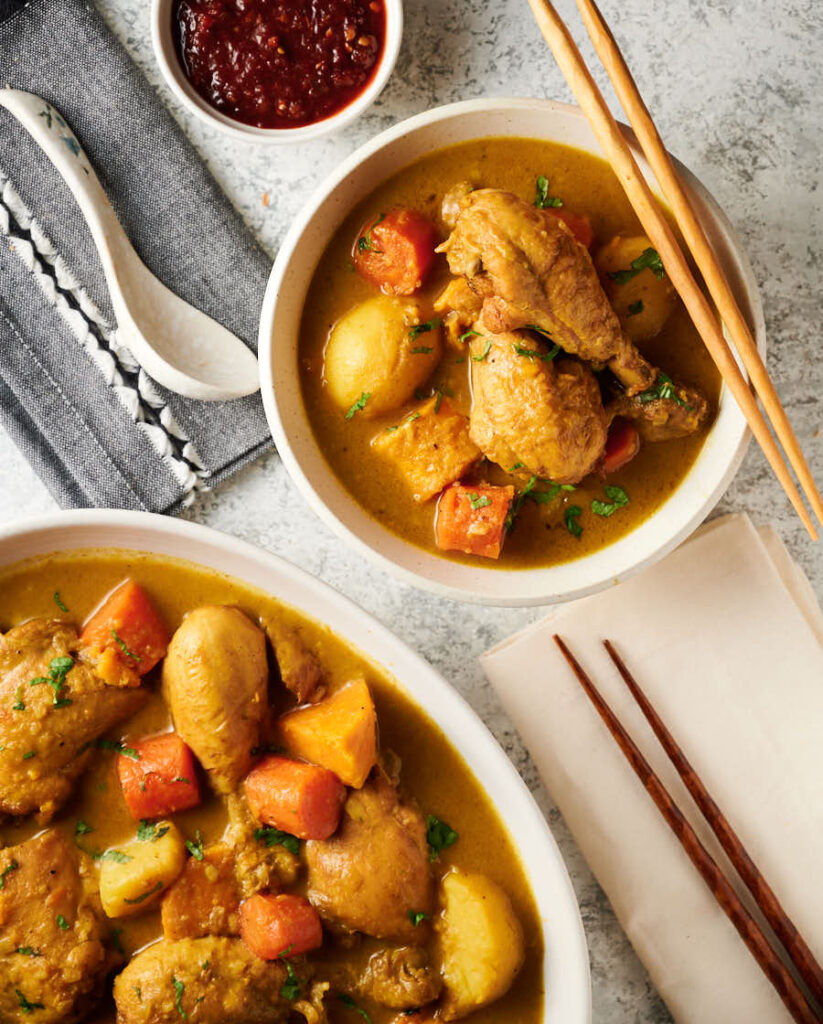
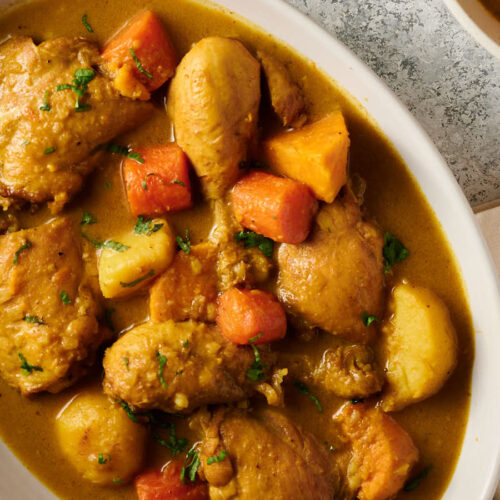
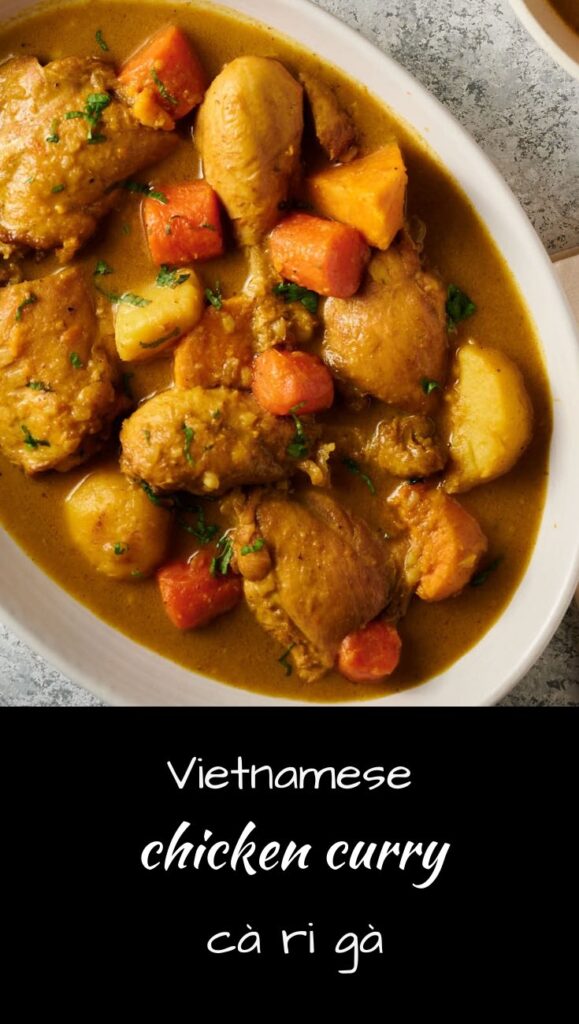
Take Indian spices. Bash them up against the flavours of Southeast Asia. And you get cà ri gà. Vietnamese chicken curry. Seriously tasty stuff.
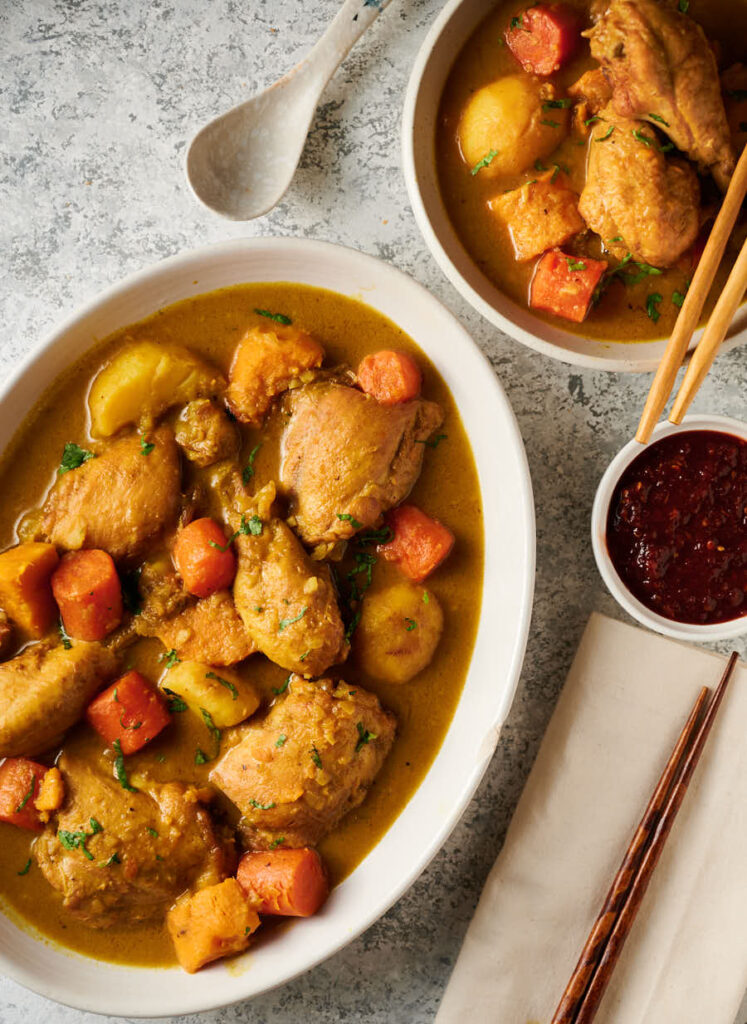
Chicken curry. Sweet potatoes. Carrots. Potatoes. Coconut milk. Lemongrass. Fish sauce. How can this possibly not be awesome?
It’s not quite like Indian curry. Familiar. But different. It’s more like a soup. Thin. Brothy. Perfect for dipping bread. And that’s exactly how you should eat it. With bread. Crazy. But so good.
Vietnamese chicken curry is also really good with rice noodles. Leave the root vegetables out. Serve it up in a big soup bowl. Maybe a bit unconventional. But it works.
I don’t get why nobody is doing it. Like a Vietnamese version of laksa. I’m calling that one a glebekitchen original. Please tell me if I’m wrong.

Indian technique makes a better Vietnamese chicken curry
There are a lot of cà ri gà recipes out there that tell you to marinate the chicken in curry powder and then fry the chicken. That’s the really hard way. Train wreck waiting to happen.
The chicken sticks to the pot. The spices burn. It can go sideways fast. Maybe not every time. But often enough.
The easy way is to bloom the spices in oil. There’s a lot of curry powder in Vietnamese chicken curry. And when you put this much spice in a dish you run the risk of a gritty texture.
I cannot stand gritty curries. So I always bloom my spices in oil. It’s easy. And it makes a big difference.
Blooming is just a fancy way of saying frying spices. Hot oil. Moderate heat. Spices. Stir. That’s it.
One thing. You need enough oil. That is critical. If you don’t have enough you might as well fight spice coated chicken like everyone wants you too.
Fry the root vegetables to keep their shape
This is the no-holds barred version of Vietnamese chicken curry. It doesn’t have to be this complicated. But this extra step makes a difference.
If you want easy Vietnamese chicken curry skip frying the root vegetables. Brown your chicken in a bit of oil. And follow the rest of the recipe.
Probably a good idea to parboil the root vegetables though. Carrots longest, then potatoes and sweet potatoes last.
But if you want to go for it fry the root vegetables. Not until they’re done. Just long enough to colour them up.
It will shorten cooking times. It will make sure the chicken doesn’t overcook. And fried does taste better. Don’t let anyone tell you otherwise.
And as long as you are frying the vegetables you might as well fry the chicken. It’s really no extra work. You’re already set up. Like I said. No holds barred.
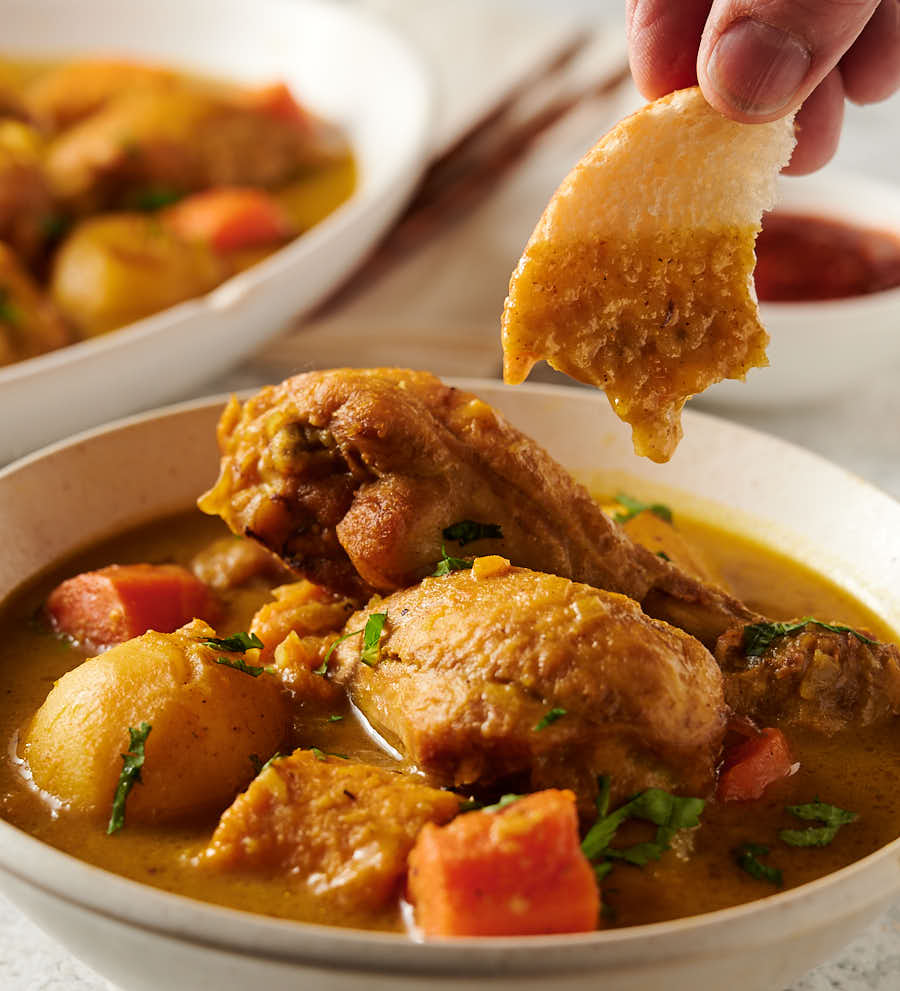
Serve good baguette with your Vietnamese chicken curry
I’m going to get into trouble for this. For sure. I like my Vietnamese chicken curry with baguette way more than rice.
I am not a fan of rice with this curry. And I eat a lot of rice. Just doesn’t work for me here. Not saying it’s wrong. Just saying it’s not for me.
Rice gets lost. I like a spoonful of broth. A bite of chicken. And a bit of bread dripping with sauce. Rinse. Repeat. Lick your bowl clean.
Curry powder matters
This is Vietnamese chicken curry. Not Indian chicken curry. So don’t think that using Indian madras curry powder is going to work here.
It is not the same. I have both. I have compared the ingredients. They are not the same. They don’t taste the same. Don’t even look the same.
It’s not actually hard to find Vietnamese madras curry powder. Once you know what you’re looking for you will see it in just about every Asian grocer.
Look for a package or a container that says ca ri ni or Vietnamese madras curry powder. Or maybe Vietnamese cari powder. Depends on the brand.
It’s actually a pretty safe bet that it’s the right stuff if it says madras on it and your Asian grocer doesn’t stock Indian.
Make the effort to find it. It matters.
Vietnam meets India meets delicious
This dish mixes up some of my favourite tastes in the world. And it comes out just like you’d expect it to.
It’s more Indian than Thai. Closest to Malaysian if I had to pick anything. Doesn’t matter really. It’s just delicious. And what else matters?
Vietnamese chicken curry. If you are a curry fan and you like Vietnamese then this is one you should try.
vietnamese chicken curry – cà ri gà
Ingredients
the spices
- 3 tbsp Vietnamese madras curry powder not Indian madras curry powder
- 1/2 tsp black pepper
- 1 tsp turmeric
- 1 tsp salt
- 2 bay leaves
The root vegetables
- 10 oz sweet potatoes cut into 1 inch pieces
- 1 lb carrots cut into 1 inch pieces
- 10 oz potatoes cut into 1 inch pieces. I use yukon gold.
- oil to shallow fry
Vietnamese chicken curry
- 2 lbs chicken skinless, bone-in. I like a mix of thighs and drumsticks.
- 1 cup shallots diced
- 3 stalks lemongrass cut in half
- 4 cloves garlic minced
- 1 inch ginger minced as fine as you can get it
- 3 tbsp fish sauce – start with 2 tbsp and decide if you want more.
- 3 cups chicken stock no sodium
- 1 1/2 cups coconut milk
- 4 tbsp vegetable oil you need this much oil to bloom the spices. They will stick or worse, burn if you cut back.
- the root vegetables
- the spice mix
- cilantro and Vietnamese garlic chili paste to garnish
Instructions
Do your prep
- Combine the curry powder, black pepper, turmeric and salt in a small bowl. Get your bay leaves ready
- Pick off the tough outer layer of the lemongrass. Cut each stalk into three even pieces.
- Peel the carrots, sweet potato and potatoes. Cut them all into 1 inch pieces
- Chop your shallots. Mince the garlic and ginger.
- Skin the chicken. Give is a liberal sprinkling of salt. You are now good to go.
Shallow fry the vegetables and the chicken
- A wok is great for this. If you have one use that. If you don’t something around a 10 inch pot should also do the trick. You can go bigger but you will need more oil. You want the oil somewhere around 2/3 of an inch deep.
- Heat 2 cups of oil over medium heat (or thereabouts – remember around 2/3 inch deep). You are going for a temperature of around 350F for the oil. Slip in a piece of sweet potato. If lively bubbles form around it you know you’re good.
- You’ll need to do this in 2 batches. Shallow fry all the sweet potatoes and half the carrots. Use a slotted spoon to flip them around so they brown evenly. The sweet potatoes take about 3 minutes. The carrots take about 4 minutes. You are going for lightly browned on the sweet potatoes and kind of blistered looking on the carrots. When they are done transfer them to a bowl lined with paper towel.
- For the second batch fry the other half of the carrots and the potatoes. Light brown on the potatoes and blistered looking for the carrots.
- The oil is hot anyway so you might as well fry the chicken. GIve it around 2 minutes per side. You want colour but you aren’t trying to cook the chicken through here. Transfer them to a bowl (no paper towel required) when the come out of the oil.
Make the Vietnamese chicken curry
- Heat the 4 tbsp vegetable oil over medium heat in a pot large enough to hold all the ingredients. Add the shallots and sweat until they are translucent and soft. This should take 3-4 minutes.
- Add the garlic and ginger and cook for another minute or so.
- Turn the heat down to medium low. Push the vegetables off to one side. You should have a puddle of oil in the middle of the pan. Its time to bloom the spices. Add the spice mix. Stir to make sure all the spice is well coated in oil. You may need a splash more oil if it looks dry. Don’t worry, you can spoon off some of the oil at the end if you want. Blooming the spices is really important so err on the side of a bit too much oil.
- Cook the spices for about 90 seconds to 2 minutes. Be careful. You don’t want the spices to burn. This step is critical. It’s also a really good trick to have in your bag for anything heavy on spice (think Indian and Mexican).
- Add the coconut milk, the chicken stock and 2 tbsp of fish sauce. Give it a good stir. Add the carrots, potatoes and the chicken. Hold the sweet potato back. It takes a little less time to cook sweet potatoes.
- Toss in the lemongrass and bay leaf. Bring to a simmer and cook for about 10 minutes.
- Add the sweet potato and cook until the chicken reaches an internal temperature of 170F for dark meat. This should take another 15 minutes. If you are using white meat you are going for 160F. Probably want to add your sweet potato in around 5 minutes sooner for white meat.
- To serve garnish with cilantro. Pass the garlic chili sauce along for people to add a bit more zing if they want. Serve with good crusty baguette.
Nutrition
vietnamese chicken curry - cà ri gà
Ingredients
the spices
- 3 tbsp Vietnamese madras curry powder not Indian madras curry powder
- 1/2 tsp black pepper
- 1 tsp turmeric
- 1 tsp salt
- 2 bay leaves
The root vegetables
- 10 oz sweet potatoes cut into 1 inch pieces
- 1 lb carrots cut into 1 inch pieces
- 10 oz potatoes cut into 1 inch pieces. I use yukon gold.
- oil to shallow fry
Vietnamese chicken curry
- 2 lbs chicken skinless, bone-in. I like a mix of thighs and drumsticks.
- 1 cup shallots diced
- 3 stalks lemongrass cut in half
- 4 cloves garlic minced
- 1 inch ginger minced as fine as you can get it
- 3 tbsp fish sauce - start with 2 tbsp and decide if you want more.
- 3 cups chicken stock no sodium
- 1 1/2 cups coconut milk
- 4 tbsp vegetable oil you need this much oil to bloom the spices. They will stick or worse, burn if you cut back.
- the root vegetables
- the spice mix
- cilantro and Vietnamese garlic chili paste to garnish
Instructions
Do your prep
- Combine the curry powder, black pepper, turmeric and salt in a small bowl. Get your bay leaves ready
- Pick off the tough outer layer of the lemongrass. Cut each stalk into three even pieces.
- Peel the carrots, sweet potato and potatoes. Cut them all into 1 inch pieces
- Chop your shallots. Mince the garlic and ginger.
- Skin the chicken. Give is a liberal sprinkling of salt. You are now good to go.
Shallow fry the vegetables and the chicken
- A wok is great for this. If you have one use that. If you don’t something around a 10 inch pot should also do the trick. You can go bigger but you will need more oil. You want the oil somewhere around 2/3 of an inch deep.
- Heat 2 cups of oil over medium heat (or thereabouts - remember around 2/3 inch deep). You are going for a temperature of around 350F for the oil. Slip in a piece of sweet potato. If lively bubbles form around it you know you’re good.
- You’ll need to do this in 2 batches. Shallow fry all the sweet potatoes and half the carrots. Use a slotted spoon to flip them around so they brown evenly. The sweet potatoes take about 3 minutes. The carrots take about 4 minutes. You are going for lightly browned on the sweet potatoes and kind of blistered looking on the carrots. When they are done transfer them to a bowl lined with paper towel.
- For the second batch fry the other half of the carrots and the potatoes. Light brown on the potatoes and blistered looking for the carrots.
- The oil is hot anyway so you might as well fry the chicken. GIve it around 2 minutes per side. You want colour but you aren’t trying to cook the chicken through here. Transfer them to a bowl (no paper towel required) when the come out of the oil.
Make the Vietnamese chicken curry
- Heat the 4 tbsp vegetable oil over medium heat in a pot large enough to hold all the ingredients. Add the shallots and sweat until they are translucent and soft. This should take 3-4 minutes.
- Add the garlic and ginger and cook for another minute or so.
- Turn the heat down to medium low. Push the vegetables off to one side. You should have a puddle of oil in the middle of the pan. Its time to bloom the spices. Add the spice mix. Stir to make sure all the spice is well coated in oil. You may need a splash more oil if it looks dry. Don’t worry, you can spoon off some of the oil at the end if you want. Blooming the spices is really important so err on the side of a bit too much oil.
- Cook the spices for about 90 seconds to 2 minutes. Be careful. You don’t want the spices to burn. This step is critical. It’s also a really good trick to have in your bag for anything heavy on spice (think Indian and Mexican).
- Add the coconut milk, the chicken stock and 2 tbsp of fish sauce. Give it a good stir. Add the carrots, potatoes and the chicken. Hold the sweet potato back. It takes a little less time to cook sweet potatoes.
- Toss in the lemongrass and bay leaf. Bring to a simmer and cook for about 10 minutes.
- Add the sweet potato and cook until the chicken reaches an internal temperature of 170F for dark meat. This should take another 15 minutes. If you are using white meat you are going for 160F. Probably want to add your sweet potato in around 5 minutes sooner for white meat.
- To serve garnish with cilantro. Pass the garlic chili sauce along for people to add a bit more zing if they want. Serve with good crusty baguette.
Nutrition
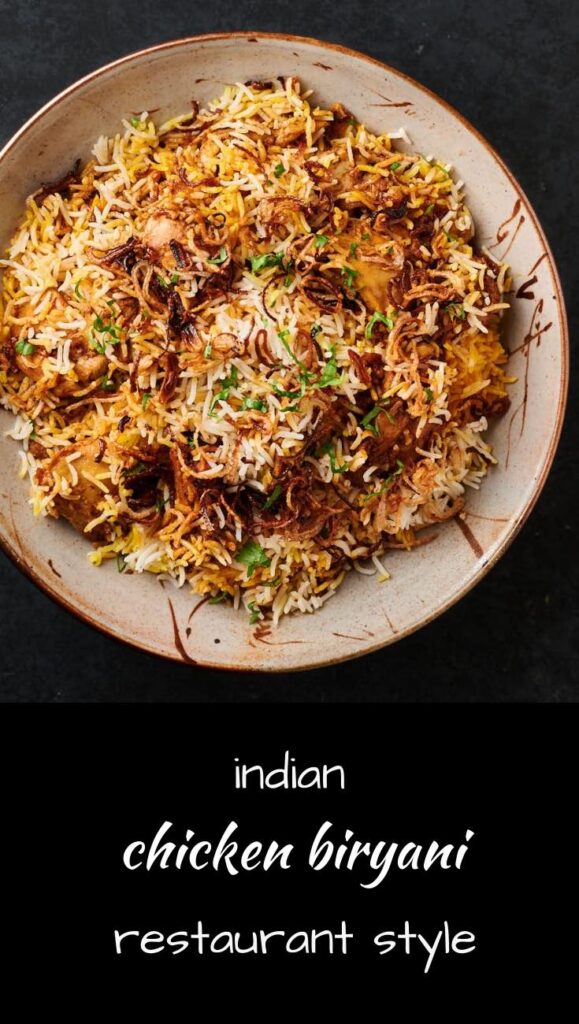
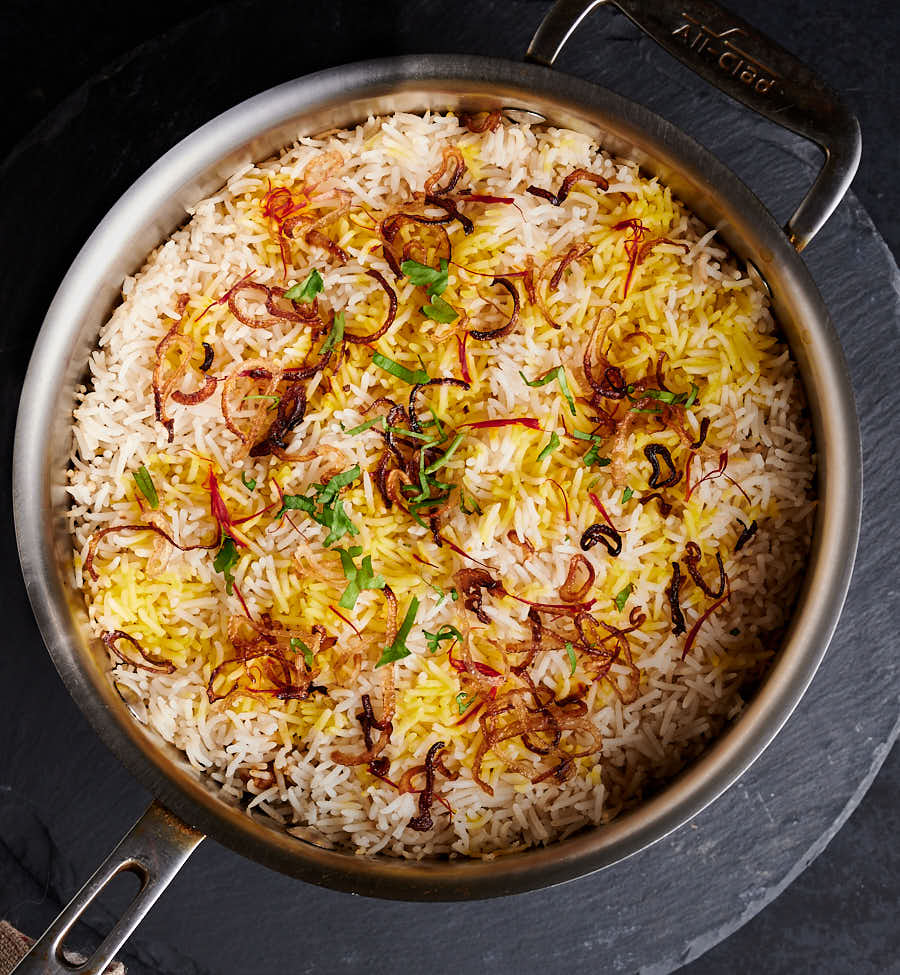
Indian chicken biryani is a magical thing. It’s party food. And there’s a reason. Everybody loves it. It’s just really tasty stuff.
If you have ever made biryani you know what I’m talking about. It’s the moment you crack it open. The aromas reach out of the pot and grab you. You take that first bite. And you know you’ve made something special.
Traditional biryani is a labour of love. It’s real work. Worth it. So worth it. But it takes time. And it’s tricky. So it isn’t easy to get your fix.
The hardest thing is the rice. Biryani calls for rice that’s 70 percent cooked. Then you take raw chicken. Toss it in. Finish cooking the rice and hope the chicken cooks. Not trivial. Doable. But not trivial.
It works. But there’s an easier way. Restaurant style.
Restaurants aren’t making biryani for 100 at once and hoping you’ll come in and ask for it. They make it to order. Like everything else in an Indian restaurant. And this is how.
Chicken biryani restaurant style
This isn’t stir fried rice. There are a few recipes out there that tell you to stir fry a bunch of stuff. Toss in some pre-cooked basmati. Mix it up. And call it done. This isn’t one of those.
You could simplify it. You could pre-cook the chicken completely. And then just heat your chicken biryani through. But that wouldn’t get the magic. The infusion of flavours into the rice.
I bet that’s what a lot of restaurants do. Just go as fast as they can. But that’s not how I roll. I want it all. I want the taste. The depth of flavour. And I want it fast. Maybe not quite as fast as in a restaurant. But close.
Flavour the rice
Biryani is about rice. That’s kind of obvious. But it’s about rice that’s infused with flavour. It’s the combination that make the magic.
So plain white basmati isn’t going to cut it. It needs spicing up. That’s not hard. Just a few extra ingredients.
And salt. Please salt your rice. It’s just not going to work if you don’t. This is not the place to watch your sodium.
Nothing to this step really. Just toss the seasoning into the pot. And cook. Easy. But really important. So don’t skip this step.
Chicken biryani gets a boost from chicken stock
I’m going to guess this one is not Indian restaurant standard. It might be somewhere. Probably should be. But I haven’t seen anyone do it. So I’m going to say this one is a glebekitchen special.
The magic in a biryani comes from cooking the chicken in a sealed pot. It’s like pressure cooking chicken flavour into the rice. 15 minutes and half cooked chicken isn’t going to cut it.
So it has to come from somewhere. And that somewhere is chicken stock. Not 100 percent chicken stock though. Just enough to get things going in the right direction.
Cook the chicken
Traditional chicken biryani has seared chicken that hasn’t nearly been cooked through. That works because the rice can stand a nice long cook. That’s why it’s parboiled.
Restaurant style doesn’t take as long. So the chicken has to be almost cooked when it all goes together. Not a big deal. Just an adjustment in the approach.
The time it takes to sear big pieces of bone in chicken isn’t a lot less than the time it takes to cook bite size pieces of chicken thigh. So roughly even from a timing perspective.
And you have the benefit of seriously tasty chicken. So it’s a win-win.
Experienced Indian cooks will notice I leave the yoghurt out of this recipe. That’s not an oversight. I’ve tried this with yoghurt. I wanted to love it. I really did. But it doesn’t work. It blunts the flavour too much. And glebekitchen is all about flavour.
Bake your chicken biryani
This is probably the biggest difference between a classic biryani and the restaurant version. Bake your biryani. Toss it in the oven and close the door.
Classic biryani is cooked on the stove. Or over a fire. Making it for 100 takes a big fire. Super cool videos on YouTube about that. But building a fire is a little too imprecise for a restaurant. Unless you’re an absolute master like Francis Mallmann I guess.
Restaurants need repeatability. Predictability. It needs to work. Every. Single. Time.
And they don’t have a hundred burners on their stovetops. But they do have ovens. And you can stack a lot of single servings of biryani in an oven.
Makes sense to me. I use the oven whenever I need consistent, even heat. And consistent even heat works well here.
Make this recipe your own
I worked hard to come up with this recipe. I ate a lot of biryani. A lot. Luckily I like it so it wasn’t too much of a hardship.
In the end I have a technique. That I can use to mix things up. Lamb. Hyderabadi style. Whatever I want.
And you can do it too. I don’t like raisins in my biryani. If you do, toss some in. Want it spicier? A bit of green chili with the cumin seed will fix you up. Richer? Add some ghee to the pot before you put it in the oven.
Whatever you want. Go for it. Make it your own chicken biryani. But make it. Just make it.
chicken biryani – indian restaurant style
Ingredients
The rice
- 1 1/2 cups basmati rice
- 1 1/4 cups water
- 1 cup chicken stock – low or no sodium. Bouillon cubes are not chicken stock.
- 3 green cardamom pods
- 5 cloves
- 2 inch cinnamon bark also known as cassia
- 1 tsp kosher salt
Biryani spice mix
- 1 tsp garam masala
- 1/2 tsp turmeric
- 2 tsp cumin powder
- 1 tsp coriander powder
- 1/2 tsp kasoor methi also known as dried fenugreek leaves
- 1 tsp kasmiri chili powder
- 1/2 tsp amchoor powder dried mango powder
The chicken
- 5 tbsp neutral oil I use canola
- 1 lb chicken thighs boneless, skinless and cut into three or four pieces per thigh
- 1/2 tsp salt
- 1 cup shallots thinly sliced
- 1/2 tsp cumin seed
- 1 tbsp garlic ginger paste
- the biryani spice mix
- 1 tbsp tomato paste diluted with 4 tbsp water
The chicken biryani
- the seasoned rice from above
- the cooked chicken along with all the tasty sauce
- 1 tbsp fried shallot plus more to garnish (see notes if you want to make them yourself)
- a few strands of saffron diluted in a couple tablespoons of warm water
- cilantro and fried shallots to garnish
Instructions
- Before you get started set your oven on to 350F.
Make the rice
- Want perfect rice every time? Get a rice cooker. I don’t like one trick kitchen appliances as a rule but I love my rice cooker. Something to think about…
- If you do have a rice cooker use it. Just combine the rice ingredients and proceed as you normally do. While the rice is cooking cook the chicken.
- If you don’t have a rice cooker this is an easy way to make basmati. You can pre-soak, rinse or whatever you want but this works pretty well as written. Blasphemy. I know. But it works. I did this for years until I got a decent rice cooker.
- Pick a saucepan with a fairly tight fitting lid that’s not way too big. Combine the water, chicken stock, green cardamom, cloves, cinnamon stick, salt and the rice in your chosen saucepan.
- Bring to a simmer over medium heat uncovered. Reduce heat to low and cover. Simmer for 20 minutes. Set a timer. Seriously. While this is going on make the chicken (see below).
- When the timer goes off after 20 minutes, turn off the heat and let stand an additional 5 minutes. Uncover. Remove the whole spices. They should be just sitting on top. Fluff gently and replace the cover to keep the rice warm.
Make the chicken
- Make the biryani spice mix. Just combine all the ingredients in a small bowl. Dilute the tomato paste. Slice your shallots. Have everything at hand.
- Heat the oil in a saute pan over medium heat. Add the shallots and cook until they start to brown. They will brown some more in the next couple steps.
- Add the cumin seed. Cook for about 30 seconds.
- Add the garlic ginger paste. Stir it into the oil and cook until it stops sputtering. Watch it. Don’t let it burn.
- Turn the heat to medium low. Add the spice mix and the 1/2 tsp salt. Stir to thoroughly combine the oil in the pan with the spices. Cook for about 30 seconds. Really watch it. There should be enough oil in the pan. If the spices start to stick turn down the heat and add a bit more oil.
- Add the diluted tomato paste, stir and turn the heat up to medium. Cook about a minute.
- Add the chicken and cook, stirring regularly until the chicken reaches an internal temperature of 150F. You want it mostly cooked. It will finish cooking in the assembled biryani.
Assemble the chicken biryani
- Use a pot that’s about 9-10 inches in diameter. Make sure it has a pretty tight fitting lid.
- Put a little more than half the rice in the pot and spread it out in an even layer. Top with the chicken mixture. Add the rest of the rice. Top with the fried shallots/onions (see note if you are making them yourself). Drizzle the saffron water mixture overtop.
- Cover the pot with tinfoil and then the lid. The tinfoil adds a little extra seal. It’s not quite as good as the dough seal in a traditional biryani but it will work well enough.
- Transfer the chicken biryani to the oven and bake for 15 minutes.
- After the biryani has baked for 15 minutes remove it from the oven and place it on the stove. Let stand for 10 minutes.
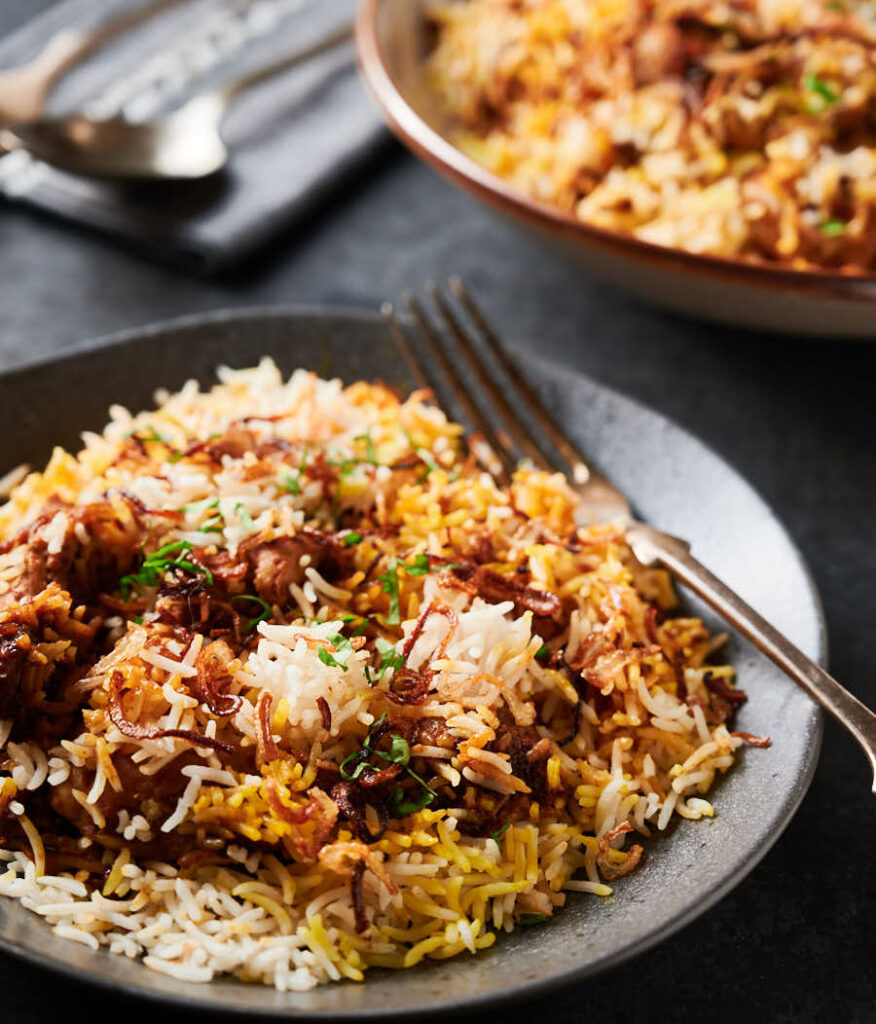
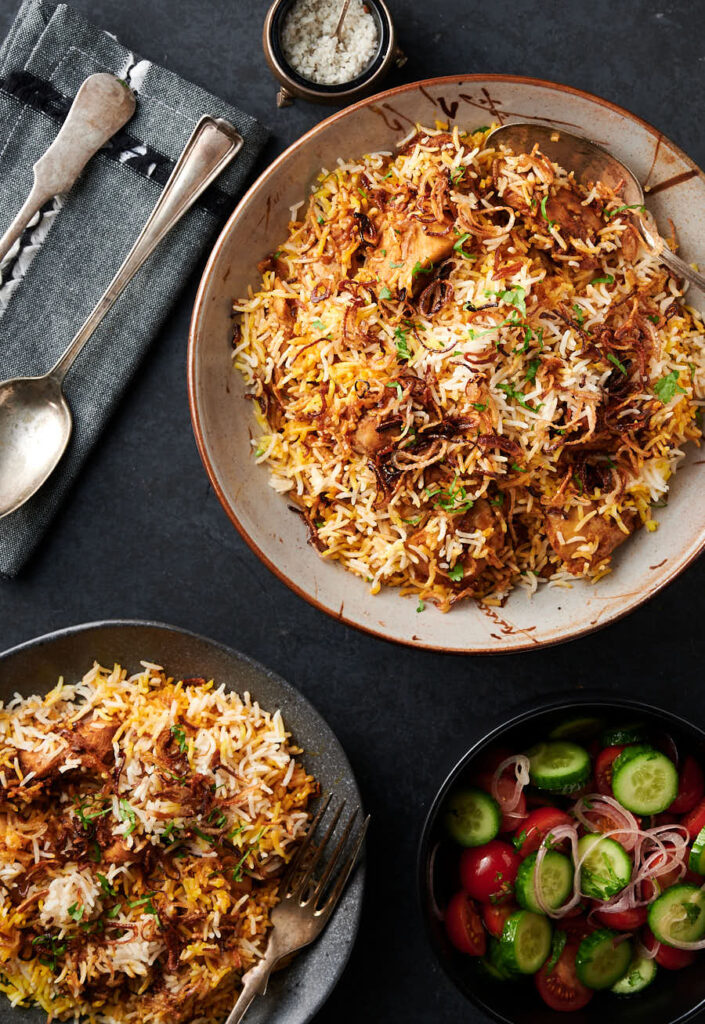
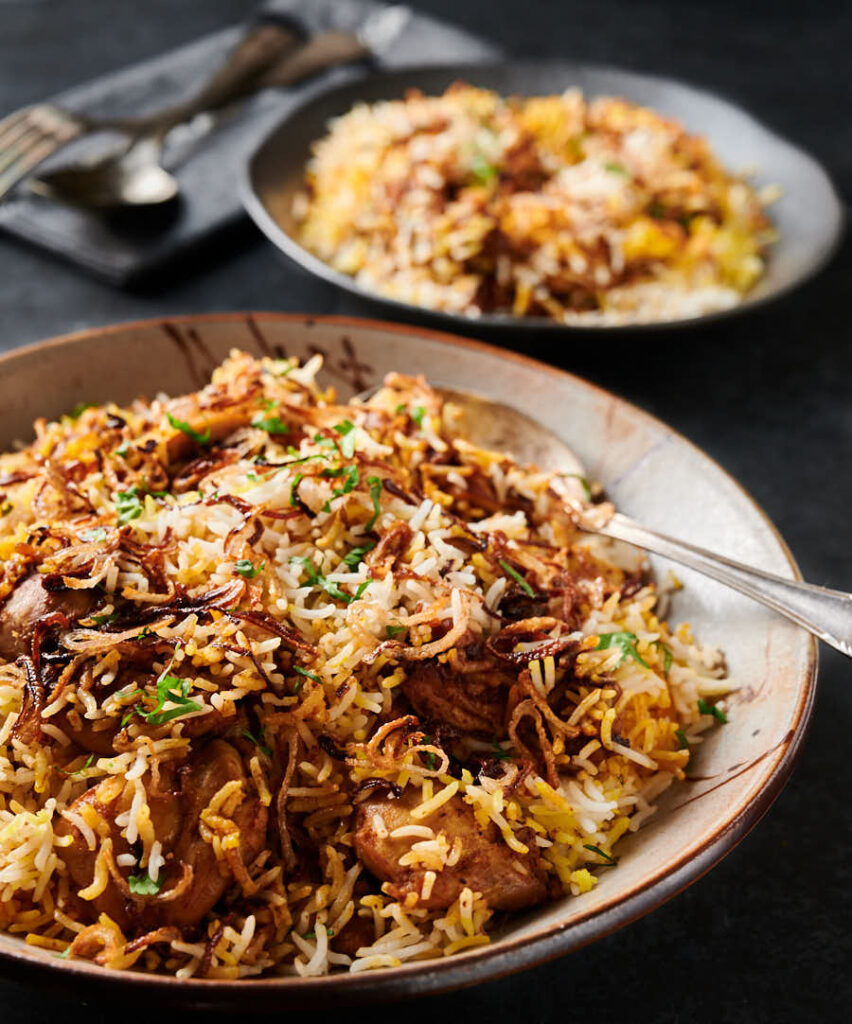
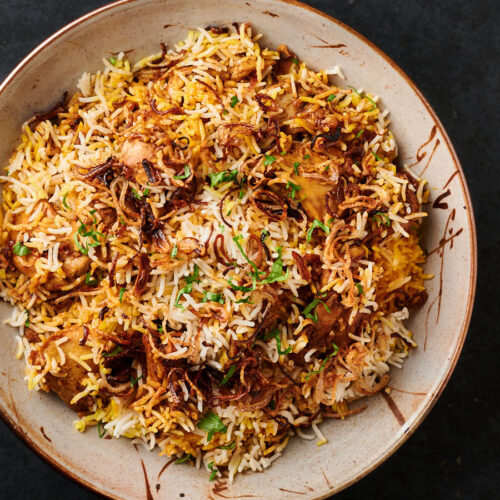
- To serve transfer the contents to a platter. It will get a bit messy. That’s OK. The mix will look good, especially once you garnish it. It should look just like the pictures because that’s exactly what I did.
- Garnish with more fried shallots and a bit of cilantro. Dig in and enjoy.
Notes
Nutrition