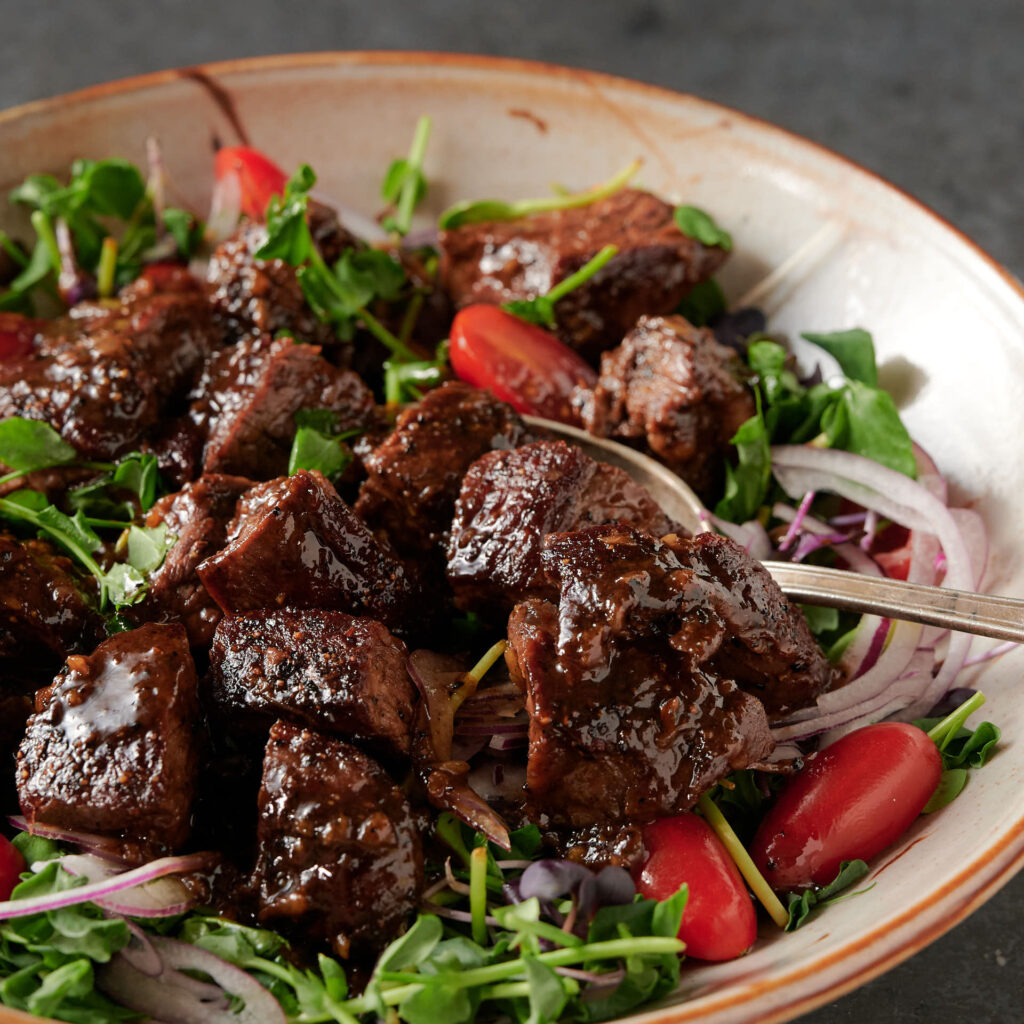
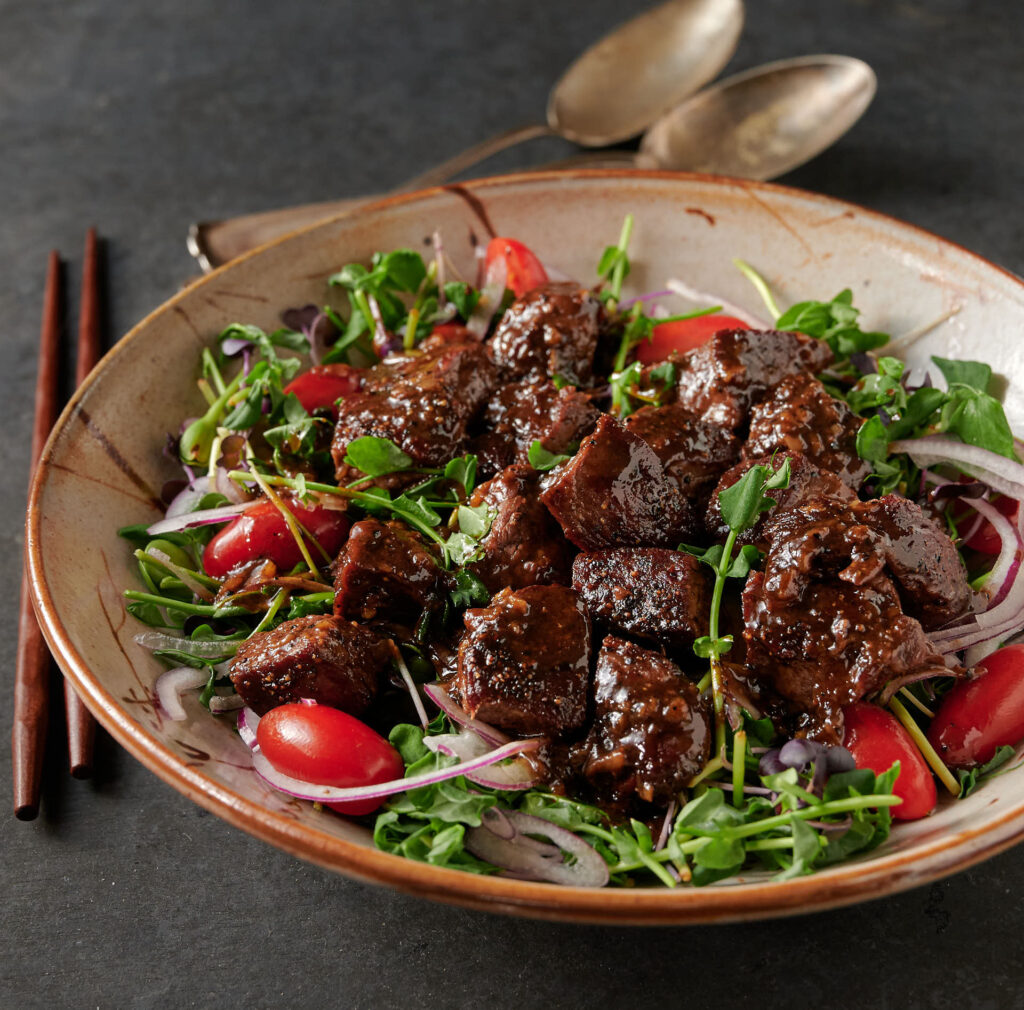
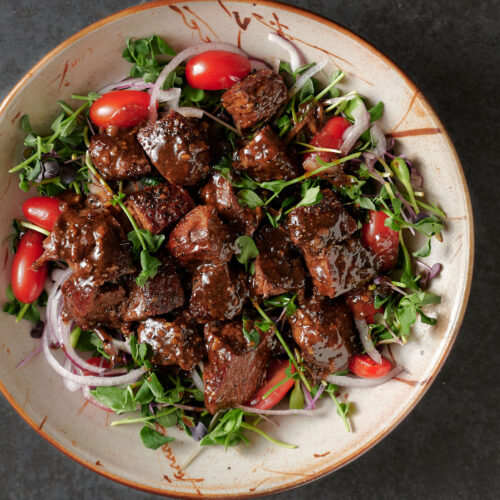
Shaking beef – bo luc lac – is one seriously tasty composed salad. Think super-flavourful sauteed beef on fresh greens, onions and tomatoes.
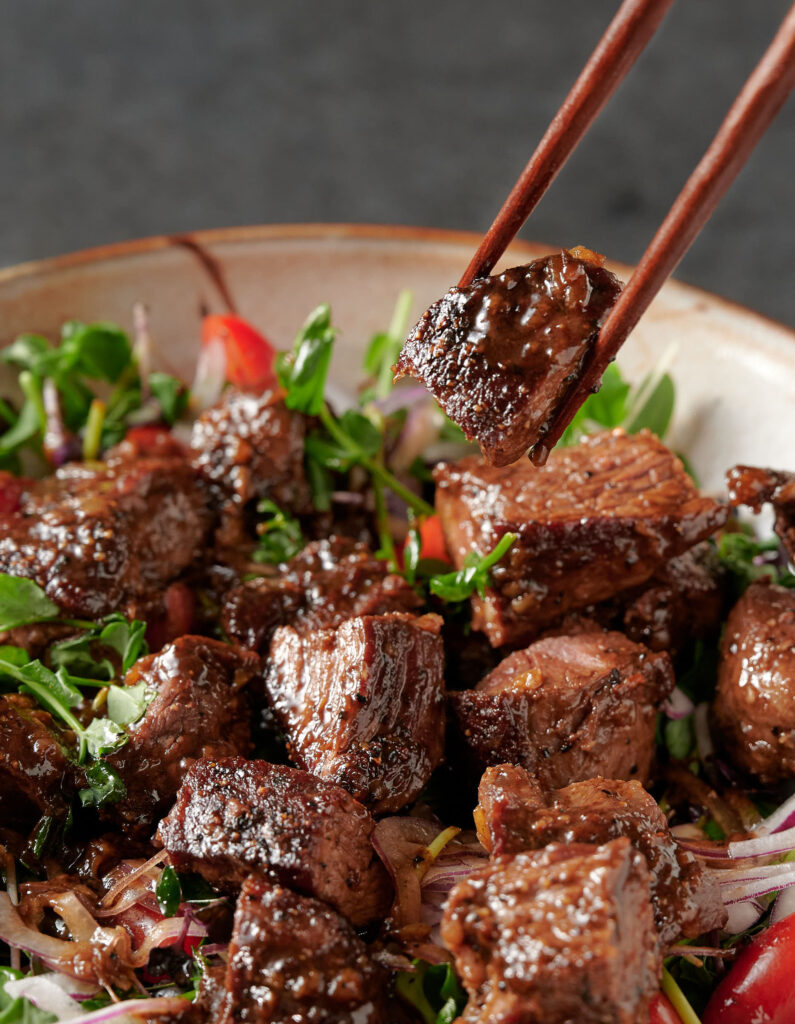
Wonderfully browned bits of beef in a peppery, salty sweet sauce. That’s what this is. The sauce wilts the greens a bit and the whole thing just explodes delicious in your mouth.
If you are a fan of the whole warm/cold composed salad thing this could become your new go to dish.
Shaking beef doesn’t shake on the plate. That just sounds unappetizing when I write it down. It’s called shaking beef because of the way it’s cooked. Traditionally anyway.
You’re supposed to shake the pan as the beef cooks. To make sure each little bit of meat gets evenly browned. Which is great in theory. But I don’t think that’s the best way to cook it.
Shaking beef needs to be browned
That browning that you get when you fry beef? That has a name. It’s called the Maillard reaction. And that reaction is a wonderful, wonderful thing.
It’s food science. Chemistry. Amino acids and reducing sugars hit heat. And magic happens. Millions of new flavour compounds are created.
You don’t need to understand it. But you do need to believe in it. And you need to make sure it happens in your pan.
Which is why I don’t get a lot of recipes for shaking beef. I see marinate cubes of beef. Get them good and wet. Then dump it in a pan.
When I try that I get steamed beef. Grey beef with maybe a little browning If I cook the beef to death. Not what I’m after at all.
Wet, cubed beef is not good for Maillard. Think about overcrowding a pan when you are browning beef for stew.
You get browning. Eventually. Once all the liquid that’s been released from the beef evaporates. Not great. But you can get by because it doesn’t matter how long you have the beef in the pot. It’s stew.
The beef is going to get braised for hours. So you don’t have to worry about overcooking it in the pot. Thing is, it does matter for shaking beef.
Cook a steak – then make bo luc lac
When I want maximum Maillard I keep the beef in 8-10 oz size pieces. Steaks. And I salt at the last possible minute. Right before it goes into the pan.
Salting at the last minute is important. Think dry brining. As soon as you salt water is drawn out onto the surface of the meat.
That’s osmosis. More food science. The process reverses after a while. That’s how dry brining works. But you don’t want it in the pan while it’s wet. So salt at the last minute. You want as dry as you can get here.
You won’t get browning on all sides like you would with cubes here. That’s true. My thinking is that two sides done right is better than six sides of mediocre.
Plus you control how done the beef gets. Want medium rare? Stop at just before medium rare. Just remember an instant read thermometer is your friend here.
Once your steak is done to your taste, cut it into bite size chunks. You want comfortable bites here. Not big chunks. Unless you really want to practice your Heimlich manoeuvre I guess.
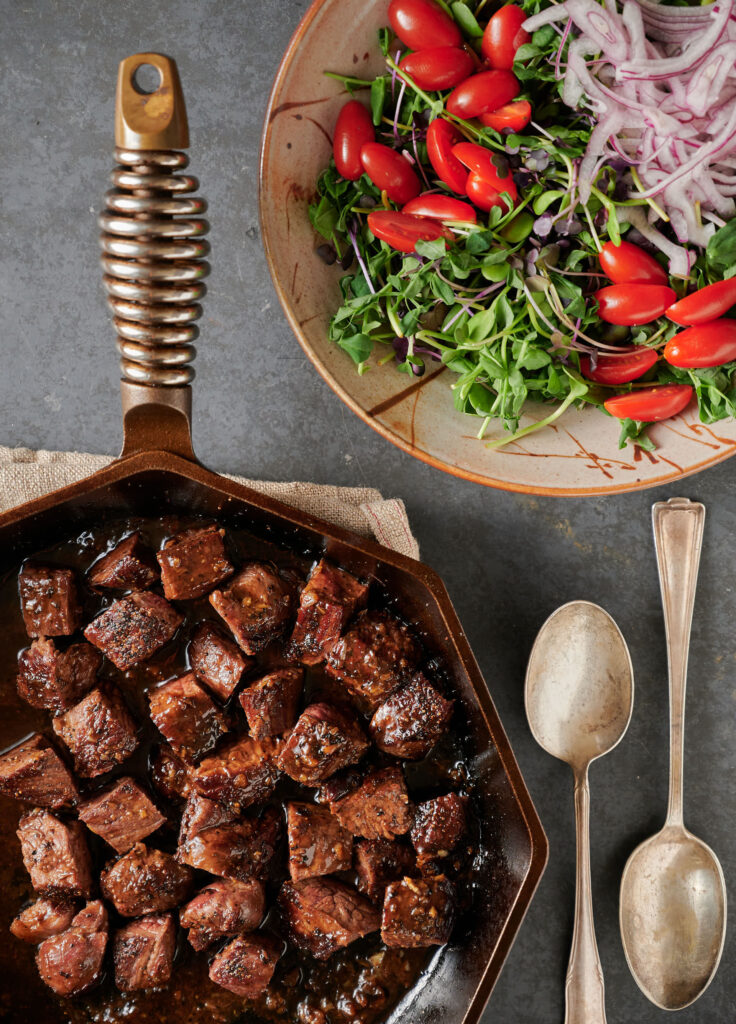
Add the sauce to the cooked beef
Even if you do decide to cut up your beef before you cook it please save the sauce for the end. Follow the recipe with a steak (better) or cubes (if you must) to maximize browning.
There’s another benefit to doing this way. When you cook beef in hot oil you get a fond. That brown stuff in the bottom of the pan? It’s gold. There’s all sorts of flavour there.
Cook the beef. Add the garlic and sweat it a bit. And then deglaze with the sauce. Scrape up that gold. Don’t leave it behind. Get that flavour into your dish.
Choice of oyster sauce matters for shaking beef
I may not be popular for saying this. But I really prefer Thai oyster sauce. For any recipe that isn’t Chinese anyway.
The flavour profile is different. I find it less salty. Less in your face. It doesn’t overpower. Just complements the dishes you use it in.
I couldn’t stand oyster sauce for years. Didn’t even stock it in my fridge. Until I discovered Thai oyster sauce. Now I always have it on hand.
Bo luc lac meets food science
This is shaking beef with a little food science thrown in. It’s a different approach for sure. Not your mom’s bo luc lac.
It’s how I like it though. I’m always after big, bold flavours. Try it. If you like it, let your mom know.
shaking beef – Vietnamese thit bo luc lac
Ingredients
The beef
- 1 lb beef ribeye or New York or filet mignon You want whole steak size pieces. Don’t cut it into cubes yet.
- salt to season the beef
- 1 tsp black pepper you want to give the beef a liberal coating of semi-coarsely ground pepper (think butcher’s blend)
- 3 cloves garlic – minced
- 2 tbsp vegetable oil plus a little more if the pan is dry when you add the garlic.
The sauce
- 2 tsp dark soy Thai sweet soy preferably
- 1 1/2 tbsp oyster sauce Thai preferably (strongly recommended really)
- 1 tbsp fish sauce
- 2 tbsp mirin
- 1-2 tsp sugar Or even more if you like things a bit sweet.
- 2 tsp sesame oil
The salad
- 1 tbsp rice vinegar to taste – this will be mixed with the hot sauce after you deglaze your pan.
- 3 cups watercress or baby greens of your choice.
- 1/4 cup red onion thinly sliced
- 1/2 cup cherry tomatoes cut in half (grape tomatoes are fine and so are thinly sliced regular tomatoes) – go with the best you can get
- a little drizzle of vegetable oil
Instructions
Do your prep
- Prepare your greens, red onion and tomatoes. Set aside.
- Combine the all sauce ingredients in a small bowl. You will be deglazing your pan with this sauce.
Cook the beef
- Pre-heat a heavy frying pan that will hold the steaks in a single layer over medium to medium high heat. Add the oil. Right before you start frying the steaks, season liberally with salt and pepper.
- Turn on your ventilation fan. This is going to smoke.
- Place the beef in the pan and fry around 3-4 minutes. You want a nice crust on the beef. This should get you to about medium rare. Depends on how thick your steaks are and how hot your pan is. I can’t be more precise because I just don’t know your specific details.
- Flip the steak and cook it another 3 minutes. Remove and let rest around 10 minutes. Check your internal temperature. 125F is rare. 130 is medium rare. Remove the pan from the heat.
- After the steak has rested for 10 minutes cut the beef into big bite size chunks.
- Return the pan to medium low heat. Keep an eye on it. You don’t want your fond to burn. Once it is heated add the garlic and cook around 30 seconds.
- Turn the heat up and deglaze the pan with the sauce. Scrape up all that delicious brown gold and stir to get it to dissolve into the sauce.
- As soon as you have finished deglazing the pan turn down the heat to low. Taste it. Now start adding the rice wine vinegar. You are looking for a nice balance of acid and savoury. Creep up on it.
- When you get to the point you are happy with your sauce (now your vinaigrette really) return the beef to the pan. Heat through gently. You don’t want it to cook more. Just warm it up.
- To serve spread your greens out on a plate. Top with onions and tomatoes. Drizzle with a bit of vegetable oil. Spoon the beef onto this mixture and drizzle with the sauce. Serve with lime wedges. Plate individually or as a communal appetizer.
Nutrition
shaking beef - Vietnamese thit bo luc lac
Ingredients
The beef
- 1 lb beef ribeye or New York or filet mignon You want whole steak size pieces. Don’t cut it into cubes yet.
- salt to season the beef
- 1 tsp black pepper you want to give the beef a liberal coating of semi-coarsely ground pepper (think butcher’s blend)
- 3 cloves garlic - minced
- 2 tbsp vegetable oil plus a little more if the pan is dry when you add the garlic.
The sauce
- 2 tsp dark soy Thai sweet soy preferably
- 1 1/2 tbsp oyster sauce Thai preferably (strongly recommended really)
- 1 tbsp fish sauce
- 2 tbsp mirin
- 1-2 tsp sugar Or even more if you like things a bit sweet.
- 2 tsp sesame oil
The salad
- 1 tbsp rice vinegar to taste - this will be mixed with the hot sauce after you deglaze your pan.
- 3 cups watercress or baby greens of your choice.
- 1/4 cup red onion thinly sliced
- 1/2 cup cherry tomatoes cut in half (grape tomatoes are fine and so are thinly sliced regular tomatoes) - go with the best you can get
- a little drizzle of vegetable oil
Instructions
Do your prep
- Prepare your greens, red onion and tomatoes. Set aside.
- Combine the all sauce ingredients in a small bowl. You will be deglazing your pan with this sauce.
Cook the beef
- Pre-heat a heavy frying pan that will hold the steaks in a single layer over medium to medium high heat. Add the oil. Right before you start frying the steaks, season liberally with salt and pepper.
- Turn on your ventilation fan. This is going to smoke.
- Place the beef in the pan and fry around 3-4 minutes. You want a nice crust on the beef. This should get you to about medium rare. Depends on how thick your steaks are and how hot your pan is. I can’t be more precise because I just don’t know your specific details.
- Flip the steak and cook it another 3 minutes. Remove and let rest around 10 minutes. Check your internal temperature. 125F is rare. 130 is medium rare. Remove the pan from the heat.
- After the steak has rested for 10 minutes cut the beef into big bite size chunks.
- Return the pan to medium low heat. Keep an eye on it. You don’t want your fond to burn. Once it is heated add the garlic and cook around 30 seconds.
- Turn the heat up and deglaze the pan with the sauce. Scrape up all that delicious brown gold and stir to get it to dissolve into the sauce.
- As soon as you have finished deglazing the pan turn down the heat to low. Taste it. Now start adding the rice wine vinegar. You are looking for a nice balance of acid and savoury. Creep up on it.
- When you get to the point you are happy with your sauce (now your vinaigrette really) return the beef to the pan. Heat through gently. You don’t want it to cook more. Just warm it up.
- To serve spread your greens out on a plate. Top with onions and tomatoes. Drizzle with a bit of vegetable oil. Spoon the beef onto this mixture and drizzle with the sauce. Serve with lime wedges. Plate individually or as a communal appetizer.
Nutrition
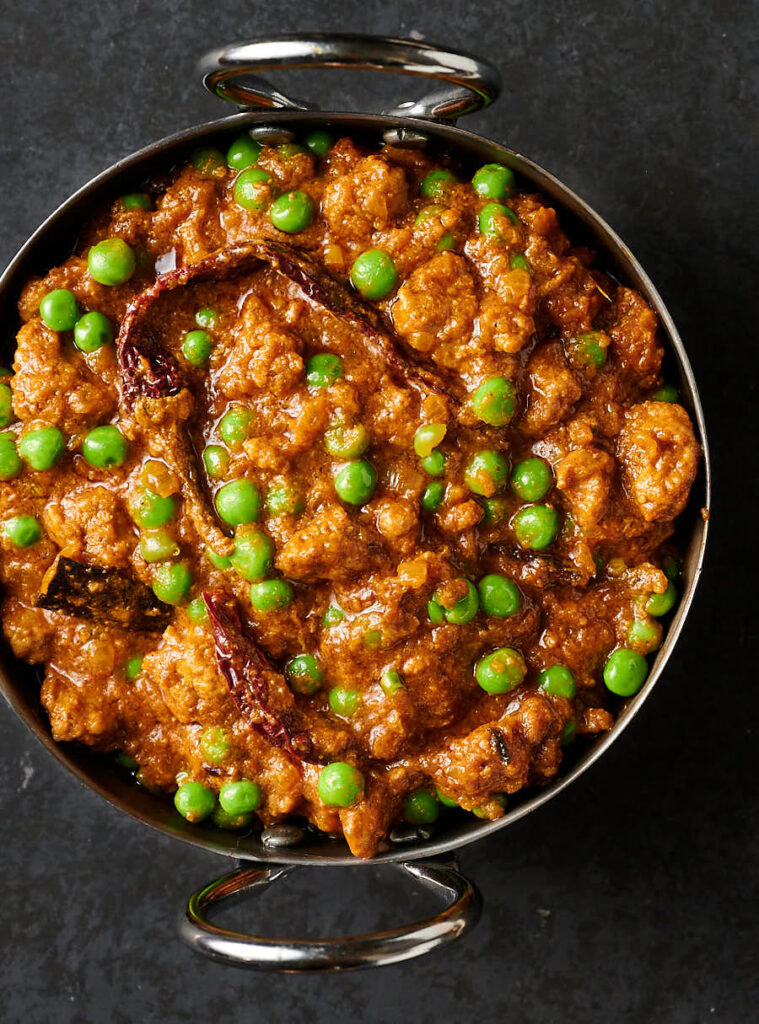
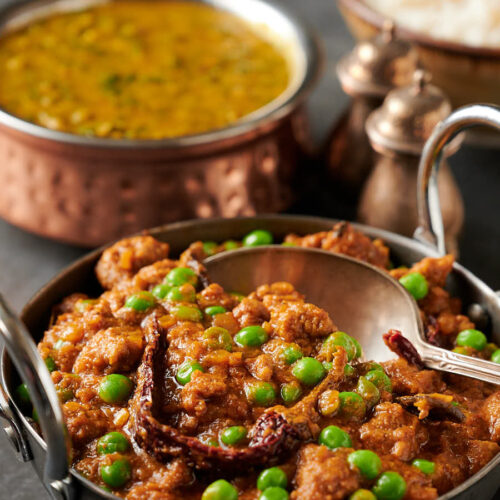
Keema matar is not your run of the mill curry. It’s a little different. Ground lamb or beef with peas. Sometimes different is really good. This is one of those times.
It’s not common on restaurant menus. Which is a shame. I’ve seen it once or twice. Discovered it in a restaurant in fact. But it’s rare. Outside the usual formula menus safe zone.
Which is too bad. That’s the problem with Indian restaurants these days. Everyone has all the same dishes. Some do it better than others. But it’s always madras and jalfrezi and butter chicken. Why?
India has one of the most diverse cuisines on the planet. There are literally thousands of dishes. And yet you see the same 20 curries on every single menu. So boring…
Dare to be different – make keema matar
You don’t have to be like them. You have the ability to stand out. Make something new. Make keema matar.
This isn’t hamburger helper. It’s a real curry. Done restaurant style. It has tons of flavour. And peas work so well in curry. Little green bursts of flavour. Up against a rich meaty curry. Balance.
I know it’s a leap of faith. I get that you’ve never even heard of it. But it’s not so far out there. It’s a meat curry. A little drier than some maybe. And it has some peas. Like aloo matar. Not scared of aloo matar, are you?
I’m being too harsh. I know. It just makes me crazy that restaurants can’t mix it up a bit. So I tend to rant about it. Sorry.
It’s outside the formula. Where only those who dare take control. Try keema matar. Try something new. You won’t be sorry.
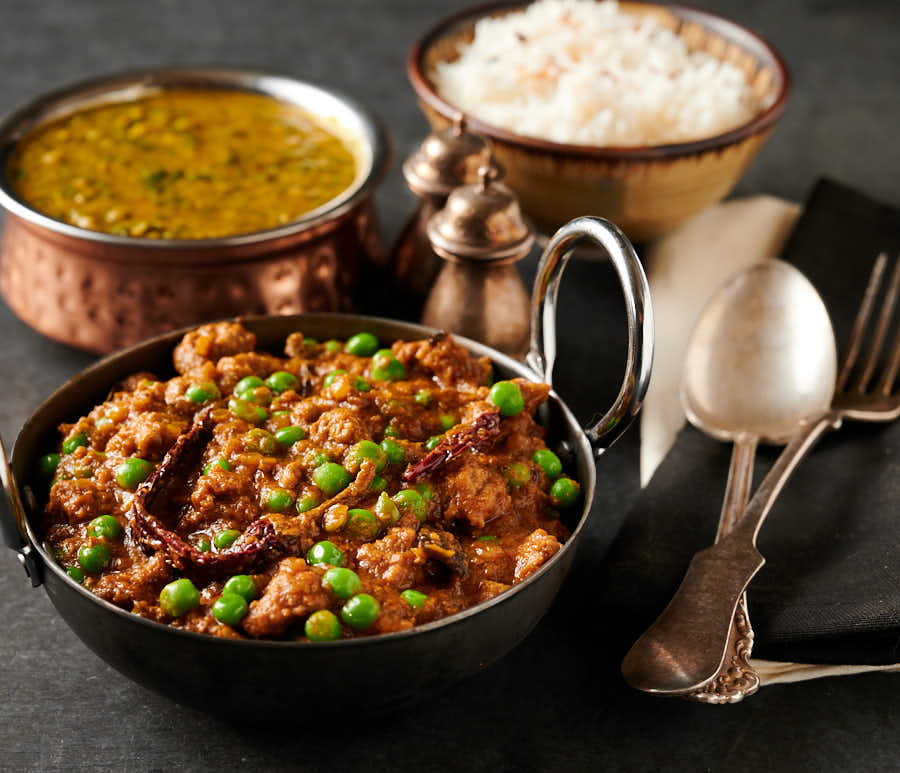
This is restaurant style cooking
This is a restaurant style curry. Done using all the restaurant techniques. Just exactly like what’s going on in the kitchen when you go out to dinner.
Restaurant style cooking goes fast. Really fast. So be ready. Have everything at hand.
Do your prep. That’s important. Make your curry base and have some heated and ready to go. Pre-cook your keema . Measure out your ingredients.
Have everything ready. Put on an apron or some old clothes. This is going to get messy. A bit of splatter is part of the fun. You are playing Indian chef here.
If you have not read the guide to Indian restaurant technique yet, do it now. This isn’t the same as traditional Indian cooking. So if you haven’t done it before it’s a good idea to read up a bit before you put oil to pan.
Lamb or beef?
You can do this with just about any ground meat. It’s most common with lamb or beef. It’s probably least common with turkey. Even I don’t think I’d like it with turkey. Don’t try that…
Both lamb and beef are good. They are very different though. Lamb tends to be a bit richer. To my palate anyway. Beef is more assertive. In your face.
It’s really up to you. What you like. I like lamb better. My wife likes beef. So we mix it up.
More beef than lamb though. Because keema matar is one of her favourite curries of all. For real. See – I’m not making this up.
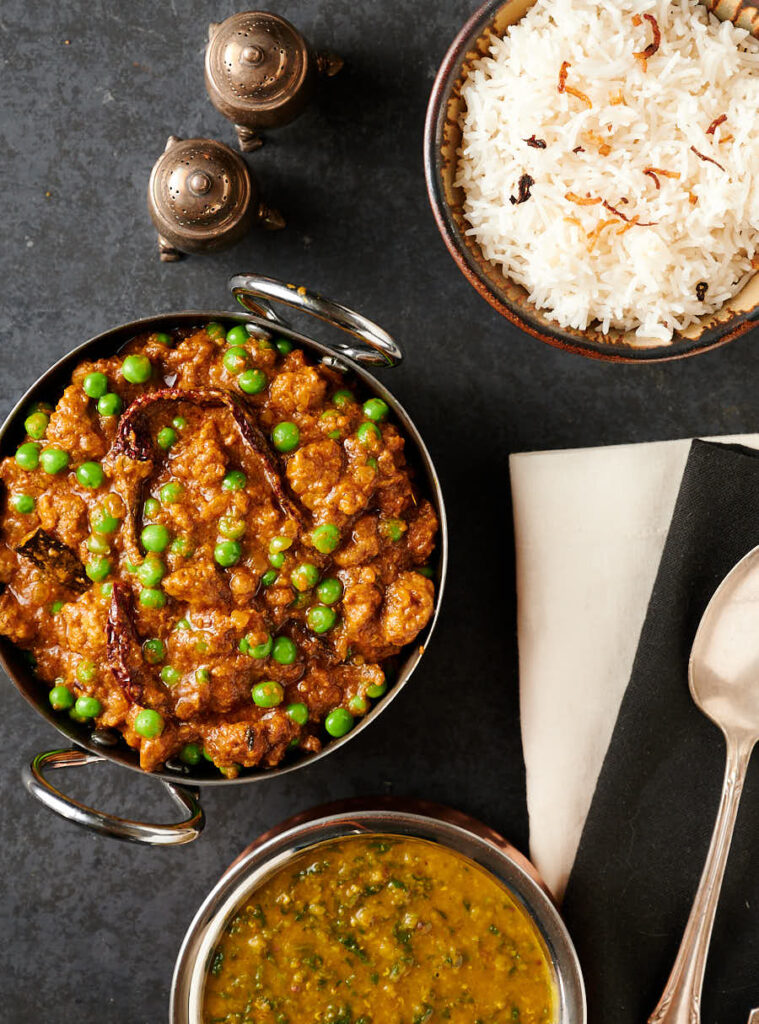
Keema matar. For when you don’t want to toe the line. For when you dare to be different. Try it. You’ll see.
restaurant style keema matar
Ingredients
- 2 Tbsp oil
- 1/2 onion – finely minced
- 2 tsp garlic ginger paste – recipe link below
- 1/2 tsp kasoor methi – fenugreek leaves
- 2 tsp Indian restaurant spice mix – recipe link below
- 1 tsp kashmiri chili powder
- 1/2 tsp kosher salt remember you added salt to the keema already
- 2 tsp tomato paste with enough water to dilute to the consistency of pasatta
- 15 oz curry base – recipe link below
- 1 cup peas fresh or frozen
- 12 oz pre-cooked keema – recipe link below
- juice of 1/4 lemon
- salt to taste – or not
- a bit of sliced red chili to garnish – optional
Instructions
- Combine Indian restaurant spice mix, kasoor methi, chili powder and salt in a small bowl.
- Dilute the tomato paste with enough water to get to the consistency of passata.
- Heat your frying pan (don’t use non-stick) briefly over medium heat. Add 2 Tbsp vegetable oil. Use all the oil specified. It’s important.
- When the oil starts to shimmer add the onion and cook until translucent.
- Stir in the garlic ginger paste. Cook it, stirring constantly, until it stops sputtering.
- Turn down the heat and add the spice mix. This is the critical step. Stir it constantly for 30 seconds. If it starts to darken lift the pan off the heat. You want the spice mix to cook in the oil but not burn.
- Turn the heat up to medium high. Add the diluted tomato paste and stir until bubbles form (the oil will likely separate). This takes around 30 seconds to one minute depending on the heat.
- Add 3 oz of curry base. Stir until bubbles form (little craters really), around 30 seconds. Watch the edges of the pan. The curry can stick here.
- Now add 6 oz of curry base and stir briefly. Let it cook until the bubbles form again. This takes 1-2 minutes.
- Add the rest of the curry base and let cook until the bubbles form. Turn the heat down to low and add the pre-cooked keema.
- Let the curry simmer for about 5 minutes. If it gets too thick add a bit more curry base. Don’t add water.
- Add the peas (thawed if using frozen) and cook another 2-3 minutes to warm the peas through.
- Stir in the lemon juice, taste and adjust salt and lemon to taste.
- Garnish with sliced red chili if you like.
