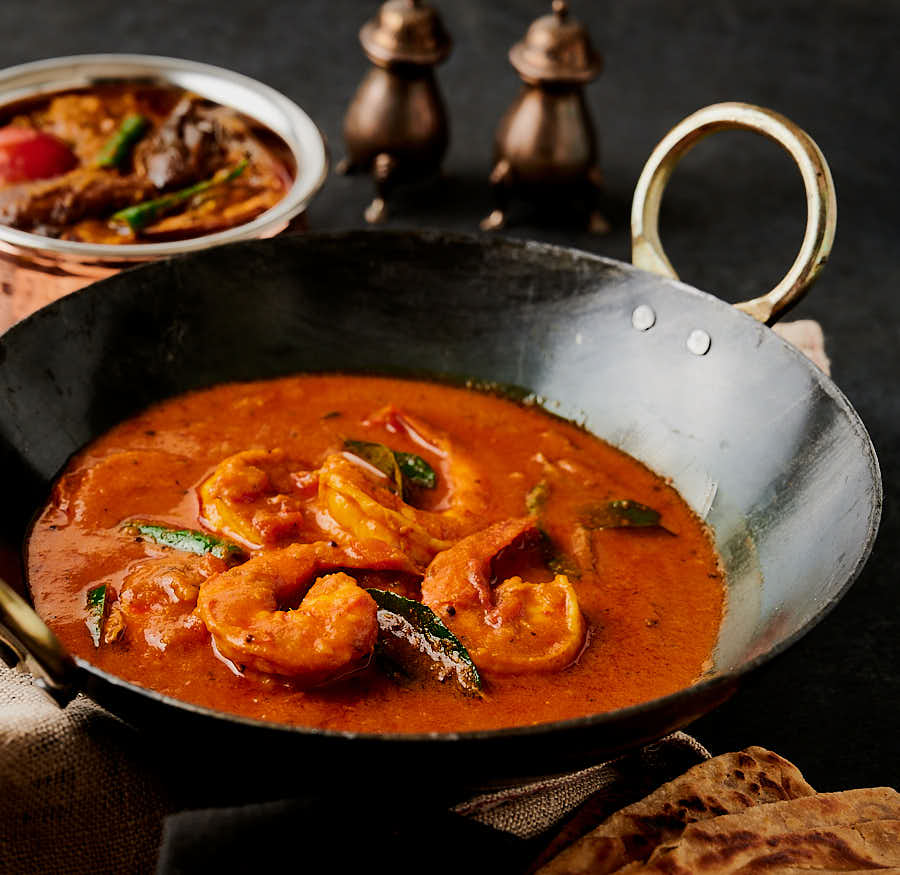
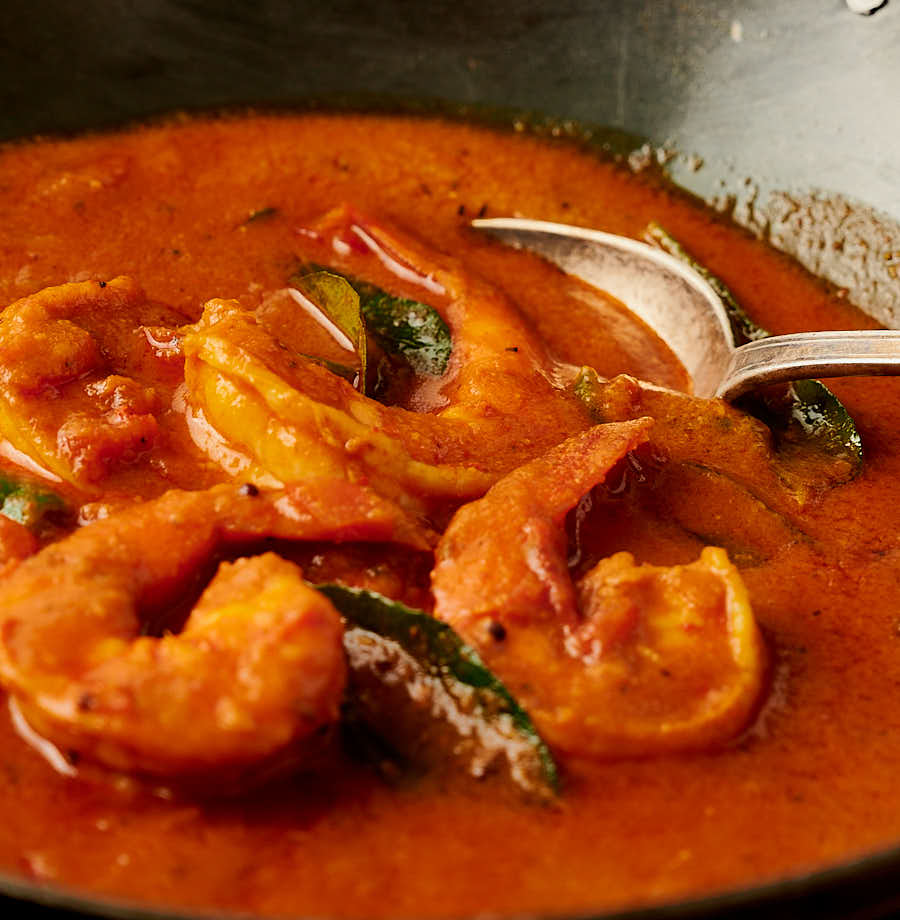
Perfectly cooked prawns. Fresh curry leaves. Green chilies. Coconut milk. Are you feeling it? Prawn curry done South Indian restaurant style.
Prawn curry just like you wish they served you at your local Indian restaurant. But made in your kitchen. By you. For you. And your friends. Seem like a tall order? Read on.
I’ve been asked many times. More seafood please? More fish? This is the start…
South Indian prawn curry
This is the first prawn curry ever on glebekitchen. So I’m pulling out all the stops. Bash you over the head flavours. But balanced as well.
It works. South Indian is all about big flavours. Flavours you should get to know. Because you are going to love it. Lots of coastline in Kerala. Coastal means shellfish. See why I think this works? Match made in India.
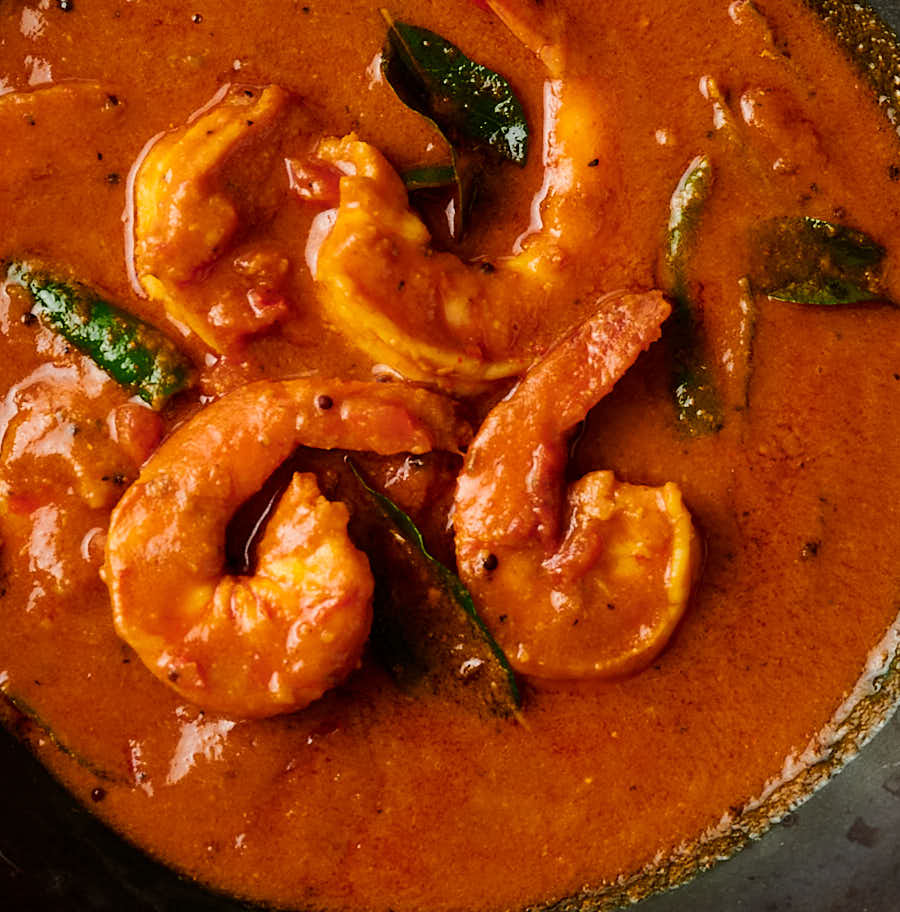
There’s something magic about how South Indian flavours come together. A little spicy. A little peppery. The irreplaceable flavour of curry leaves. Green chilies and tomatoes. And coconut milk to bring it all together.
That’s the backbone. The common theme. Not always. But often. Mustard seed, cumin seed, a hint of cinnamon and whole cardamom are the little bit extra here.
Prawns vs shrimps – it really doesn’t matter in this case
Shrimp and prawns are different. Anatomically. And in habitat. But they are really close in flavour. I’ve only had real prawns a couple times. But in the dishes I enjoyed I could not really taste the difference.
I made this recipe with shrimp. The bag said shrimp. In Canada we call them shrimp. I don’t actually think I can actually buy prawns. Not easily anyway. So this is south Indian shrimp curry.
Problem is – the world seems to want to call this prawn curry. So I’m calling this prawn curry.
I have lots of battles I want to fight. Use fresh ingredients. Don’t use store bought garlic ginger paste. Do your prep. Bloom your spices. Use an instant read thermometer.
These are things I care about. Passionately. I want you to hear what I’m saying. So I push hard.
Shrimp vs. prawns. That I care less about. If they look like they do in the pictures you are probably OK. I am pretty sure I’m OK.
Fresh curry leaves are best
If you can get fresh curry leaves do it. Just do it. Seriously. Especially if you’ve never cooked with them before. They are special. There is no substitute.
Dried curry leaves are not a substitute. They aren’t even a fleeting shadow of the flavour fresh brings. Seriously. Might as well throw dust bunnies in your curry. About the same flavour.
Think about fresh coriander leaf. Cilantro. Bright. Fresh. Distinctive. Nothing like it.
Now think about dried coriander leaves. Do they even exist? They shouldn’t. Zero flavour. Dust. Curry leaves are exactly the same. There is just no point.
If you can’t get fresh curry leaves just leave them out. It won’t be what this recipe is about though. Tasty? Absolutely. Amazing? Probably not.
Seems I’m passionate about fresh curry leaves. Add that to the list on the side of my soapbox…

Season your prawns for an extra layer of flavour
I think a lot of people expect they can just chuck a bunch of prawns into the gravy and everything will work out.
They are probably right. Won’t be bad at all. As long as the prawns don’t get overcooked.
But it won’t be as good as it can be either. There’s definitely room for improvement there.
There’s a couple things I like to do. I like to season the prawns. An extra layer of flavour.
Not complicated either. A little turmeric. A little kashmiri chili powder. Boosts the flavour. And it makes them look great.
The other thing I like to do is pre-cook them. That way I know what I’m putting into my prawn curry. I have control. No guessing what’s going on with them in the dish.
How exactly do you tell when they are done if they are covered in a lush, thick and opaque sauce? Unless I bite into one I’m not sure I can.
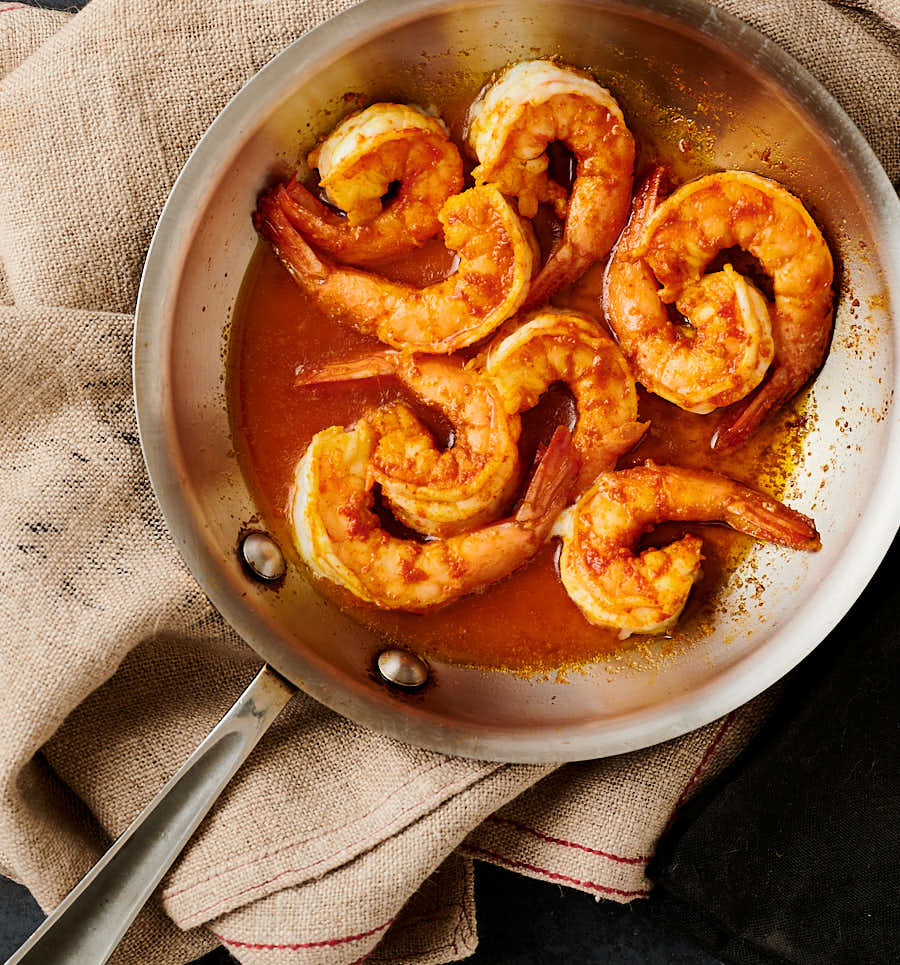
Shallow fry your prawns
I usually poach shrimp when I want them done perfectly. It’s repeatable. And you can shock them in cold water to stop the cooking.
You can’t beat that for a lot of dishes. And for perfect prawn cocktail. And I love prawn cocktail so I’ve worked pretty hard nailing down my technique.
But for this prawn curry I’m going a different route. Shallow fry. That’s a restaurant trick. Coat the prawns in a bunch of flavour. Fry them. Enjoy.
It’s a little trickier. There’s a hard and fast formula for poaching. Controlled. Consistent results with zero stress. If you can work a timer you can poach shrimp.
Shallow frying is more about feel. Not precision. No formula here. Sorry about that. It’s a bit of a test. Every pan is different. Every stove is different. I cannot tell you exactly how long to cook them.
But you don’t have to full on guess either. There are guidelines here. You want to cook them until they just start to turn pink on the bottom. A hint of opaque up the side. Then flip and repeat. Same story on the other side. You want to slightly undercook them. They will continue cooking as they cool. And they will likely cook a little more when you add them to the final curry.
It’s a life skill. Part of getting your chops down in the kitchen. It’s not trivial. But it’s not impossible either. Have a little faith. You can do it.
Restaurant style – real restaurant technique for real restaurant taste
This is a glebekitchen restaurant style recipe. That’s pretty specific. It means you are cooking the same way they do in restaurants.
You’ll get restaurant results if you pay attention. But you have to do restaurant style prep. No real way around it. I have an easy Indian restaurant series that comes really close if this is too much.
It means making curry base gravy . Not hard. But it has to be done. And it’s best done ahead of time. You can portion it out and freeze it. Once you have this you can make restaurant curries in around 20 minutes, including prep.
You need to make Indian restaurant mix powder . That’s just a fancy way of saying you need to make a spice blend. It’s about as hard as it sounds. Measure out some spices. Mix. Done.
If this is your first time you probably should read this primer on making Indian restaurant curries . It covers everything in detail. There’s also a video on technique.
This style isn’t dead easy. There are a few techniques you need to get down. It’s not impossible either. If you are able to make a meal that doesn’t involve just opening a package you can do this.
It will take a bit of practice at first. But you can do it. I have faith. And so should you. You will be very happy with yourself when you get it down.
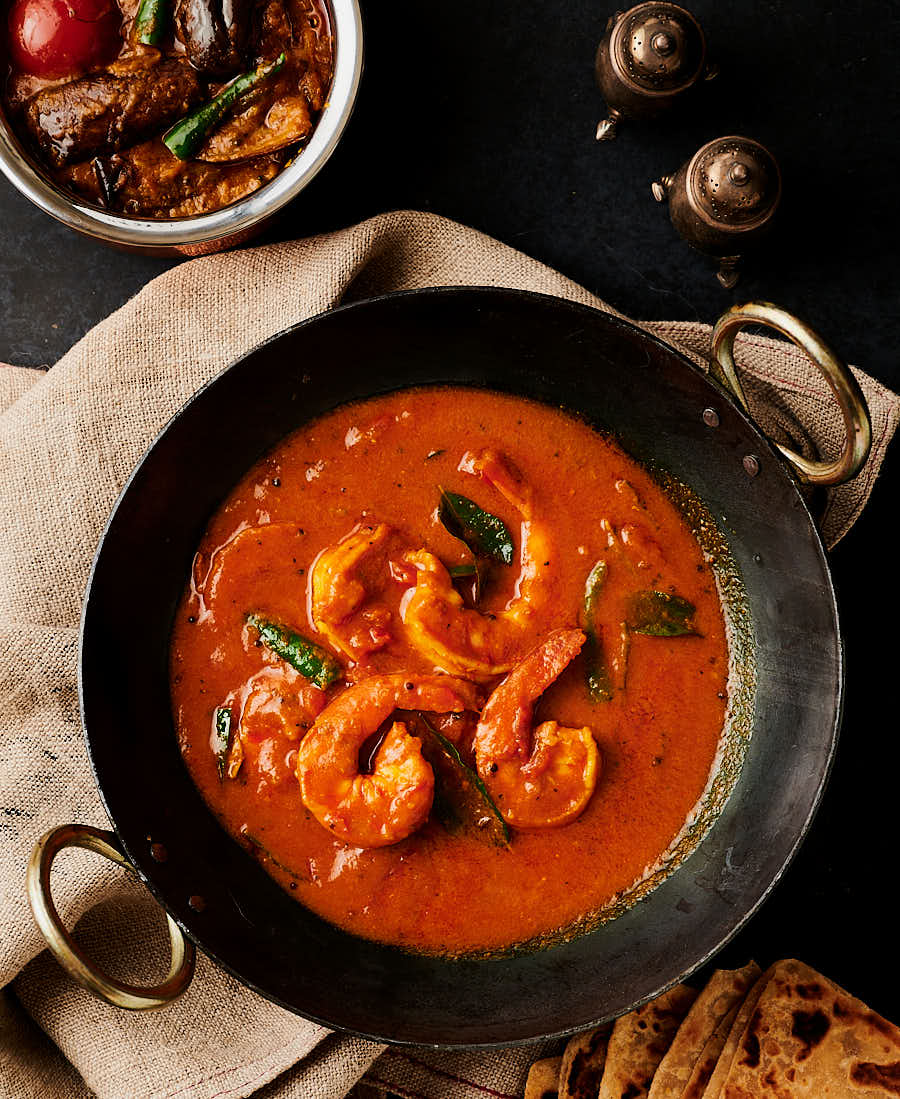
Prawn curry. Loaded with south Indian flavours. A lush restaurant style sauce. Perfectly done prawns. Are you feeling it now? I know I am.
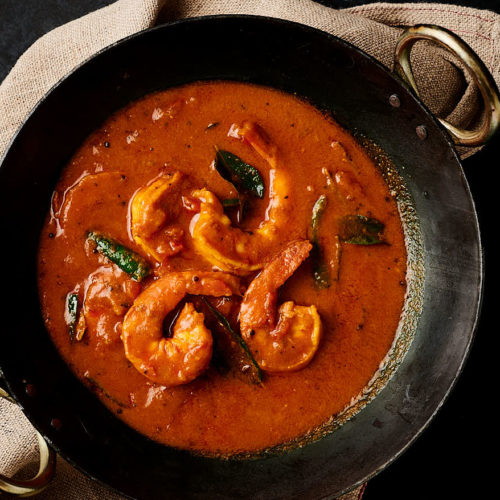
South Indian prawn curry
Ingredients
Pre-cook the prawns
- 1/2 lb prawns 16-20 count (that is 16-20 prawns per pound) so 8-10 prawns
- 1/2 tsp turmeric
- 1/2 tsp kashmiri chili powder
- sprinkle of salt
- enough oil to shallow fry the prawns
- 1 tsp garlic ginger paste
The spice mix
- 2 tsp indian restaurant spice mix – recipe link below
- 1 tsp kashmiri chili powder
- 1/4 tsp black pepper
- 1/2 tsp kosher salt
The curry ingredients
- 3 Tbsp oil – you can use the oil you fried the shrimp in. That’s seasoned oil now.
- 3 cardamom pods (green)
- 2 inch cinnamon stick cassia bark
- 1/2 tsp mustard seed
- 1/4 tsp cumin seed
- 12-15 curry leaves fresh, not dried. If you can’t get them fresh leave them out.
- 1 Tbsp garlic/ginger paste – recipe link below
- 2 green chilies – cut in half lengthwise and then into 3/4 inch pieces. Seed the chilies to tame the fire a bit.
- 1 Tbsp tomato paste with enough water to dilute to the consistency of pasatta
- 15 oz curry base
- 1/2 cup coconut milk (not coconut cream)
- 2 tbsp tomato diced
- 1 green chili diced
- the prawns from above you are just warming them through in this step
Instructions
Pre-cook the prawns
- Gently toss the prawns with 1/2 tsp turmeric and 1/2 tsp kashmiri chili powder. Sprinkle with salt.
- Pick a pan that is just big enough to comfortably hold the prawns in one layer.
- Add the oil and heat over medium low. You want enough to come up the sides of the prawns about 1/4 of the way up. That’s why you want the smallest pan that fits. It will take less oil.
- Add the garlic ginger paste and fry until it stops sizzling.
- Cook the prawns until the bottom turns pink and they just start to go opaque on the sides. This takes somewhere between 30-45 seconds depending on how hot your pan is. Note that the times are for 16-20 prawns. You will need to adjust up or down based on the size of shrimp you use.
- Flip the prawns and cook another 30-45 seconds or so. You don’t want them fully cooked as they will cook a little more as they cool and then in the final curry. As soon as the slit in the back turns opaque you are done.
South Indian prawn curry
- Make the spice mix.
- Dilute the tomato paste with enough water to get to the consistency of passata.
- Heat your frying pan (don’t use non-stick) briefly over medium heat. Add the oil (you can use some of the oil from frying the shrimp). Use all the oil specified. It’s important. You need that oil to bloom the spices. You don’t want them to stick and potentially burn because you skimped on a bit of oil.
- When the oil starts to shimmer add the cardamom and cinnamon stick. You should see little bubbles form around them. Let that go for around 20 seconds.
- Now add the mustard and cumin seed along with the curry leaves. Stir and cook until the seeds start to crackle. This takes another 20 seconds or so.
- Add the garlic ginger paste and large pieces of the two green chilies to the pan and cook, stirring constantly, until the paste stops sputtering.
- Turn down the heat and add the spice mix. This is the moment of truth in any curry. Stir it constantly for 30 seconds. If it starts to darken lift the pan off the heat. You want the spice mix to cook in the oil but not burn. If it burns you are starting over. No way around it.
- Turn the heat up to medium high. Add the diluted tomato paste immediately and stir until bubbles form (the oil will likely separate). This takes around 30 seconds to one minute depending on the heat.
- Add 3 oz of curry base. Stir until you see small craters forming, around 30-45 seconds. If it takes much longer that’s a sign that you can turn the meat up a bit more. Watch the edges of the pan. The curry can stick here. That’s not a problem. Just scrape it back into the pan.
- Now add 6 oz of curry base and stir briefly. Let it cook until the craters form again. This takes 1-2 minutes.
- Add the rest of the curry base and let cook until the craters form. Turn the heat down to low. Add the coconut milk and stir.
- Mix in the remaining diced green chili. Simmer for about 3-4 minutes.
- Add the diced tomatoes. Stir to combine. Add the prawns and cook until they are just warmed through.
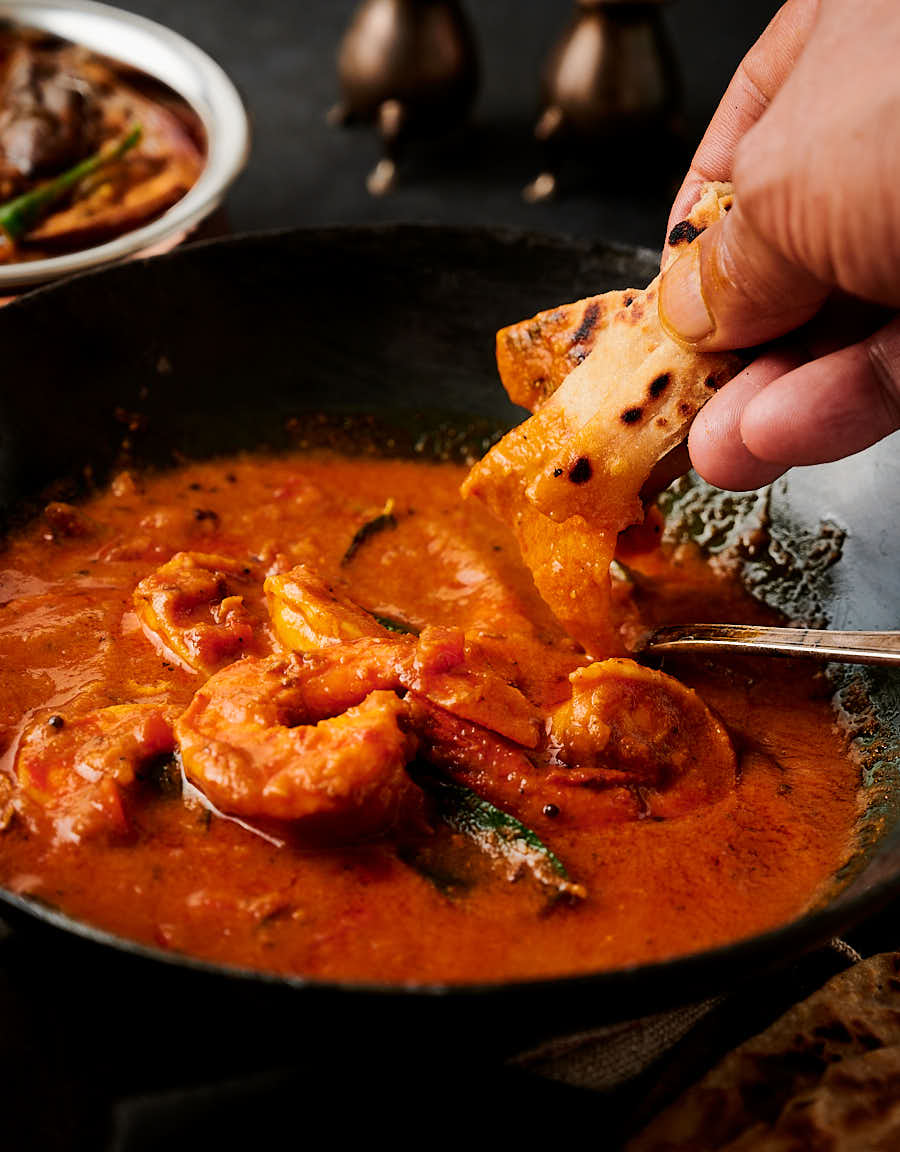
- Serve with rice and/or parathas or chapatis.
Notes
Nutrition
South Indian prawn curry
Ingredients
Pre-cook the prawns
- 1/2 lb prawns 16-20 count (that is 16-20 prawns per pound) so 8-10 prawns
- 1/2 tsp turmeric
- 1/2 tsp kashmiri chili powder
- sprinkle of salt
- enough oil to shallow fry the prawns
- 1 tsp garlic ginger paste
The spice mix
- 2 tsp indian restaurant spice mix - recipe link below
- 1 tsp kashmiri chili powder
- 1/4 tsp black pepper
- 1/2 tsp kosher salt
The curry ingredients
- 3 Tbsp oil - you can use the oil you fried the shrimp in. That’s seasoned oil now.
- 3 cardamom pods (green)
- 2 inch cinnamon stick cassia bark
- 1/2 tsp mustard seed
- 1/4 tsp cumin seed
- 12-15 curry leaves fresh, not dried. If you can’t get them fresh leave them out.
- 1 Tbsp garlic/ginger paste - recipe link below
- 2 green chilies - cut in half lengthwise and then into 3/4 inch pieces. Seed the chilies to tame the fire a bit.
- 1 Tbsp tomato paste with enough water to dilute to the consistency of pasatta
- 15 oz curry base
- 1/2 cup coconut milk (not coconut cream)
- 2 tbsp tomato diced
- 1 green chili diced
- the prawns from above you are just warming them through in this step
Instructions
Pre-cook the prawns
- Gently toss the prawns with 1/2 tsp turmeric and 1/2 tsp kashmiri chili powder. Sprinkle with salt.
- Pick a pan that is just big enough to comfortably hold the prawns in one layer.
- Add the oil and heat over medium low. You want enough to come up the sides of the prawns about 1/4 of the way up. That’s why you want the smallest pan that fits. It will take less oil.
- Add the garlic ginger paste and fry until it stops sizzling.
- Cook the prawns until the bottom turns pink and they just start to go opaque on the sides. This takes somewhere between 30-45 seconds depending on how hot your pan is. Note that the times are for 16-20 prawns. You will need to adjust up or down based on the size of shrimp you use.
- Flip the prawns and cook another 30-45 seconds or so. You don’t want them fully cooked as they will cook a little more as they cool and then in the final curry. As soon as the slit in the back turns opaque you are done.
South Indian prawn curry
- Make the spice mix.
- Dilute the tomato paste with enough water to get to the consistency of passata.
- Heat your frying pan (don’t use non-stick) briefly over medium heat. Add the oil (you can use some of the oil from frying the shrimp). Use all the oil specified. It’s important. You need that oil to bloom the spices. You don’t want them to stick and potentially burn because you skimped on a bit of oil.
- When the oil starts to shimmer add the cardamom and cinnamon stick. You should see little bubbles form around them. Let that go for around 20 seconds.
- Now add the mustard and cumin seed along with the curry leaves. Stir and cook until the seeds start to crackle. This takes another 20 seconds or so.
- Add the garlic ginger paste and large pieces of the two green chilies to the pan and cook, stirring constantly, until the paste stops sputtering.
- Turn down the heat and add the spice mix. This is the moment of truth in any curry. Stir it constantly for 30 seconds. If it starts to darken lift the pan off the heat. You want the spice mix to cook in the oil but not burn. If it burns you are starting over. No way around it.
- Turn the heat up to medium high. Add the diluted tomato paste immediately and stir until bubbles form (the oil will likely separate). This takes around 30 seconds to one minute depending on the heat.
- Add 3 oz of curry base. Stir until you see small craters forming, around 30-45 seconds. If it takes much longer that’s a sign that you can turn the meat up a bit more. Watch the edges of the pan. The curry can stick here. That’s not a problem. Just scrape it back into the pan.
- Now add 6 oz of curry base and stir briefly. Let it cook until the craters form again. This takes 1-2 minutes.
- Add the rest of the curry base and let cook until the craters form. Turn the heat down to low. Add the coconut milk and stir.
- Mix in the remaining diced green chili. Simmer for about 3-4 minutes.
- Add the diced tomatoes. Stir to combine. Add the prawns and cook until they are just warmed through.
- Serve with rice and/or parathas or chapatis.
Notes
Nutrition
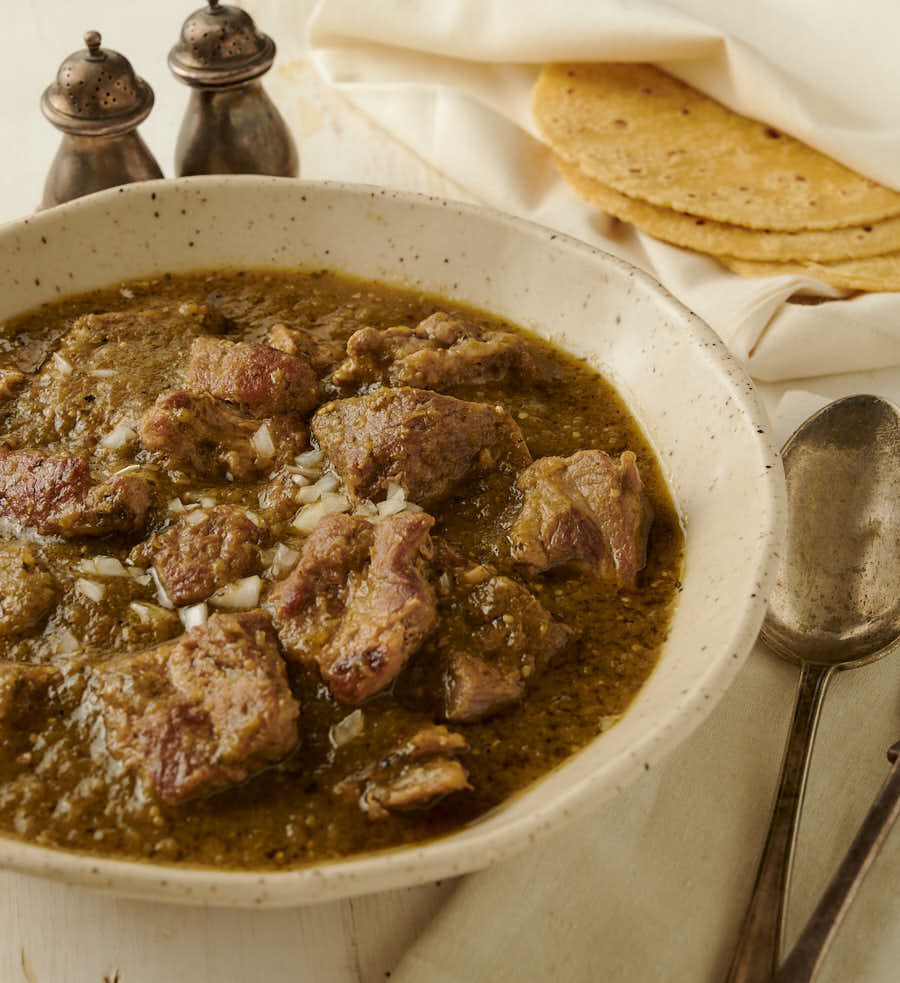
I like pork. No. That’s not right. I love pork. And chile verde is one of my favourite things.
There’s just something about green chilies, tomatillos and deeply browned, braised pork that works. Really, really well.
If you like pork. And you like green chilis and tomatillos. Then there’s no doubt in my mind you will love chile verde. You really have to taste it to understand.
You really, really need to try it for yourself.
Chile verde is about layered flavours
There isn’t a whole lot to chile verde. It’s a simple dish. Not a ton of ingredients. That means each ingredient counts.
And they come together in a way that you wouldn’t really expect. I love this kind of cooking. The whole is greater than the sum of the parts. So much better.
Step one is dry roasting the peppers and onions. Garlic too. I like the Rick Bayless approach to this.
A lot of recipes will have you throw everything in the oven. And roast. That’s one way. But not my way.
I like to dry roast on a comal or in a cast iron frying pan. Toss them in the pan over medium heat. No oil.
Dry means dry. I find you get a better char. Even. And no burning. And no fried flavour. That’s important.
You also don’t get the sweet flavours you get when roasting in the oven. That’s important too.
Sweet works in some dishes. But not this one. This is all about the savoury. Thank you Mr. Bayless.
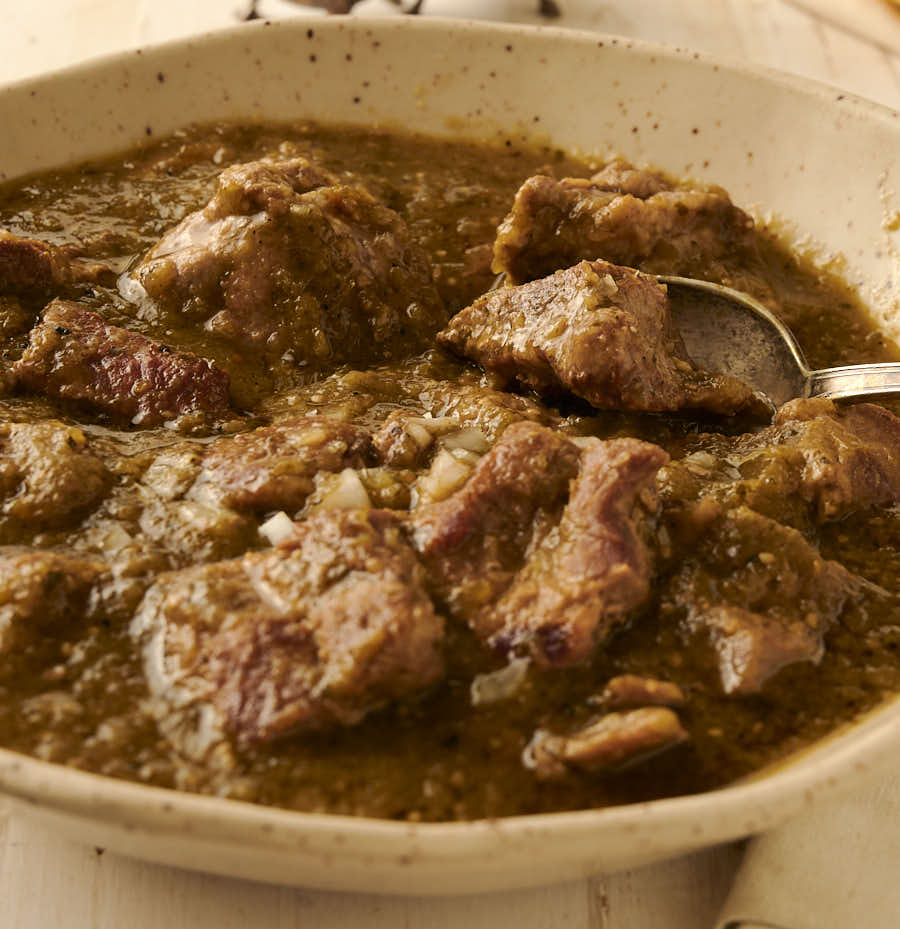
Brown your pork for depth
I can’t overstate this. A lot of the magic that is chile verde comes from the fond. Those brown bits in the bottom of the pot? That is the flavour glue that brings this dish together.
So you need to take the time. Brown your pork well. It isn’t hard. If you aren’t willing to do it you should probably stop reading. Right now.
Pick a big pot. One with a lot of surface area on the bottom. This will cut down on the number of batches. And you will need to cook your pork in batches.
Toss all the pork in a pot. That’s a good way to make poached pork. Pork throws liquid as it cooks. And that liquid with boil your pork.
Not a lot of fond that way. I give that 1 out of 10. But only because I’m in a good mood.
Leave room around each piece. You don’t want steam. The pork needs to fry. To do its Maillard reaction thing.
You are making flavour. The brown stuff in the bottom of the pot when you are done. That is just pure gold.
Fry the salsa for the win
This is the step that brings it all together. So simple. Trivial almost. But so important. Critical even.
Fry your salsa. The roasted chilies and tomatillos. They get pureed into a salsa. A pretty good salsa.
When that salsa hits hot oil though. When that fond gets deglazed into the sauce. That is the point where it goes from being pork in salsa to Chile verde.
From something mildly amusing to “I’m opening a food truck and serving chile verde tacos”.
You’re reading this. And saying “This guy is totally over-stating this”. I’m writing this. And I’m thinking I am under-selling it. If you get one thing from this recipe this step needs to be it.
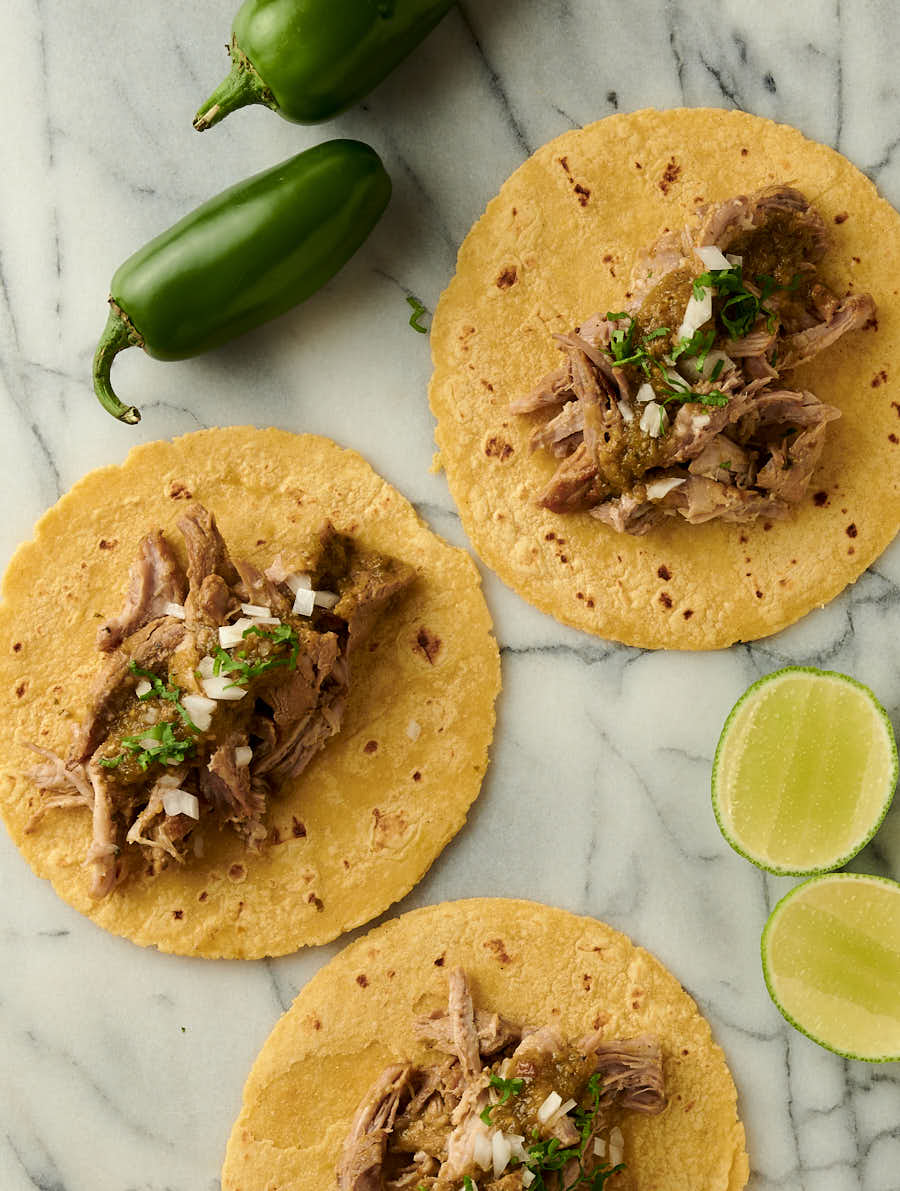
Chile verde makes amazing tacos
Add this to your taco Tuesdays. Seriously delicious tacos. Or burritos. I felt like tacos so that’s the picture I took. But both are great.
Super easy once you have your chile verde done. Have it for dinner one night. And tacos the next night. That is just good living.
Warm corn tortillas. Chile verde. A little chopped onion. Maybe a bit of habanero salsa. Or not. Up to you. And a squeeze of lime. Simple. Easy. Delicious.
Or stuff a burrito with shredded pork. Some pinto beans. Pico. Rice if you must. A big smear of guacamole. That is already a serious burrito. But there’s more.
Plate it. Drown it with more sauce. Flip that under the broiler for about a minute. Burritos meets enchiladas. Magic happens. The wet burrito.
Never had a wet burrito ? It’s an amazing thing. Truly special. I still remember my first.
San Diego. Many years ago. Little hole in the wall taqueria.
“chile verde burrito. Hold the rice.” I say.
“You want it wet?” the guy asks.
“What’s that?” I say.
“With sauce on top”.
“The green sauce???”.
Cut to scene. Me standing at the counter. Eyes wide. Huge grin on my face.
“Bring it!!!”
Chile verde wet burrito. Some things stay with you for life.
The quick and dirty way
I shouldn’t do this. I’m working against myself. But I know once you try this recipe you’ll be addicted. I know. I am.
There’s a cheat. An easy way. Not quite as good. But close enough. To get your fix. When it’s Tuesday and you are jonesing. When there isn’t a poblano for miles.
You can use jarred salsa verde to make this. There. I said it. Jarred salsa. I’ve lost all credibility. Wouldn’t blame you if you left and never came back.
A Mexican brand like Herdes works well. No product endorsement here. I’m not getting paid to say this. I just like it.
I do this sometimes. Poblanos and tomatillos aren’t the easiest thing to find where I live. Seasonal.
My addiction? Year round. I’m not proud of it. But I do it anyway. And I’m unrepentant. Addiction is like that.
Skip making the salsa verde bit in the recipe. Substitute the jarred sauce in the chile verde part of the recipe. Go from there. You won’t likely need to add salt though.
That’s it. Easy. Not quite the same. But still tasty. My dirty little secret.
Make chile verde – just do it
I have a few lifelong favourites. This is one of them. Has been for many years.
The earthiness of the deeply browned pork, onions and garlic. The acid from the tomatillos. The complexity of the poblanos. A few simple ingredients come together to make something incredible.
Make a big batch. Have it for dinner. Tacos or burritos the next day. And the day after that. It’s a dish that just keeps on giving.
Try it. It’s easy. And it’s so worth it…
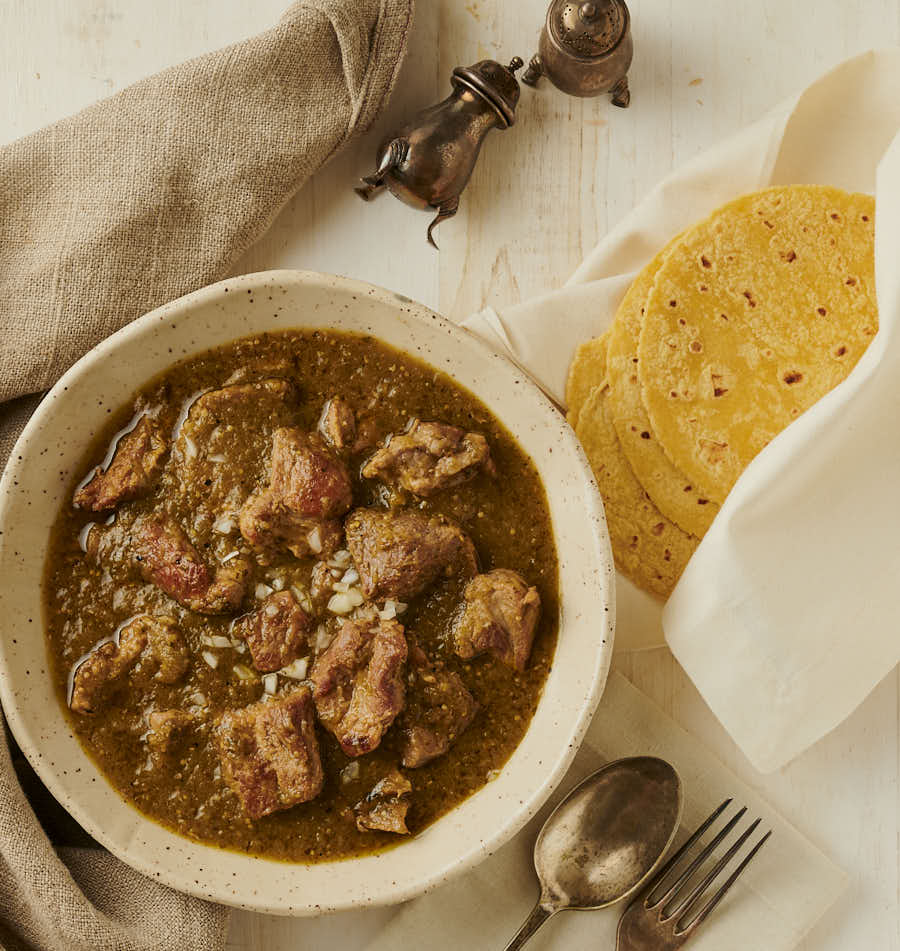
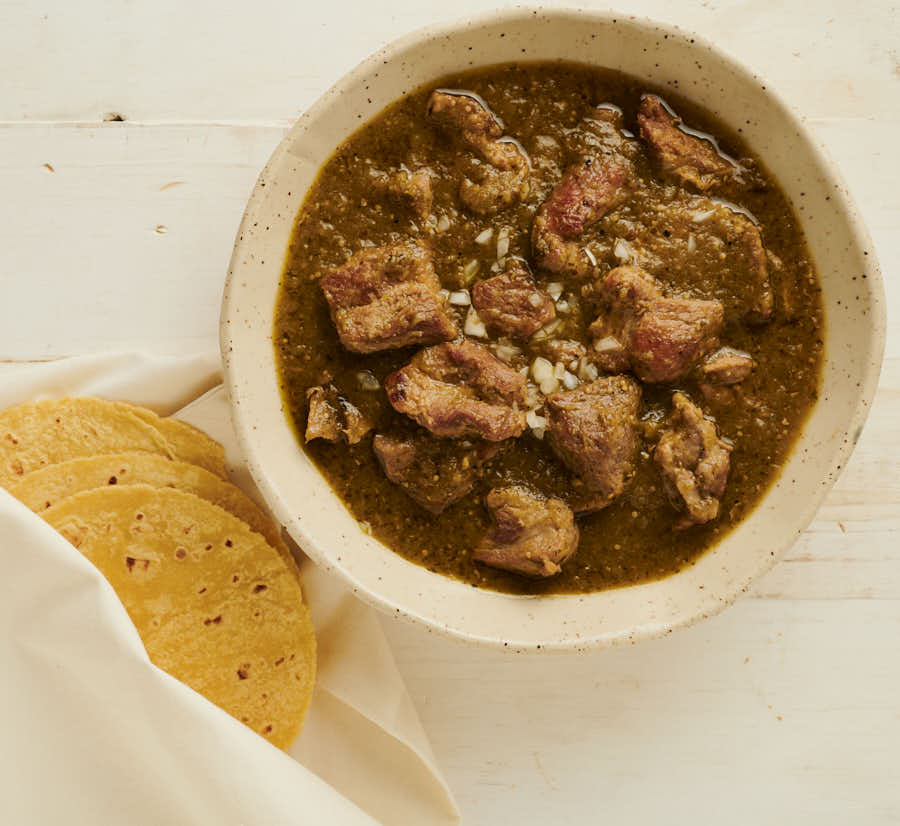
Chile verde – braised tomatillo poblano pork
Ingredients
Salsa verde
1 lb tomatillos
3-4 poblano chilies
1 jalapeno left intact
1 white onion sliced into 3 one inch slices
2 cloves garlic
1/2 cup cilantro chopped
1 cup chicken stock low or no sodium
1 tsp salt
3 lbs pork shoulder or pork ribs
3 Tbsp vegetable oil or pork lard if you can get it
1 cup chicken stock low or no sodium – this is not an accidental repeat of the stock in the salsa verde. 2 cups total.
salt to taste
fresh tortillas to serve
Instructions
Make the salsa verde
- Roast and peel your poblanos. This is easiest using a BBQ but you can do it with your broiler as well. I would not recommend doing it over a gas burner as it makes one unholy mess.
- You want to blast your poblanos with direct heat until the skin blisters and starts to char. This will make it way easier to peel them.
- Once they are blistered and a wonderful golden black all over transfer them to a bowl and cover with plastic film wrap. Let them steam in their own heat for about 15 minutes.
- Once they are cool enough to handle, remove the skin, stem and seeds. Set aside.
- Pre-heat a comal or cast iron frying pan over medium heat.
- Slice your onion into 3 one inch thick slices (parallel to the equator of the onion so you see big rings). Peel your garlic cloves.
- Place the onions, jalapeño and garlic on the dry, pre-heated pan. You want to cook them until the onions are soft and have a bit of char on both sides. Flip your garlic and jalapeño around. The garlic will cooked quickest, followed by the jalapeño and finally the onion slices.
- Remove from heat and allow to cool.
- Bring a pot holding enough well-salted water to cover the tomatillos completely to a boil. Simmer the tomatillos for about 4 minutes – they will turn pale when they are ready to come out. Allow to cool. You can also roast the tomatillos under the broiler. That is messy and I find there’s enough char flavour coming from the onion and peppers so I usually don’t bother. Up to you.
- Combine the poblanos, onion, garlic, tomatillos, cilantro, and salt in a blender and puree until smooth. You will likely need to add some or all of the first cup of chicken stock to get it go.
Make the chile verde
- Cut pork into individual ribs or 1 inch by 1 inch cubes. Season with salt and pepper.
- Heat the vegetable oil in a pot large enough to hold all the pork.
- Work in batches. Brown the pork. Each batch should be no more than one layer deep with room around individual pieces. One pound per batch is a reasonable starting point. The maillard reaction that comes from browning the pork adds tons of flavour to this dish so take the time here. It’s worth it.
- Remove each batch as it finishes browning and place in a bowl. You want to catch all the juices. Juices are flavour.
- Remove all but 2 Tbsp fat from the pot. Heat over medium heat. Fry the pureed tomatillo pepper mixture for 3 minutes. Stir constantly to scrape up the brown bits on the bottom of the pot. That stuff is pure cooking gold. The sauce will darken.
- Return the pork and the accumulated juices to the pot. Add the second cup of stock.
- Cover and simmer for 1 hour. Check for tenderness. This will probably take around 90 minutes for pork shoulder but it is done when it is done. And that is when it is tender.
- Taste and adjust for salt. You will need more so creep up on it carefully.
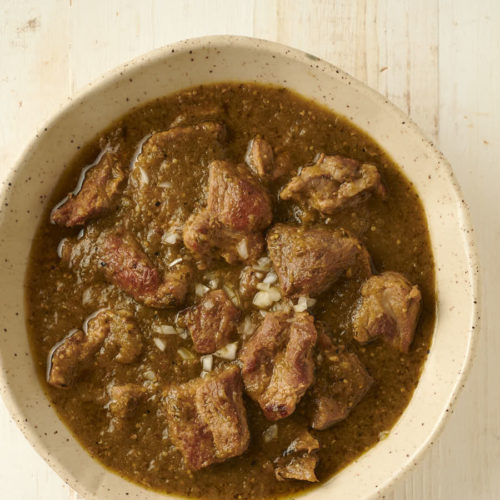
- Garnish with a little cilantro or white onions if you like. Serve with warm corn tortillas. Or make killer tacos. Or the best wet burrito you have ever had.
