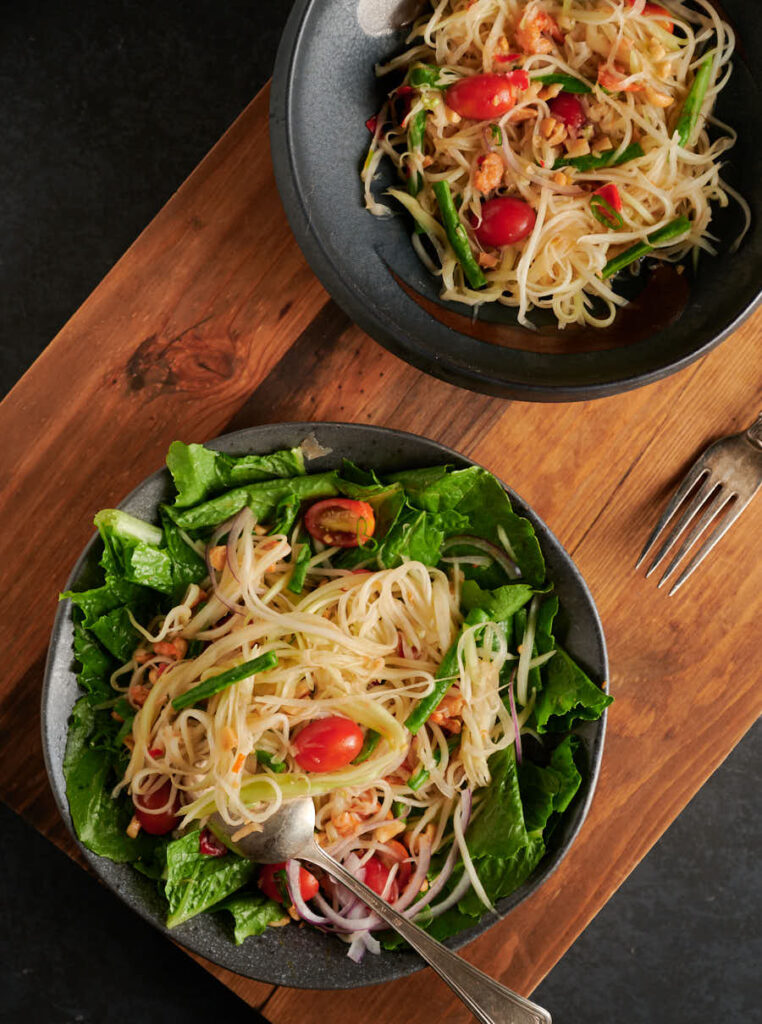
Thai papaya salad is one crazy tasty salad. Spicy. Sweet. Salty. Sour. The quadruple crown of delicious.
That’s a lot of hyperbole. So I would expect you to doubt me. I would doubt me. But it’s so good. I could drink the dressing. Seriously.
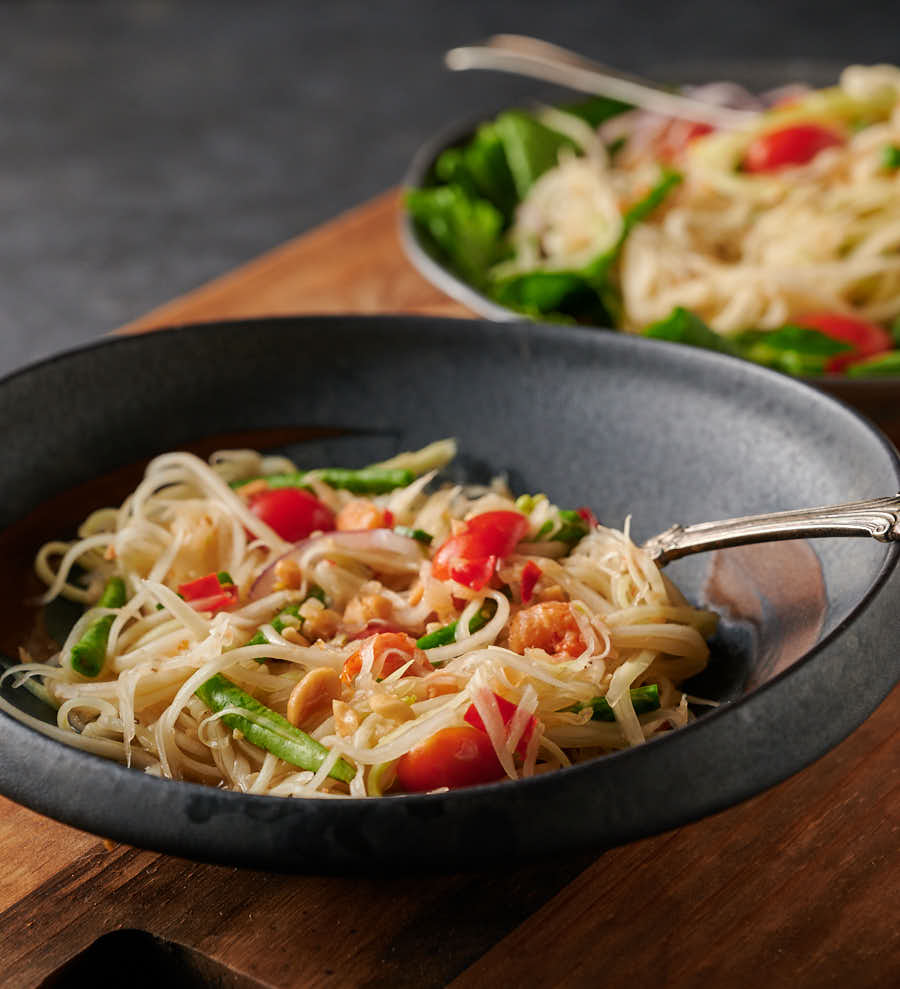
It absolutely shines with anything grilled. Or roasted. Fish. Chicken. Pork. It all just works.
Or try it with shrimp poached in a tom yam style broth. That’s dinner right there.
Make papaya salad with green papaya
You can get green papaya at just about any Asian market. At least where I live. It will be in with the produce.
It’s football shaped. Green skin. Should be firm. Not blotchy. No soft spots. Like a green mango.
Green papaya doesn’t taste like ripe papaya. It has none of that funky smell or taste. Might as well be a completely different fruit. Whatever you do, don’t use ripe papaya for som tam. It will not be good.
While you’re at the market ask for a Kiwi brand papaya shredder. It costs about five bucks and it makes shredding papaya a snap.
It’s great for carrots. Cucumber. Anything you want shredded. If you like to cook Thai or Vietnamese you need one of these things. I’m not a kitchen gadget lover. But this thing is worth the space it takes.
Use a mortar and pestle for great som tam
Papaya salad is called som tam in Thai. Som is “sour” and tam is “pounded”. So a mortar and pestle is kind of a given.
In Thailand they have these great big mortar and pestles. Big enough you can make the whole salad in it.
That’s a pretty specialized bit of kit. If you have something like that by all means use it.
I don’t have one like that so I’ve adapted the recipe to work with a smaller version. If you don’t have a mortar and pestle you could try a small food processor.
But the smell of freshly pounded Thai chilies and garlic while you pound them. That alone is reason to get one. Plus I don’t see how you can bash up the long beans or bruise the papaya without a pestle so…

Papaya salad doesn’t have to be crazy spicy
I like medium spice. Enough to wake up my tastebuds. But not enough to hurt. Not bland. But not blazing.
Balanced flavours is the way I like to think of it. I almost never want the fire to be the first and last thing you taste. Almost never.
Sometimes the endorphin rush you get from palate searing spicy is fun. In a masochistic sort of way. But generally I want people to enjoy. So I don’t go crazy.
It’s up to you of course. Papaya salad the way you like it. One Thai red chili has decent zing. Strip the ribs and seeds out and it’s still not bland.
Two chilies and you’re getting into real fire territory. Three and I’d call it seriously hot. More and you’re talking incendiary.
There’s nothing in this salad to temper heat. No fat. So the heat builds. And build. And builds. Keep that in mind. If your friends aren’t chili heads be careful. Don’t say you weren’t warned.
Every ingredient adds something
This is Thai cooking. It’s a layered cuisine. I think that’s why I like it so much. It’s like Indian that way. Many, many flavours coming together to make magic.
So don’t leave things out. Every ingredient matters in papaya salad.
Tamarind is like nothing else. It adds a delicate sour taste. Mellow against the exuberance of lime. It’s a nice touch.
Fish sauce is the backbone flavour. If you don’t want to use fish sauce don’t make this recipe. In fact, give up on ever cooking Thai or Vietnamese. Soy sauce is not the same as fish sauce. No matter what it says on the Internet.
Dried shrimp. That’s really why I wrote this paragraph. If you like shrimp and you like salt you will be OK with dried shrimp.
Don’t be afraid. I’d say they are less challenging than fish sauce. A nice meaty umami bomb in the salad.
Worst case you can eat around them. Best case you’ll get it. And next time you see a recipe that calls for dried shrimp you’ll go for it.
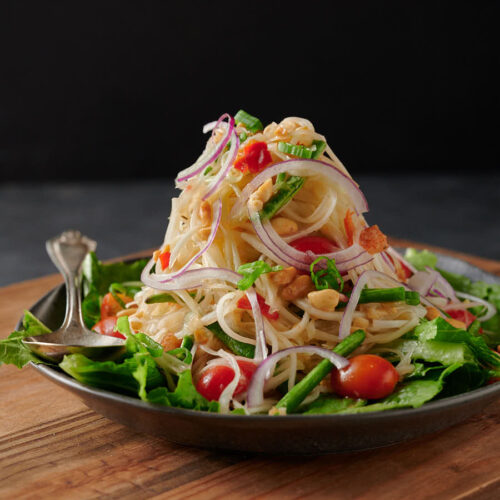
Serve som tam as part of a Thai meal
Papaya salad isn’t meant as a course. That’s a western perspective. Serve it up a side. Along side some rice.
My absolute favourite is with grilled chicken. Something with big flavours. Lemongrass. Garlic. Pepper. Some sweet Thai chili sauce on the side. That’s what I’m talking about. A happy place.
Papaya salad. Som tam. Doesn’t really matter what you serve it with. Just serve it. Your taste buds will thank you. And so will your friends.
papaya salad – som tam thai
Equipment
- mortar and pestle
Ingredients
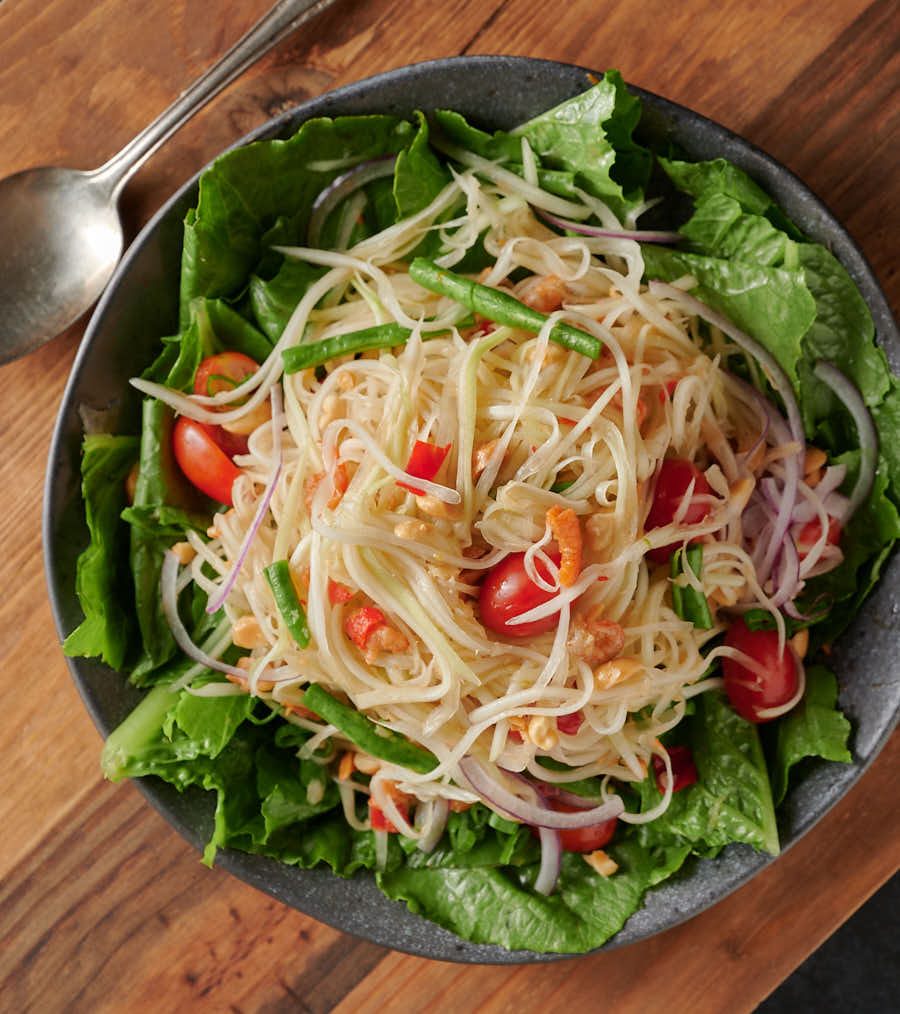
- 3 cups green papaya julienned
- 3 long beans cut into 1 1/2 inch pieces.
- 5-6 cherry tomatoes cut in half
- 1-2 Thai red chilies chopped. Cut out the white membrane if you want to cut the heat but want to keep the flavour.
- 2 cloves garlic roughly chopped
- 2 tbsp palm sugar finely chopped
- 1 small lime cut in half lengthwise. Cut one half into 3 pieces. Use the other one to juice into the salad dressing.
- 1 1/2 tbsp dried shrimp small ones or large ones coarsely chopped
- 1 1/2 tbsp tamarind paste not the same as that concentrate stuff
- 1 1/2 tbsp fish sauce
- 3 tbsp roasted peanuts chopped
- a bit of red onion to garnish (optional)
Instructions
- Prep your papaya. Peel it. Julienne it with a knife or use one of those Thai julienne slicers. Put the shredded papaya in a bowl of cold water and set aside while you prep the dressing.
- Add the garlic and chilies to a mortar. Pound until it forms a really coarse paste. Add the palm sugar and keep pounding to get the sugar to fully dissolve.
- Add the long beans and beat them up a bit. You want them to break a bit. You don’t want to beat them into nothing. Just open them up so some of the dressing gets into the beans.
- Squeeze the 3 lime wedges into the mortar. Toss the squeezed wedges in as well. Add the shrimp. Pound lightly. Again, you aren’t trying to destroy what’s in the mortar at this point.
- Add the fish sauce, juice from the remaining half lime and tamarind paste and stir to mix.
- Drain the papaya. Transfer the contents of the mortar to a metal bowl (one that can take a bit of a pounding from the pestle. Add the papaya. Toss to combine the papaya with the dressing. Gently bruise the papaya with a pestle.
- Add the tomatoes and give them a bit of a bash with the pestle. Add the peanuts. Toss to combine everything together. Use your hands. That works way better. Just remember to rinse them. There’s hot chili in the mix. You don’t want that in your eyes.
- Serve, juice and all. Garnish with a bit of red onion for looks if you like. The red onion is not authentic. I just like the way it looks.
Notes
Nutrition
papaya salad - som tam thai
Equipment
- mortar and pestle
Ingredients
- 3 cups green papaya julienned
- 3 long beans cut into 1 1/2 inch pieces.
- 5-6 cherry tomatoes cut in half
- 1-2 Thai red chilies chopped. Cut out the white membrane if you want to cut the heat but want to keep the flavour.
- 2 cloves garlic roughly chopped
- 2 tbsp palm sugar finely chopped
- 1 small lime cut in half lengthwise. Cut one half into 3 pieces. Use the other one to juice into the salad dressing.
- 1 1/2 tbsp dried shrimp small ones or large ones coarsely chopped
- 1 1/2 tbsp tamarind paste not the same as that concentrate stuff
- 1 1/2 tbsp fish sauce
- 3 tbsp roasted peanuts chopped
- a bit of red onion to garnish (optional)
Instructions
- Prep your papaya. Peel it. Julienne it with a knife or use one of those Thai julienne slicers. Put the shredded papaya in a bowl of cold water and set aside while you prep the dressing.
- Add the garlic and chilies to a mortar. Pound until it forms a really coarse paste. Add the palm sugar and keep pounding to get the sugar to fully dissolve.
- Add the long beans and beat them up a bit. You want them to break a bit. You don’t want to beat them into nothing. Just open them up so some of the dressing gets into the beans.
- Squeeze the 3 lime wedges into the mortar. Toss the squeezed wedges in as well. Add the shrimp. Pound lightly. Again, you aren’t trying to destroy what’s in the mortar at this point.
- Add the fish sauce, juice from the remaining half lime and tamarind paste and stir to mix.
- Drain the papaya. Transfer the contents of the mortar to a metal bowl (one that can take a bit of a pounding from the pestle. Add the papaya. Toss to combine the papaya with the dressing. Gently bruise the papaya with a pestle.
- Add the tomatoes and give them a bit of a bash with the pestle. Add the peanuts. Toss to combine everything together. Use your hands. That works way better. Just remember to rinse them. There’s hot chili in the mix. You don’t want that in your eyes.
- Serve, juice and all. Garnish with a bit of red onion for looks if you like. The red onion is not authentic. I just like the way it looks.
Notes
Nutrition
Sometimes you just want satisfying. Chicken and chickpea curry delivers. Simple, balanced and delicious. It’s the real deal.
This is not a famous Indian dish. Not likely a curry you’ve heard of. But it’s one I like. So I’m sharing.
I came up with this one night because I needed dinner. No plan. Zero research. No thinking.
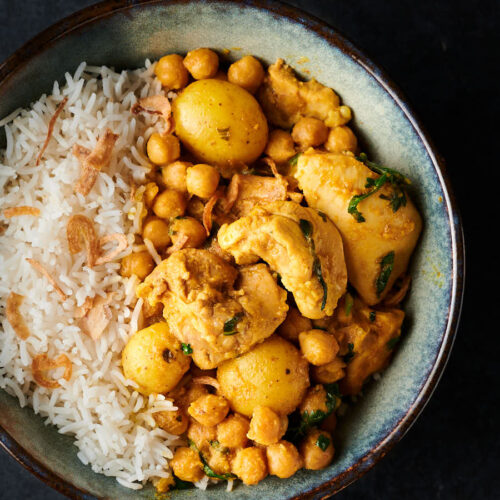
Chicken. Chickpeas. Potatoes. And an appetite. That’s what I had. And chicken and chickpea curry is what I came up with.
I was not thinking blog post. Wasn’t thinking anything really. Except that I was hungry. Turns out I liked it. So here it is.
Chicken and chickpea curry. Done easy restaurant style. Pretty sure it’s not on any menu I’ve ever seen. But good enough I’m writing it down. So I remember to make it again. And again.
This isn’t murgh cholay by the way. If that’s what you are looking for this isn’t it. Don’t say I didn’t warn you.
Easy restaurant style curry
Ever wonder why all the recipes on the internet never turn out like what you get in Indian restaurants? There’s a reason. And it’s not you. It’s because restaurants come at it in a completely different way.
Restaurant curries rely on stuff like curry base. And pre-cooked chicken. A lot of prep. Just what you’d expect in a restaurant. They have to crank curries out in 10 minutes. That’s a whole different world.
Easy restaurant style gets you the taste without the prep. No curry base required. I’m not saying I don’t like cooking with curry base. Just saying if you don’t have any – or don’t feel like making any – there is another way.
Chicken and chickpea curry is a standalone meal
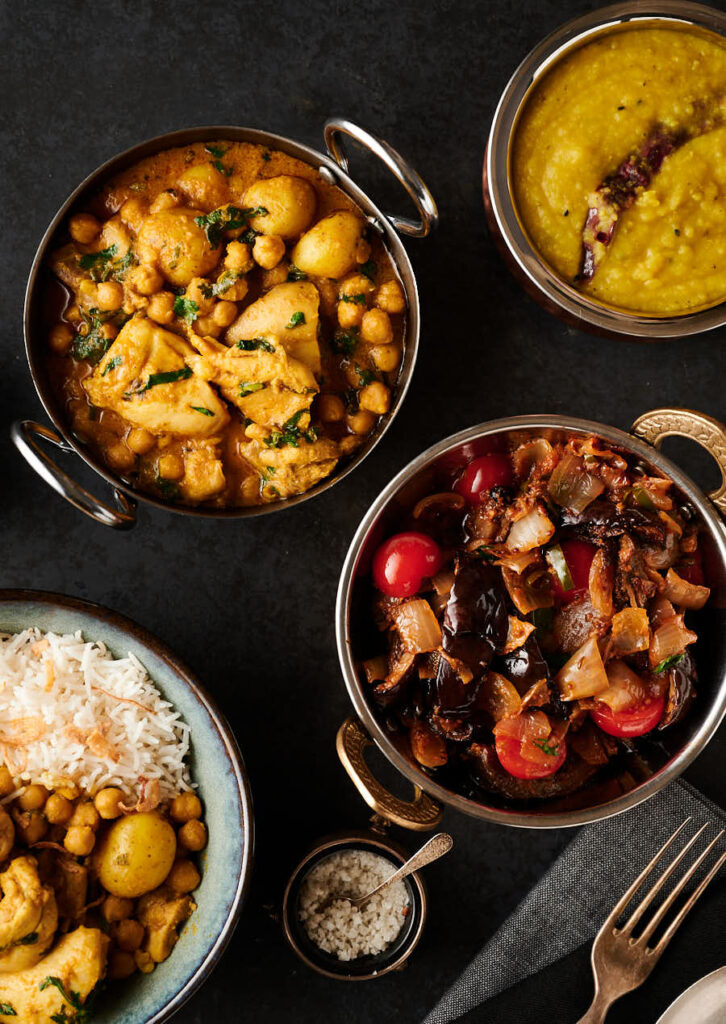
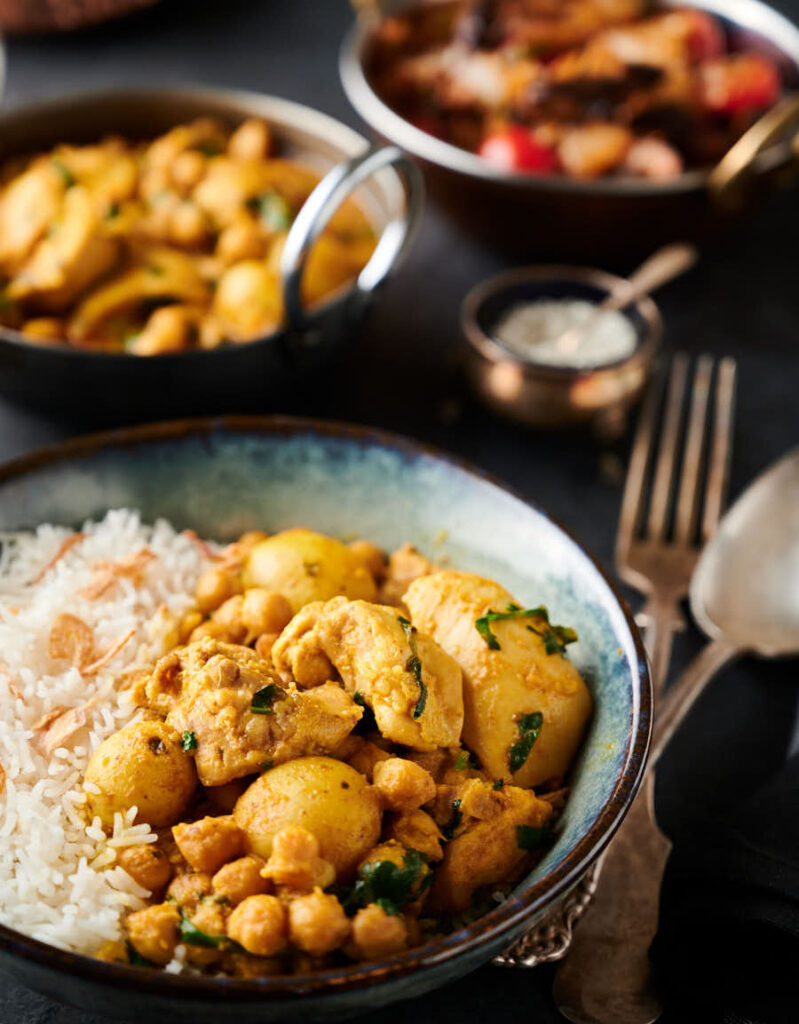
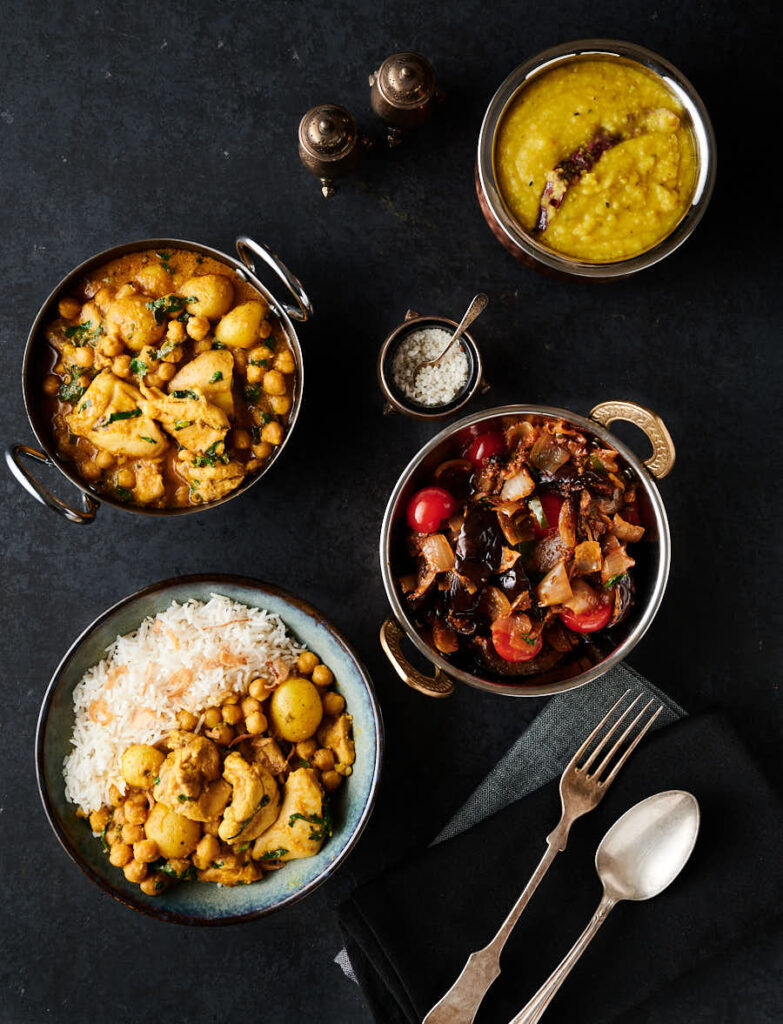
This is all in one. You can serve it like you would a regular curry. Wth rice. Some dal. Like in the pictures.
Or you can just eat it as is. Might not quite serve 4 if you go that route. But it is a solid meal on it’s own. Potatoes. Chickpeas. And chicken curry. Hearty fare.
I cooked up a storm to take these pictures. Dal. Rice. Eggplant curry. Almost made some parathas. So I could get the shot. I ate way too much for dinner.
So make chicken and chickpea curry when you want to make one dish. A really tasty dish. Don’t worry about rice. Or sides. Just make it. Spoon it into a bowl. Maybe a paratha or chapati to go with it. Enjoy.
Chicken and chickpea curry. Could be the most satisfying curry you’ve never heard of.
chicken and chickpea curry
Ingredients
The onion paste
- 2 cups onions – coarsely chopped
- 2 tbsp vegetable oil
- 1 cup water
The spice mix
- 2 tsp coriander powder
- 2 tsp cumin powder
- 1/2 tsp turmeric powder
- 1 tsp mild kashmiri chili powder
- 1 tsp kasoor methi – dried fenugreek leaves
- 1 tsp kosher salt – use a bit less if you are using table salt
Chicken and chickpea curry
- 6 boneless skinless chicken thighs cut into 3 pieces per thigh.
- 4 tbsp vegetable oil
- 2 tbsp garlic ginger paste – see notes
- the spice mix
- the onion paste
- 15 oz chickpeas one can
- 1 cup small waxy potatoes – or chunks of a large waxy potato
- 1 cup cilantro – coarsely chopped
- 1/2 lemon juiced
Instructions
The onion paste
- Place the onions in a microwave safe dish and cover loosely. Microwave at 70 percent until the onions are soft and translucent. This takes about 10 minutes in my 1100 watt microwave oven.
- Remove the onions from the microwave. Be careful. They will be hot. Like burn you with the steam hot. Let them cool slightly.
- Place the onions, 2 tbsp vegetable oil and 1 cup of warm water in a blender and puree until smooth. Set aside.
chicken and chickpea curry
- In a small bowl, combine the coriander powder, cumin powder, turmeric, Kashmiri chili powder, kasoor methi and salt. This is your spice mix. It goes in after the garlic ginger paste.
- Heat 4 tbsp vegetable oil in a pot over medium heat until it shimmers.
- Add the garlic ginger paste. Cook until the garlic ginger paste stops spluttering.
- Turn the heat to medium low. Add the spice mix. Stir continuously until it starts to smell really good. This takes around 30-40 seconds. Watch it carefully. If you burn the spices at this point you have to start over. This is called blooming the spices. It is one of the secrets to Indian cooking. Works well in Mexican cooking as well.
- Add half the onion paste. Stir to combine. Cook over medium heat for about 2 minutes. It is going to splatter. Be warned.
- Add the remaining onion paste. Cook another 2 minutes or so.
- Turn the heat to medium low. Add the potatoes and chickpeas. Cook for around 20 minutes. The potatoes should be nearly done.
- Now add the chicken and stir. Cover and simmer until the chicken is done. It’s done when you measure the internal temperature and it says 170F. That takes about 12-15 minutes. An instant read thermometer is a handy thing to have here…
- If the curry is a bit thick add a bit of water or chicken stock and stir. Add the diced and cilantro and lemon juice. Let the chicken masala simmer another minute or so. Taste for salt and adjust as needed.
- Garnish with a bit more cilantro if desired.
