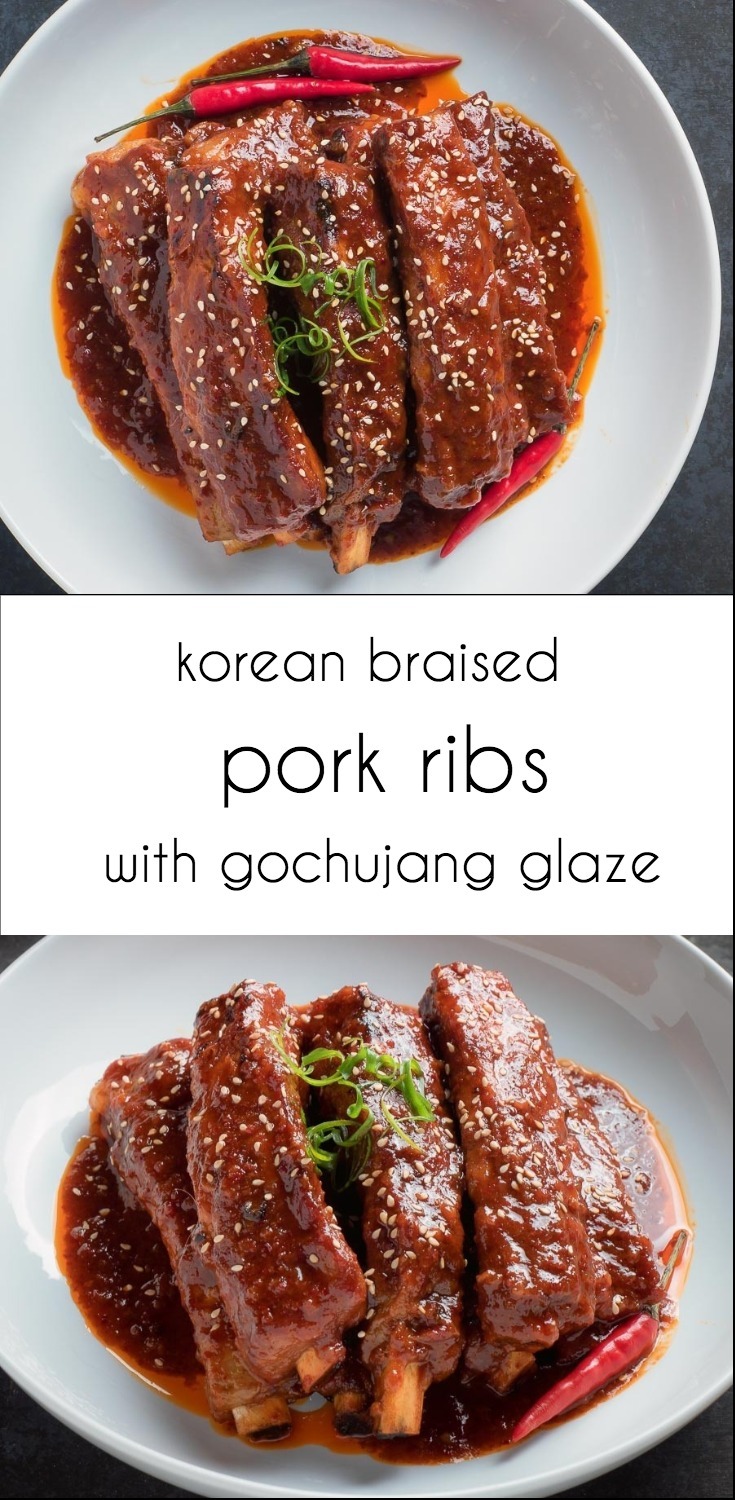
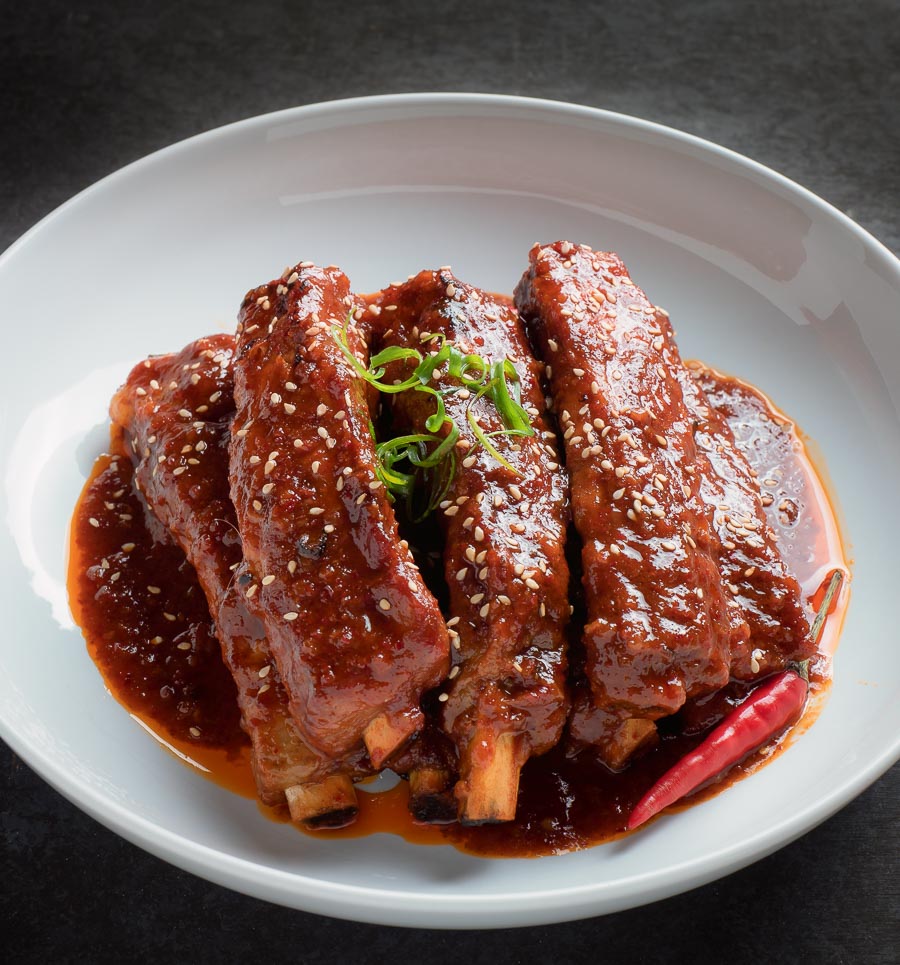
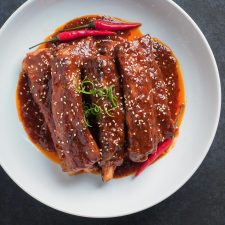
Korean braised pork ribs will make you forget you have a grill. Meltingly tender. Slightly sweet gochujang sauce. Just pork rib goodness. With a Korean twist.
Korean braised pork ribs for when you need a fix
If you live in the North you know rib withdrawal. You’re at the grocery store. You see beautiful spare ribs on sale for pretty much free. Your grill is buried under 3 feet of snow. It’s freezing out.
It’s a conspiracy to make you crazy. Torture. Some grocery store exec is sitting sipping margaritas on a private island laughing. Just. Not. Fair.
I say screw that. You don’t need a grill to make ribs great. Pork ribs are about low and slow. Braising is about low and slow. See where I am going here? Korean braised pork ribs.
Braising makes for tasty Korean pork ribs
Ribs are a braising natural. I don’t understand why you don’t see more people doing it. Think about it. A little bit fatty? Check. Needs long, slow cooking to tenderize. Check. Meltingly tender when done right. Check. See where I’m going here?
And the best part is the sauce. I am violently opposed to boiling ribs. That’s crazy talk. Seriously crazy talk. All that pork goodness down the drain.
But here it gets concentrated in the sauce. Not down the drain. Every bit of flavour winds up in your mouth. Where it belongs.
Don’t be intimidated by a few Korean ingredients
You need some Korean ingredients to make these. You need to get to know these ingredients anyway so make the trip to your local Asian specialty shop.
Gochujang is a red chili paste. It’s not super spicy. But it is super tasty. Gochugaru is Korean red chili flake. Tasty. Not too spicy. It’s what they use to make kimchi.
Pretty sure gochugaru goes into gochujang. Has me thinking about putting some gochugaru in miso. Watch for that soon.
Korean braised pork ribs. Maybe they won’t make you forget you have a grill. But they will make waiting for snow to melt a whole lot more bearable.
korean braised pork ribs
Ingredients
- 2 racks pork spare ribs - silver skins removed and cut into individual ribs
- 1/2 medium onion as finely diced as you can get it
- 4 cloves garlic crushed
- 2 tbsp coarse gochugaru - korean pepper flakes
- 4 tbsp gochujang - korean chili paste
- 2 tbsp shiro miso
- 1/4 cup mirin
- 3-4 tbsp apricot jam
- 2 tbsp low sodium soy sauce
- 2 tsp sesame oil
- 1 tbsp vegetable oil plus enough to coat the ribs
- 1 1/2 cups chicken stock - low or no sodium
Instructions
Brown the ribs
- Pre-heat your broiler. Coat the ribs with a bit of vegetable oil and lay them out in a single layer on a broiler safe sheet pan. Broil until lightly browned. Rotate the sheet pan to make sure they brown evenly. When they look good, flip them and repeat. Remove from the oven. Set your oven to 325F.
Braise the ribs
- Heat the vegetable oil in a large dutch oven over medium low heat. Add the onions and cook, stirring occasionally, until translucent. This takes about 5 minutes. Stir in the garlic and cook another 30 seconds. Reduce heat to low.
- Mix in the gochugaru, gochujang, shiro miso, mirin, soy, apricot jam and sesame oil. Stir to combine.
- Add the chicken stock and bring to a simmer.
- Add the ribs to the dutch oven. Stir. The liquid won’t cover the ribs. That’s OK. Resist the urge to add more stock. Put a sheet of aluminium foil over the dutch oven and cover tightly. Place the pot in the pre-heated oven.
- After 30 minutes, remove the pot. Using tongs, move some of the submerged ribs up. Move the ones that were on the top down. Basically mix them up. Replace the foil and lid and return to oven.
- Continue to cook for another 30-40 minutes. Check at 30 minutes. They should be fork tender but if they aren’t cook them another 10 minutes. Cook them until they are tender. Tender doesn’t mean mush. Mush is bad. Tender means they pull away cleanly from the bone. Maybe a little tug to get them off but the bone winds up clean.
- Remove the pot from the oven. Remove the ribs to a bowl and tent with foil.
- Put the sauce in a large cup or fat separator and spoon off the fat. Return the sauce to the pot. Over medium heat, reduce the sauce until it’s fairly thick - like a thin BBQ sauce. This should only take around 5-8 minutes if you resisted the urge to add more liquid while cooking.
- Return the ribs to pot and toss in the sauce. Garnish with sesame seeds. Serve with rice and a nice green salad. Or forget the sides and just mow down on ribs.
Nutrition
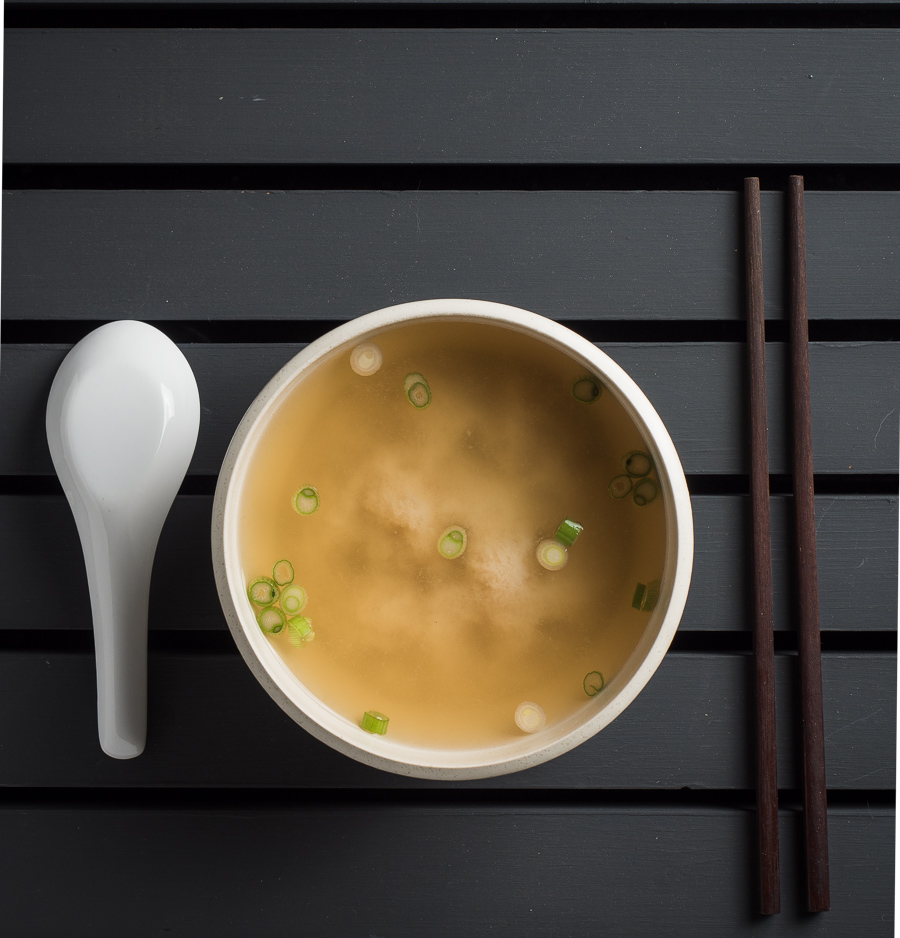
Want to make Japanese miso soup at home? Want to make it in less than 10 minutes? This is the recipe for you.
I love Japanese miso soup. It’s like comfort in a bowl. Salty, complex flavours. Wholesome. Reach down inside and make you happy. Think I’m a bit crazy? How good can something with 4 or 5 ingredients be? Maybe you don’t love it like I do.
The thing that has always slowed me down is the dashi. A quick bowl of miso soup when I’m in the mood gets killed pretty fast if I have to make dashi first. Sure, it’s better, but it takes time.
Hon-dashi makes miso soup easy
Dashi means you need to have kombu and bonito flakes at hand. Simmer. Strain. I’m all for authentic but I also would like my Japanese miso soup right now. Not two hours from now. Not tomorrow.
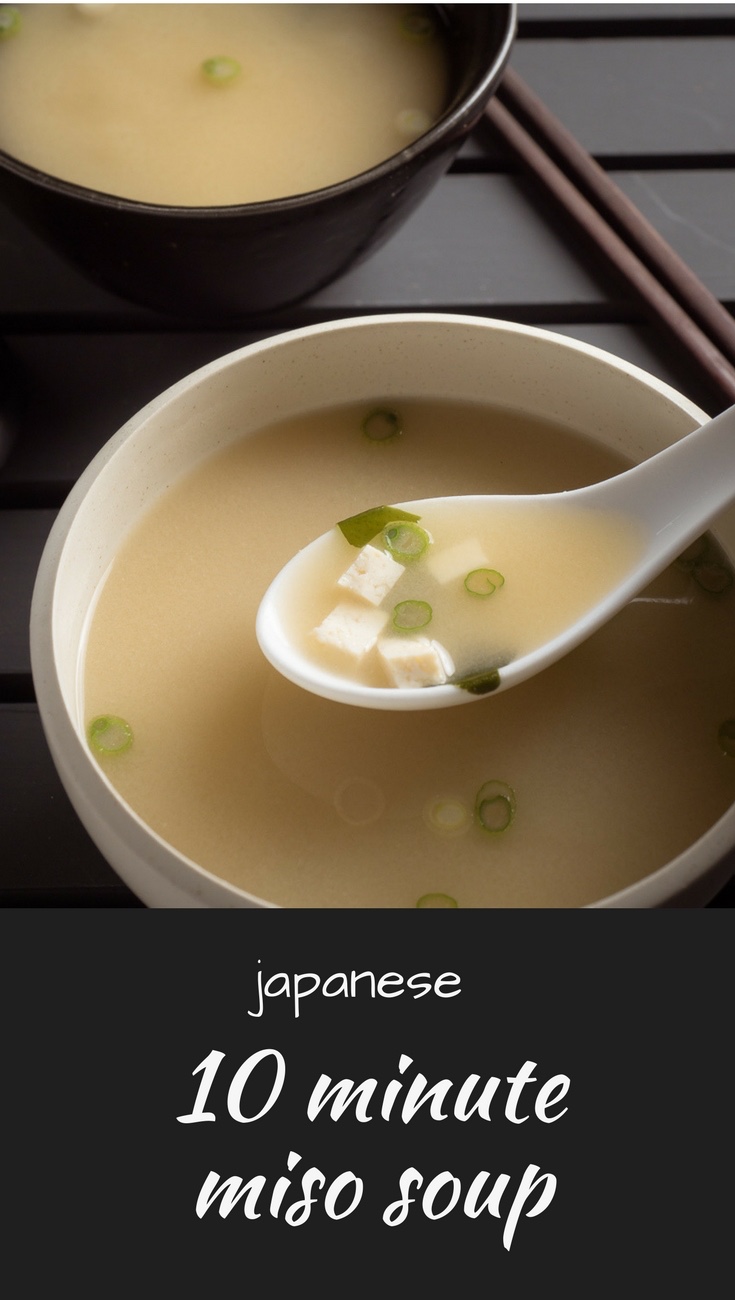
Enter hon-dashi. It’s cheating I guess. But it takes as long as it takes for water to boil. That’s it. And it keeps forever. You can get it at just about any Asian market. Little granules of instant dashi. That’s how miso soup goes from hours to minutes. Pretty sure lots of Japanese home cooks are using hon-dashi.
The other trick to making Japanese miso soup is a good one. Don’t put your miso into the dashi broth and chase around lumps. Put your miso into a small mesh strainer.
Put the strainer into the broth so it’s wet all around but not fully submerged. Then use chopsticks and stir. Work the miso through the strainer. No lumps.
That mystery green stuff floating in the soup is wakami. It’s dried seaweed. I like it. It’s an extra step though. Might take you 12 minutes to make your miso soup. If you can’t spare the extra 2 minutes just leave it out.
That’s it. Easy. Japanese miso soup to order. Anytime.