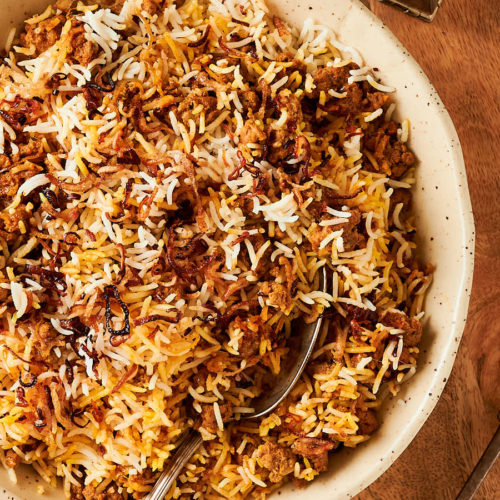
Keema rice. Lamb keema. Indian spice. Basmati rice. Biryani technique. Sometimes the whole is greater than the sum of the parts. This is one of those times.
This is not rice and keema. Well technically it is. I guess. But not really. It’s more like a keema biryani. Done like they would in a good Indian restaurant.
What this isn’t is keema stir fry. This is not keema fried rice. Not at all.
I’ve tried keema fried rice. Don’t like it. Might be better than just mixing keema and rice on your plate. Maybe. But not a lot.
This is upscale. What you were hoping for when you ordered keema rice. A little more work. A whole lot better.
Keema rice – keema biryani by any other name
I’m a keema addict. Seriously. Just type it into the search bar. You’ll see how many keema based recipes are on glebekitchen.
And yet keema rice has always been a bit of a mystery. Make keema matar. Add rice. Stir. Really? What kind of recipe is that? Tried it. Just don’t get it.
So I thought about it. About what it could be. Not what it is.
What it could be is keema biryani. Restaurant style.
Biryaniisa culinary treasure
A full blown dum biryani sits at the pinnacle of Indian cuisine. I think anyway. It is truly one of the great things to eat in this world.
Break the dum. Take off the lid. The aroma fills the kitchen. Every grain of rice infused with flavour. Everything cooked to perfection.
It’s a tricky thing to make though. Sounds easy. Make some rice and spiced meat. Toss it into a pot. Seal the pot. Bake. Serve.
Except that everything that goes into that pot needs to be perfectly underdone. Rice done to 70 percent complete. Meat underdone. So it’s just right after the bake.
That’s why it’s masterclass territory. Takes some kitchen mojo. Not impossible. But I’m willing to bet you won’t nail it first time you try it. Not ashamed to say I didn’t.
Restaurant style keema biryani is bulletproof
Not all restaurants are equal. There’s a distinction to be made. This is about what goes on in better Indian restaurants. Not what they serve at bad takeaways.
The takeaway version is just like regular keema and rice. A stir fry. Maybe some sort of vegetable curry on the side. Has nothing to do with the real thing.
Some like that. I don’t. I want better. Took me a while to figure it out. But in the end I have something I can make. And be happy with.
Something that works. Every. Single. Time. That’s the thing about restaurants. They have to make it work consistently.
Restaurant technique makes this keema rice work
Restaurants do not have big vats of food ready to go. That would be expensive. And wasteful. They cook to order.
That’s why the whole stir fried keema and rice thing exists. It’s easy. Not great. But easy. And fast.
Leftover rice. Pre-cooked keema. A little oil and 3 minutes. That’s the domain of the bad takeaway.
Dum biryani sits at the other end of the spectrum. The ultimate. For when you want to go for gold.
In between there’s high end restaurant technique. That’s what this is.
Make spice infused rice. Make keema and gravy. Combine them. Bake it off to get everything working together. Stir. Enjoy.
I think it’s actually easier than stir fry. But it takes longer. Around 20 minutes. No takeaway customer is going to wait 20 minutes to get their food.
But better restaurants work at a more relaxed pace. A drink. An appetizer. Twenty minutes isn’t unreasonable. You’ll wait.
And in the kitchen most of that twenty minutes time is unattended. So line cooks can do other things while the keema rice magic is happening. Like make your chicken tikka masala.
Keema rice is about rice
That shouldn’t be a shocker. When you put rice in the name it’s probably important. So it can’t just be plain rice.
Not around here anyway. The rice needs to be special. Flavour infused. That’s a big part of what makes this dish.
It’s not hard. Chicken stock. Spices. Salt. That’s where the flavour comes from. And cooking the rice in that mix is how you get it done.
Literally. Toss the stock, the spices and the rice in a pot. Or a rice cooker. Cook. Done.
Rice plus spices plus stock equals amazing rice. Have I mentioned I’m doing my doctorate in food math?
Lamb stock is good too. Harder to get. Or more work. But it’s a nice touch. If you can get it. Ask your butcher. They can probably fix you up.
Cooking rice is not as hard as you think
Easiest way to cook rice? A rice cooker. I do that. If you really like rice a good rice cooker is a good investment.
Took me a long time to come to that conclusion. But I’m happy I did. Very happy.
For about a million years I used a stovetop and pan. That works. Really well actually. Never failed me.
A rice cooker is a little easier. The rice comes out perfect every time. And it doesn’t tie up a burner on your stove.
But if you aren’t a rice addict. If you don’t eat it two or three times a week. You can probably make do with a pot.
Rice in a pot isn’t black magic. It’s a formula. More food math. One cup rice. One and one half cups liquid. 1 tsp salt. Those are ratios. It scales linearly.
Bring to a simmer. Cover. Turn the heat to low. Cook for 20 minutes. Let stand covered for 5 minutes. Fluff gently. Done. Really good rice. No extra gear required.
And there’s a party trick in this recipe. Chuck in whole spices. Cook the rice. The whole spices will be waiting for you when the rice is done. Right on top.
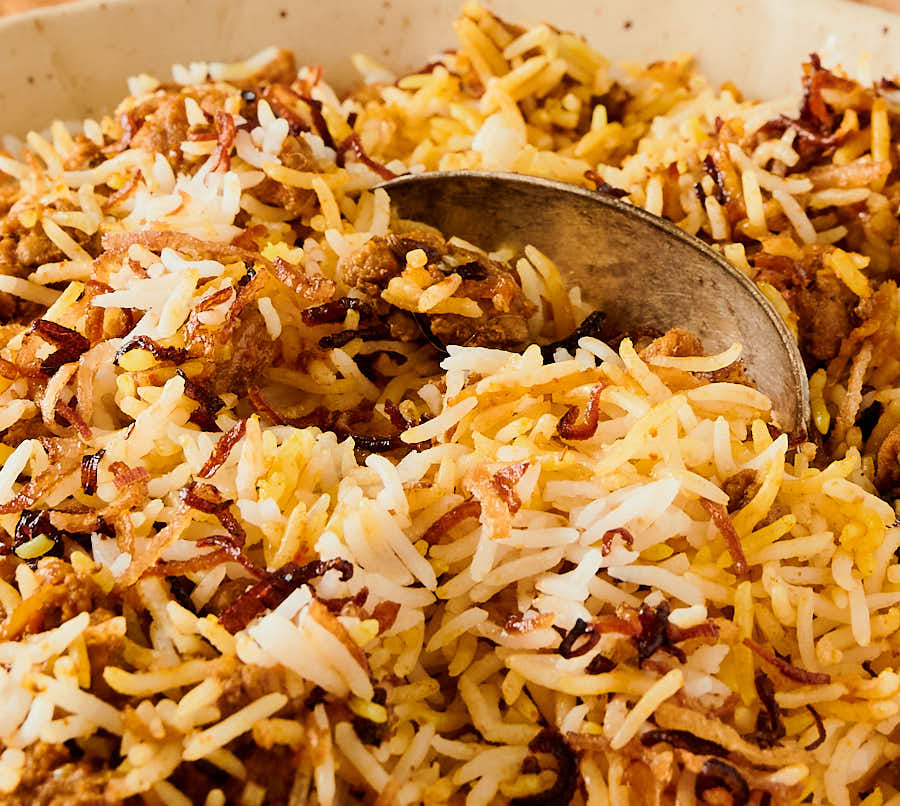
Fried shallots add a flavour boost
There’s something special about fried shallots. You can buy fried onions. They stock them at Indian grocers. But they aren’t quite the same.
Pre-fab fried onions aren’t terrible. Just not as good. I’ve used them. I’m not proud of that. But I get busy too. So sometimes I cut corners.
But that’s pretty rare. Home-made fried shallots are worth the effort. It doesn’t take a ton of oil. And it goes pretty quick.
It will smell up your kitchen though. So make sure to have your hood fan on full blast. Or open a window.
The technique is described in the notes. Go for it. You won’t regret it. Except you will become an addict. Lucky for you they keep in the fridge for a couple weeks.
Keema biryani is a main course
Don’t think of keema rice as a side. It’s definitely a dish worthy of centre stage. Like any biryani. It should be the star.
And it doesn’t really play well with other dishes. It demands attention. I wouldn’t serve this with anything else on the plate.
Keema rice. A nice green salad to start. Or kachumber salad if you want to stick with an Indian theme.
This one is classic example of “if you know you know”. And if you don’t know? I think you owe it to yourself to find out…
Keema rice – indian restaurant style
Ingredients
The rice
- 1 1/2 cups basmati rice
- 1 1/4 cups water
- 1 cup chicken stock – low or no sodium. Bouillon cubes are not chicken stock.
- 1 black cardamom pod
- 5 cloves
- 2 inch cinnamon bark also known as cassia
- 1 tsp kosher salt
Keema rice spice mix
- 2 tsp coriander powder
- 1 tsp cumin powder
- 1/2 tsp turmeric
- 1 tsp kasmiri chili powder
- 1 tsp kasoor methi also known as dried fenugreek leaves
The lamb
- 3 tbsp neutral oil e.g. canola or vegetable
- 1 lb ground lamb
- 1/2 tsp salt
The keema
- 1 cup shallots thinly sliced
- 1/2 tsp cumin seed
- 1 black cardamom pod
- 1 tbsp garlic ginger paste
- the keema spice mix
- 1 1/2 tbsp tomato paste diluted with about 5 tbsp water
The keema rice
- the seasoned rice from above
- the keema along with all the tasty sauce
- 1 tbsp fried shallot plus more to garnish
- 1/4 cup water or chicken stock
- cilantro and fried shallots to garnish
Instructions
- Set your oven on to 350F.
Make the rice
- If you have a rice cooker use it. Combine the rice, water, chicken stock, black cardamom, clove, cinnamon or cassia stick and salt. Push the button. Walk away. Make the keema while the rice cooker does its thing.
- If you don’t have a rice cooker this is an easy way to make basmati. You can pre-soak, rinse or pray to the rice gods if you want but this works pretty well as written. It works. I did this for years until I got a decent rice cooker.
- Pick a saucepan with a fairly tight fitting lid that’s not way too big. Combine the water, chicken stock, black cardamom, cloves, cinnamon bark, salt and the rice in your chosen saucepan.
- Bring to a simmer over medium heat uncovered. Reduce heat to low and cover. Simmer for 20 minutes. Set a timer. Trust me. You will forget otherwise. While this is going on make the keema (see below).
- When the timer goes off after 20 minutes, turn off the heat and let stand an additional 5 minutes. Uncover. Remove the whole spices. They should be just sitting on top. Fluff gently and replace the cover to keep the rice warm.
Brown the lamb
- Pick a nice large skillet. 12 inch diameter works well if you have one.
- Preheat the pan over medium heat.
- Add the oil.
- Crumble the lamb into the pan. You want little chunks about the size of a coffee bean.
- Add the salt and fry the lamb, stirring occasionally, until the lamb is pretty much cooked through. This should take somewhere around 8-10 minutes.
- Remove the lamb from the frying pan. Use a slotted spoon. You want to leave the rendered lamb fat behind. Reserve 5 tablespoons of it. That luscious lamb fat flavour gets used in the next step.
Make the keema
- Do your prep. Make the keema spice mix. Combine all the spice mix ingredients in a small bowl. Dilute the tomato paste. Slice your shallots. Have everything at hand.
- Heat the reserved lamb fat in a saute pan over medium heat. Add the shallots and cook until they start to brown. They will brown some more in the next steps.
- Push the shallot to one side of the pan. Add the cumin seed and black cardamom. Cook for about 30 seconds. You want to see little bubbles forming around the seeds.
- Add the garlic ginger paste. Stir it into the oil and cook until it stops sputtering. Watch it. Be careful. Don’t let it burn.
- Turn the heat to medium low. Add the spice mix. Stir to thoroughly combine the oil in the pan with the spices. Cook for about 30 seconds. Really watch it. There should be enough lamb fat in the pan. If the spices start to stick turn down the heat and add a bit more oil. If you are on an electric stove and run into trouble pick the pan up and move it to a cold burner. You do not want the spices to burn. You are starting over if you do that.
- Add the diluted tomato paste. Stir and turn the heat up to medium. Cook about a minute.
- Add the pre-cooked lamb and cook, stirring regularly, until everything is nice and hot.
- At this point your keema will be quite dry. I find it takes about 1/4 cup of water or chicken stock to get it to the point of being lightly saucy – which is what you want. Judgement call here but I like 1/4 cup.
Assemble the keema rice
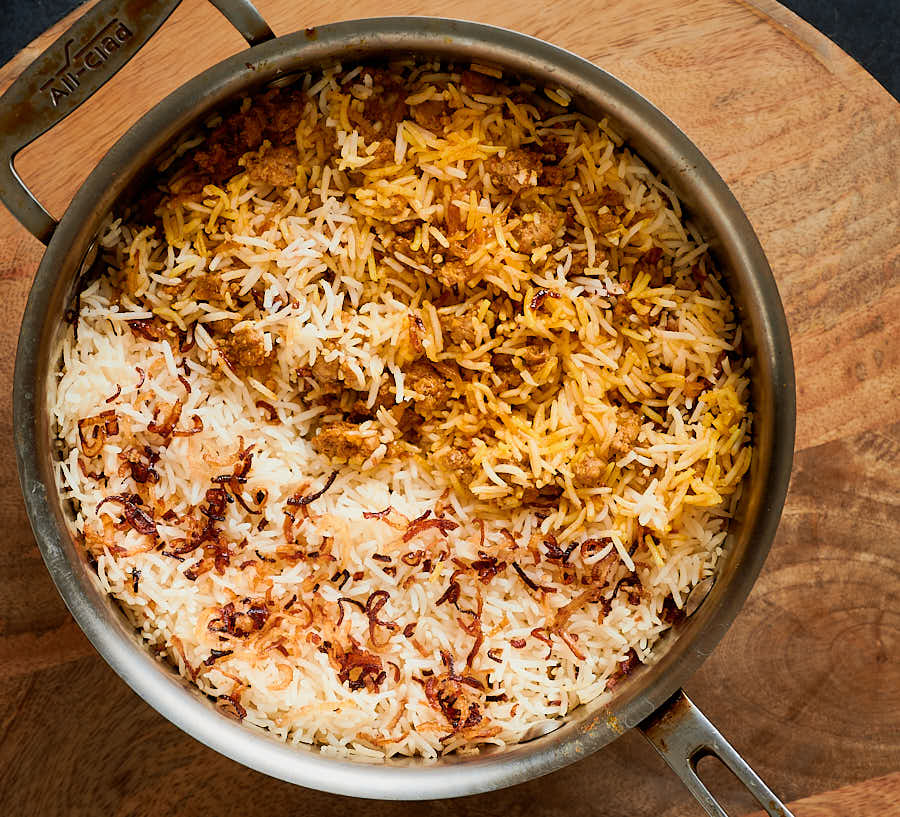
- Use a pot that’s about 9-10 inches in diameter. Make sure it has a tight fitting lid.
- Put a little more than half the rice in the pot and spread it out in an even layer. Top with the keema mixture. Add the rest of the rice. Top with the fried shallots.
- Cover the pot with tinfoil and then the lid. That’s a trick I picked up from cooking French braises. The tinfoil adds a little extra seal. It’s not quite as good as the dough seal in a traditional dum biryani but it helps.
- Transfer the assembled keema rice to the oven and bake for 15 minutes.
- After the keema has baked for 15 minutes remove it from the oven and place it on the stove. Let stand for 10 minutes.
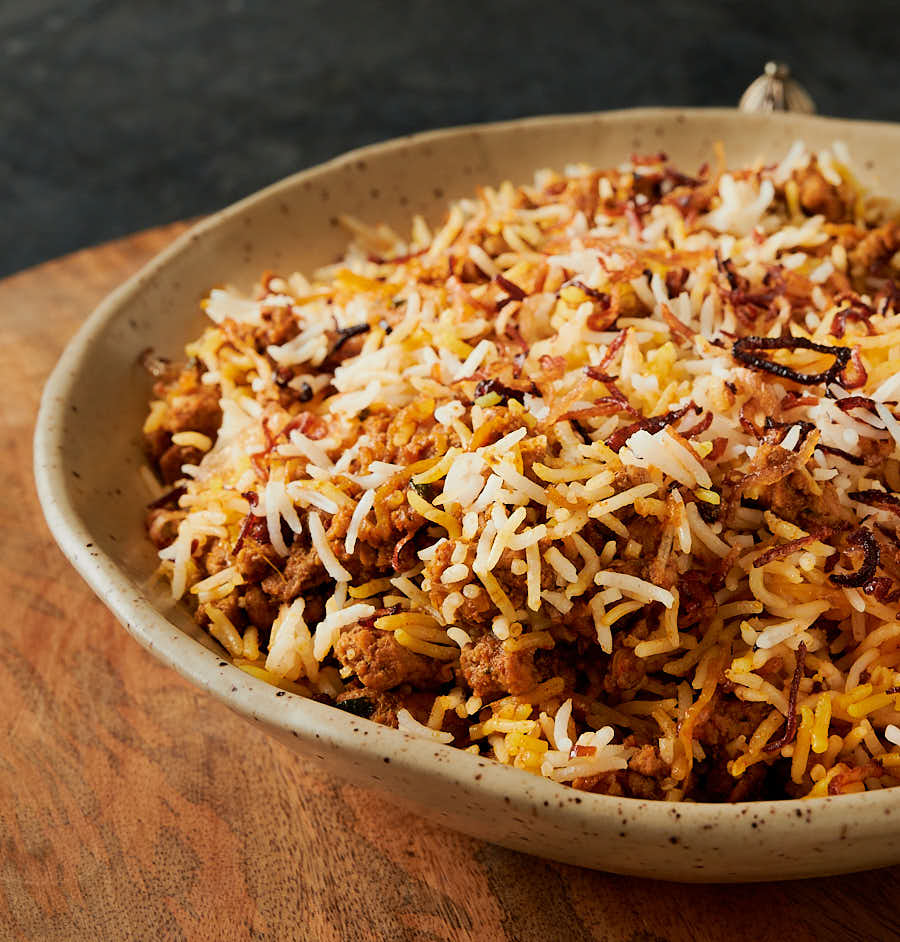
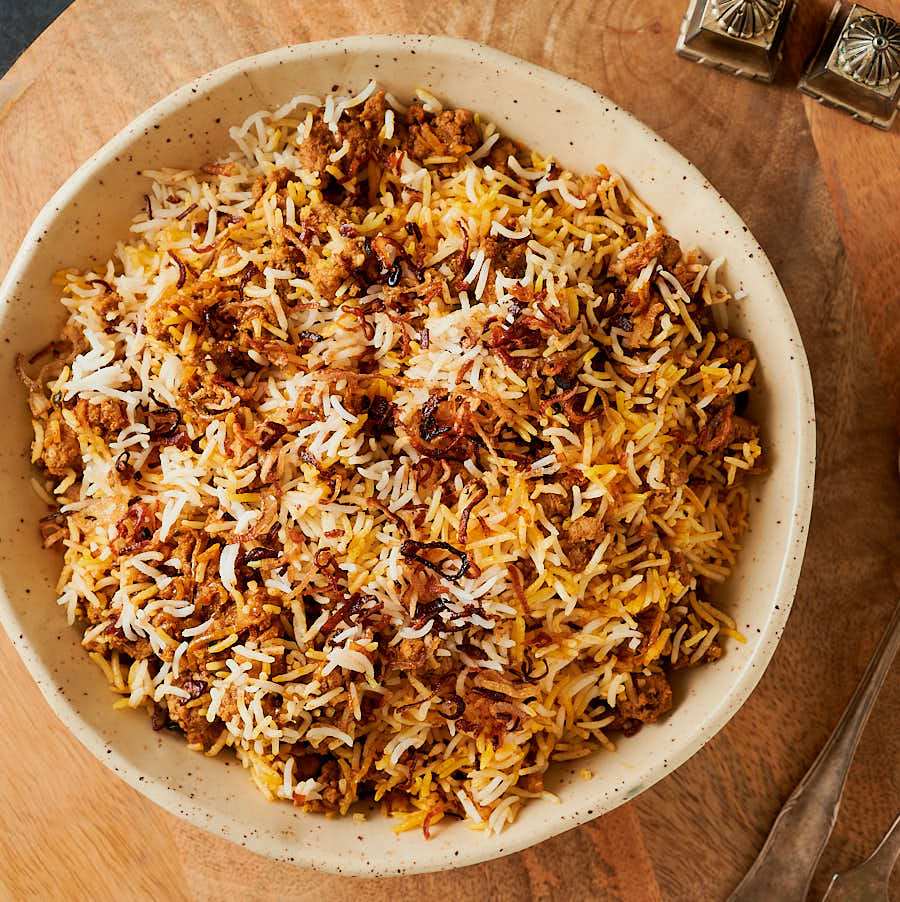
- To serve transfer the contents to a platter. Don’t worry if it looks messy. That’s OK. It’s keema rice. It’s one big tasty jumble.
- Garnish with more fried shallots and a bit of cilantro. Serve. Enjoy.
Notes
Nutrition
Keema rice - indian restaurant style
Ingredients
The rice
- 1 1/2 cups basmati rice
- 1 1/4 cups water
- 1 cup chicken stock - low or no sodium. Bouillon cubes are not chicken stock.
- 1 black cardamom pod
- 5 cloves
- 2 inch cinnamon bark also known as cassia
- 1 tsp kosher salt
Keema rice spice mix
- 2 tsp coriander powder
- 1 tsp cumin powder
- 1/2 tsp turmeric
- 1 tsp kasmiri chili powder
- 1 tsp kasoor methi also known as dried fenugreek leaves
The lamb
- 3 tbsp neutral oil e.g. canola or vegetable
- 1 lb ground lamb
- 1/2 tsp salt
The keema
- 1 cup shallots thinly sliced
- 1/2 tsp cumin seed
- 1 black cardamom pod
- 1 tbsp garlic ginger paste
- the keema spice mix
- 1 1/2 tbsp tomato paste diluted with about 5 tbsp water
The keema rice
- the seasoned rice from above
- the keema along with all the tasty sauce
- 1 tbsp fried shallot plus more to garnish
- 1/4 cup water or chicken stock
- cilantro and fried shallots to garnish
Instructions
- Set your oven on to 350F.
Make the rice
- If you have a rice cooker use it. Combine the rice, water, chicken stock, black cardamom, clove, cinnamon or cassia stick and salt. Push the button. Walk away. Make the keema while the rice cooker does its thing.
- If you don’t have a rice cooker this is an easy way to make basmati. You can pre-soak, rinse or pray to the rice gods if you want but this works pretty well as written. It works. I did this for years until I got a decent rice cooker.
- Pick a saucepan with a fairly tight fitting lid that’s not way too big. Combine the water, chicken stock, black cardamom, cloves, cinnamon bark, salt and the rice in your chosen saucepan.
- Bring to a simmer over medium heat uncovered. Reduce heat to low and cover. Simmer for 20 minutes. Set a timer. Trust me. You will forget otherwise. While this is going on make the keema (see below).
- When the timer goes off after 20 minutes, turn off the heat and let stand an additional 5 minutes. Uncover. Remove the whole spices. They should be just sitting on top. Fluff gently and replace the cover to keep the rice warm.
Brown the lamb
- Pick a nice large skillet. 12 inch diameter works well if you have one.
- Preheat the pan over medium heat.
- Add the oil.
- Crumble the lamb into the pan. You want little chunks about the size of a coffee bean.
- Add the salt and fry the lamb, stirring occasionally, until the lamb is pretty much cooked through. This should take somewhere around 8-10 minutes.
- Remove the lamb from the frying pan. Use a slotted spoon. You want to leave the rendered lamb fat behind. Reserve 5 tablespoons of it. That luscious lamb fat flavour gets used in the next step.
Make the keema
- Do your prep. Make the keema spice mix. Combine all the spice mix ingredients in a small bowl. Dilute the tomato paste. Slice your shallots. Have everything at hand.
- Heat the reserved lamb fat in a saute pan over medium heat. Add the shallots and cook until they start to brown. They will brown some more in the next steps.
- Push the shallot to one side of the pan. Add the cumin seed and black cardamom. Cook for about 30 seconds. You want to see little bubbles forming around the seeds.
- Add the garlic ginger paste. Stir it into the oil and cook until it stops sputtering. Watch it. Be careful. Don’t let it burn.
- Turn the heat to medium low. Add the spice mix. Stir to thoroughly combine the oil in the pan with the spices. Cook for about 30 seconds. Really watch it. There should be enough lamb fat in the pan. If the spices start to stick turn down the heat and add a bit more oil. If you are on an electric stove and run into trouble pick the pan up and move it to a cold burner. You do not want the spices to burn. You are starting over if you do that.
- Add the diluted tomato paste. Stir and turn the heat up to medium. Cook about a minute.
- Add the pre-cooked lamb and cook, stirring regularly, until everything is nice and hot.
- At this point your keema will be quite dry. I find it takes about 1/4 cup of water or chicken stock to get it to the point of being lightly saucy - which is what you want. Judgement call here but I like 1/4 cup.
Assemble the keema rice
- Use a pot that’s about 9-10 inches in diameter. Make sure it has a tight fitting lid.
- Put a little more than half the rice in the pot and spread it out in an even layer. Top with the keema mixture. Add the rest of the rice. Top with the fried shallots.
- Cover the pot with tinfoil and then the lid. That’s a trick I picked up from cooking French braises. The tinfoil adds a little extra seal. It’s not quite as good as the dough seal in a traditional dum biryani but it helps.
- Transfer the assembled keema rice to the oven and bake for 15 minutes.
- After the keema has baked for 15 minutes remove it from the oven and place it on the stove. Let stand for 10 minutes.
- To serve transfer the contents to a platter. Don’t worry if it looks messy. That’s OK. It’s keema rice. It’s one big tasty jumble.
- Garnish with more fried shallots and a bit of cilantro. Serve. Enjoy.
Notes
Nutrition
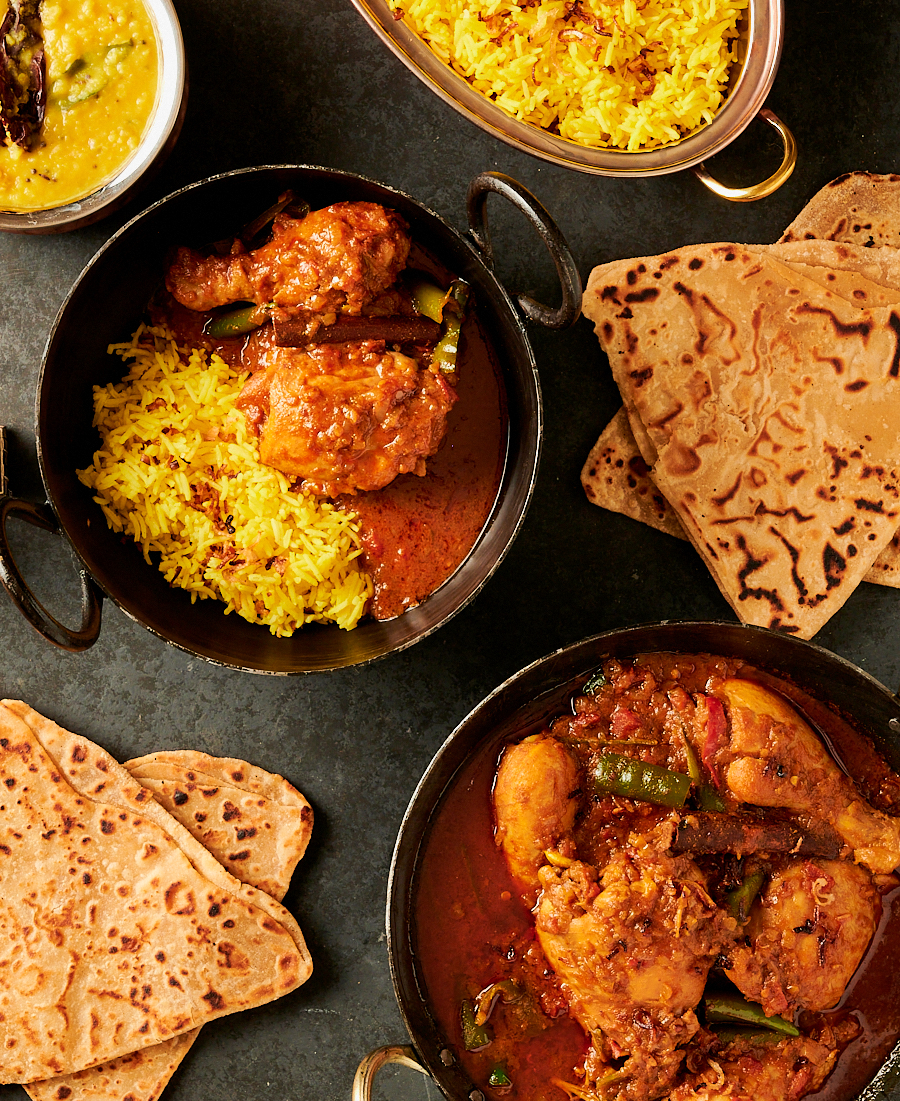
Sometimes simple is best. This is one of those times. Simple chicken curry. Like your mom makes. Well maybe not your mom. But my mom. My mom could cook.
It’s the kind of stuff that everyone who grew up Indian knows. What they remember. What I remember. Comfort food. Family food.
It’s not complicated. Pretty straight forward in fact. And it’s a great intro into the techniques you need to get good at cooking Indian.
This is about cooking Indian like people do in their homes. Straightforward food. Tasty food. Food for every day.
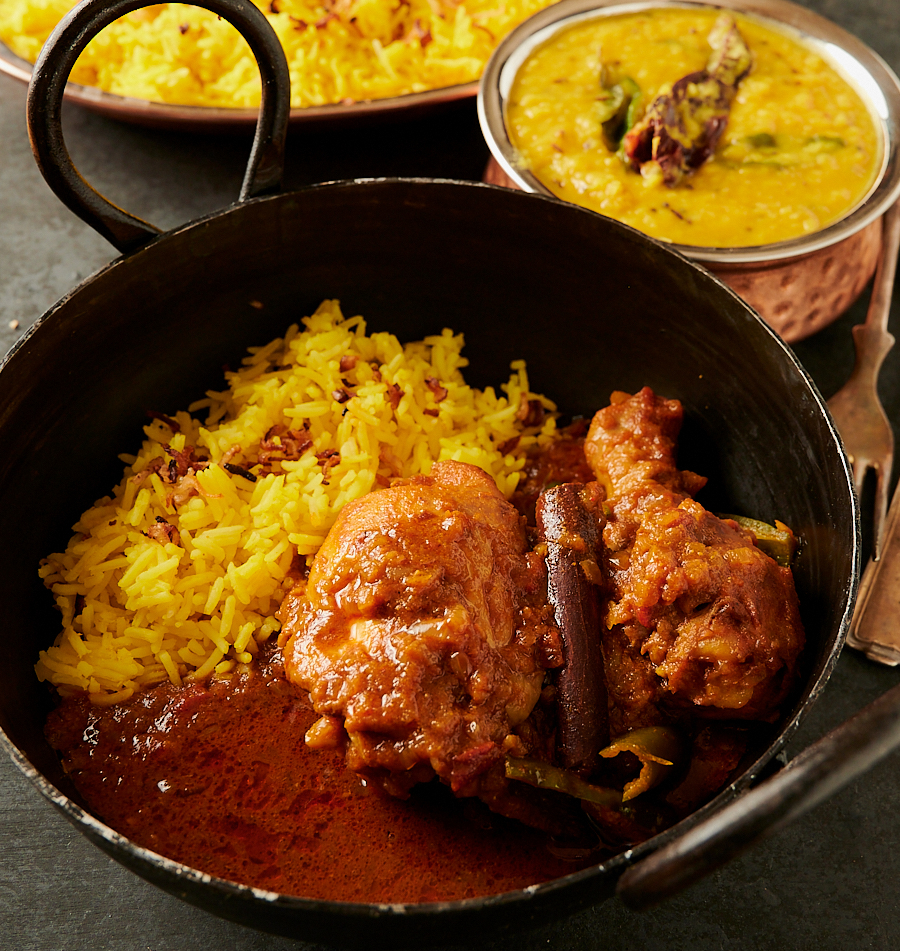
This is my baseline simple chicken curry
The internet is packed with simple Indian chicken curries. Easy chicken curries.
Some of them aren’t so easy. Find exotic ingredients. Toast whole spices. Grind them. Make fancy masalas.
I like those. They aren’t simple. But they are good. Really good. Authentic. I’m for those recipes. But that’s jumping into the deep end.
At the other end there’s the pseudo curries. Mix some garam masala with some yoghurt. Mix it with some chicken. Cook. I don’t like those.
Somewhere in the middle there’s this simple chicken curry. Not the most complicated. But legit. I think. A starting point. A gateway curry. An easy chicken curry.
Get this down and you can make just about any homestyle chicken curry. I’m handing you the keys to tasty town.
This is what they call a staff curry in the UK
There’s a thing. In the UK. The staff curry. What Indian restaurant staff eat. Special. Secret. Shrouded in mystery.
It has secret spices. And chicken on the bone. Dark meat even. Can you even begin to imagine?
I’m going to blow the whistle. Let everyone in on the secret. Are you ready? It’s not as exciting as you hoped.
There is no secret. There is no definitive staff curry. I have no idea why anyone thinks there is. Makes zero sense. There are good chicken curries. Lots of those.
But only one true staff curry? In every restaurant everywhere? That’s a little limiting. I think anyway.
Staff curry is whatever chef feels like cooking for his staff. A big pot of home cooking. A whole lot of delicious.
Like chef’s mom used to make. Well maybe like their mom if she was a professional chef. I’m guessing chef has a few ideas of their own.
And it’s probably not the same every day. Who wants that? Same meal 5 days a week? Year in year out? I’m guessing not. Chef needs to mix things up. Or staff will quit.
Make this simple chicken curry your own
This is a baseline recipe. A foundation. And you can build a lot of dishes on this foundation. Push it in all sorts of directions.
Just like chef does to keep his staff happy. Get the basics down and you can do almost anything.
Want something like a dopiaza? Fry up some big chunks of onion. Toss them in towards the end.
Jalfrezi your thing? Blister up some green peppers. And some onions. Maybe add a 1/2 teaspoon of tandoori masala to the spice mix. Add some cilantro stems along with the green chilies. Maybe a few pieces of tomato right at the end.
Like South Indian? Add some fresh curry leaves in with the whole spices. Some black pepper into the spice mix.
Coconut milk instead of chicken stock. A little tamarind paste at the end to give it some tang.
Or swap out the coriander, cumin and turmeric for some Sri Lankan roasted curry powder. Can you say Ceylon?
Looking to make a madras curry? Replace the coriander, cumin, turmeric and paprika with madras curry powder. Add a tsp of kasoori methi. Some fresh lemon juice at the end.
If you’re feeling adventurous add some Indian pickle. That makes a great addition. A little garlic chili pickle adds complexity. Naga pickle if you like that heat and flavour.
What I’m trying to say is chef isn’t constrained to one recipe. And you shouldn’t be either. Have fun. Get the simple chicken curry down. And then play with it.
Get your Indian mojo
Bloom your spices – There are oil soluble flavour compounds in ground spices. And you want to get those flavour compounds out of the spices and into your mouth. Blooming spices is how you do it.
Fry powdered spices in oil. That’s all there is to it. And if you’re wondering. Yes, this is the smell of Indian restaurants.
Brown your onions – There are no shortcuts here. Think French onion soup. You want brown. Just do this. It’s important.
Bone-in chicken – This is homestyle chicken curry. A braise. Boneless, skinless chicken breasts are not good in braises.
I’m still struggling to find something they are good for. Not Indian. Pretty sure about that. Bone-in thighs. Bone-in legs. That’s the business. Try it. It makes a difference.

Make this simple chicken curry
Make this. Even if you’ve been following glebekitchen for years. Even if you’re a Jedi master at restaurant style.
This is worth trying. I like to mix it up. And I’m betting you will too.
I can cook more complicated curries. More elaborate. Look around this blog. There’s no shortage.
But I come back to this one. Often. Homestyle. Comfort food. Just good simple chicken curry. Give it a try. I think you’ll like it. Chef does. And so does his staff…
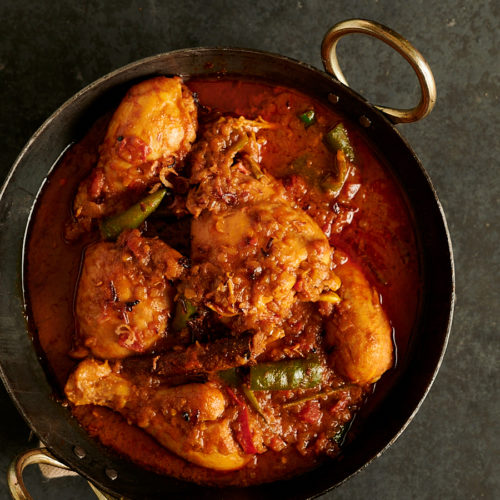
simple chicken curry
Ingredients
Spice Mix
- 1 Tbsp coriander powder
- 2 tsp cumin powder
- 1 tsp turmeric powder
- 1/2-1 tsp chili powder depending how hot you like it
- 1 tsp paprika
- 1 tsp kosher salt to start
Simple Chicken Curry
- 3 Tbsp vegetable oil plus one Tbsp vegetable oil
- 1 2 inch piece of cinnamon bark or cinnamon stick
- 8 green cardamom pods
- 3 cups onion finely diced. About one really large onion
- 1 Tbsp tomato paste diluted with a couple tablespoons of water
- 3 cloves garlic
- 1 1 inch piece of ginger
- 2 plum tomatoes seeded and diced
- 3 green chilis seeded and diced (or 1 jalepeno, seeded and diced)
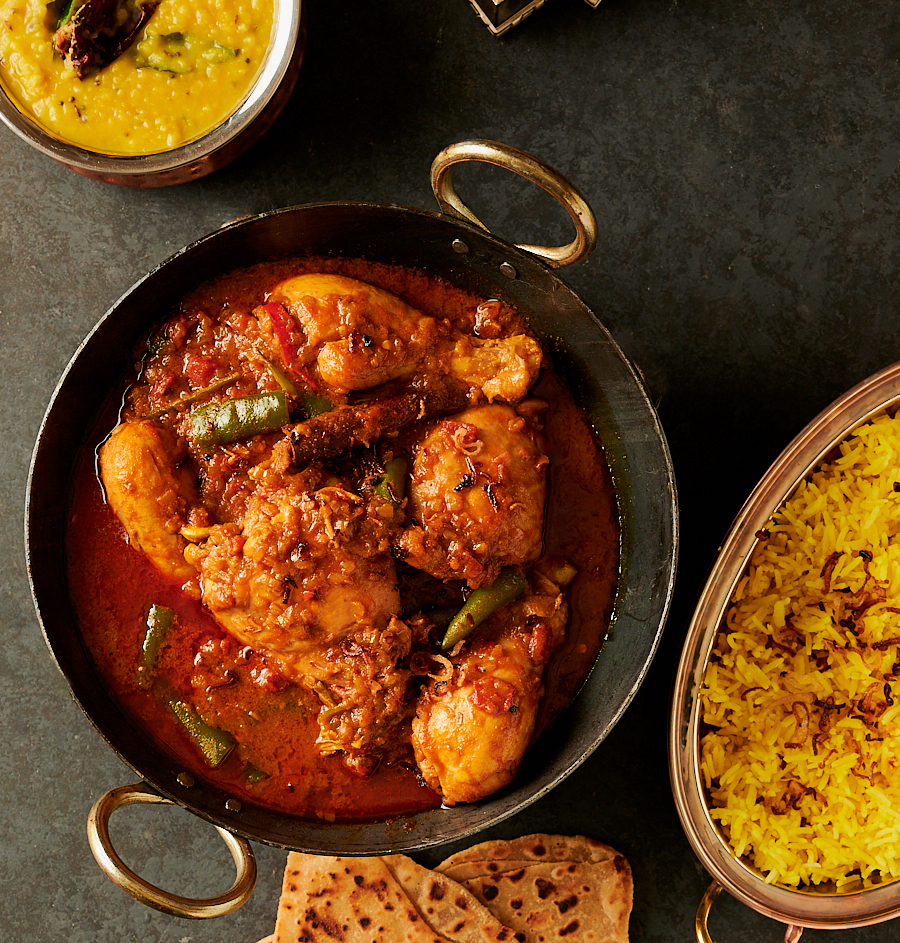
- 8 chicken thighs bone-in, skinless
- 1/2 cup chicken stock
Instructions
Make the masala
- Make your mix powder. Combine all the ground spices with the salt.
- Use a food processor to finely chop the onion. It takes two seconds and it works way better. You are looking for a really fine dice. Almost a paste.
- Now use your food processor to make a garlic ginger paste. It’s already dirty so this comes for free. Combine the garlic and ginger with a bit of water and whiz until you have a puree. If you have a big food processor you may have to make more to get it to work or use a blender (more dishes though).
- Heat 3 Tbsp oil in a 4-5 quart pot over medium heat. Add the cinnamon and cardamom and cook about 20-30 seconds. The spices should sizzle.
- Crank up your fan hood to max. Really. Full blast time. Unless you want your house to smell like an Indian restaurant.
- Add the onion and cook, stirring regularly until they take on a golden brown colour. You want them soft. Really soft. Take your time here. Give it 10 minutes at least. It takes as long as it takes and it is important.
- Turn the heat down to medium low. You don’t want your spices to burn. Add the 4th Tbsp of oil and your spice mix. Stir constantly for about a minute. If things start to stick you need more oil. If you really get into trouble toss the tomato paste in and move the pot off the burner. This is called blooming spices. There are oil soluble flavour compounds in spices. This gets them out of the spices, into your oil and then into you mouth. It’s important.
- Add the diluted tomato paste, green chilies and garlic ginger paste.
- Continue to stir and cook another minute. Stir in the chopped plum tomatoes. Cook for two to three minutes.
Make the curry
- Add the skinned chicken thighs and/or drumsticks to the pot, stir and add 1/2 cup of stock or water. Bring to a gentle boil, reduce heat and simmer about 25 minutes – until the chicken is cooked through. The chicken is done when the internal temperature hits around 170-175F.
- Adjust salt to taste. I expect around another 1/2 tsp if you are using kosher salt. Probably none at all if you are using table salt.
