If you want to learn how to make Indian curries that taste just like you get in the restaurant, here’s how. The techniques, the ingredients, the recipes. Indian restaurant curry at home. You can do it.
If you’ve ever wondered why you can’t make Indian restaurant curry at home, here’s why. The entire internet is pretty much devoted to teaching you how to make homestyle curry.
This video should help you get started
Start by watching this video. It’s short. Once you’ve seen it everything below should make more sense. Read the post and come back and watch the video again. It will all make sense. I promise.
Watch how hard the curry is cooking once you add the curry base. That’s what you’re going for. Push it hard after you add it in. It’s almost indestructible at this point. I said almost. Remember that.
You will probably run into a bit of trouble the first couple times you cook restaurant style. Don’t just read this and decide you are having a dinner party.
Practice a bit before you decide to show off. It will come. Just a little different from what most people are used to.
You need to cook like they do in restaurants
The techniques used by restaurants are very different. It takes 1 or 2 hours to make a curry at home. It takes 10 minutes and a whole lot of prep to make it in a restaurant.
They don’t have big pots of curry sitting around. They can’t have you wait two hours while they cook your curry. Here’s how they do it. This is a long read. A pretty complicated read.
But it’s how it’s done and it’s not that hard once you get your head around it. Indian restaurant curry at home. You will amaze yourself.
You probably know some of the ingredients already
To make any curry you will probably need to make a trip to a really good grocery store. Or more likely an Indian food store. Some you may already know. Some you may not.
Cinnamon bark (cassia) – you can substitute cinnamon stick. It’s about the same.
Green cardamom – this is the whole spice. You should be able to get it pretty much anywhere.
Coconut milk powder – this is a key ingredient in many South Indian dishes. Maggi is a pretty common brand. It comes in boxes. You can substitute coconut milk.
Tandoori masala – this comes in boxes and jars. It’s tandoori seasoning complete with the red colour. It’s used in some curries. You can also use it to make a quick tandoori marinade. Not a bad one to have around. Get it at Indian grocery stores.
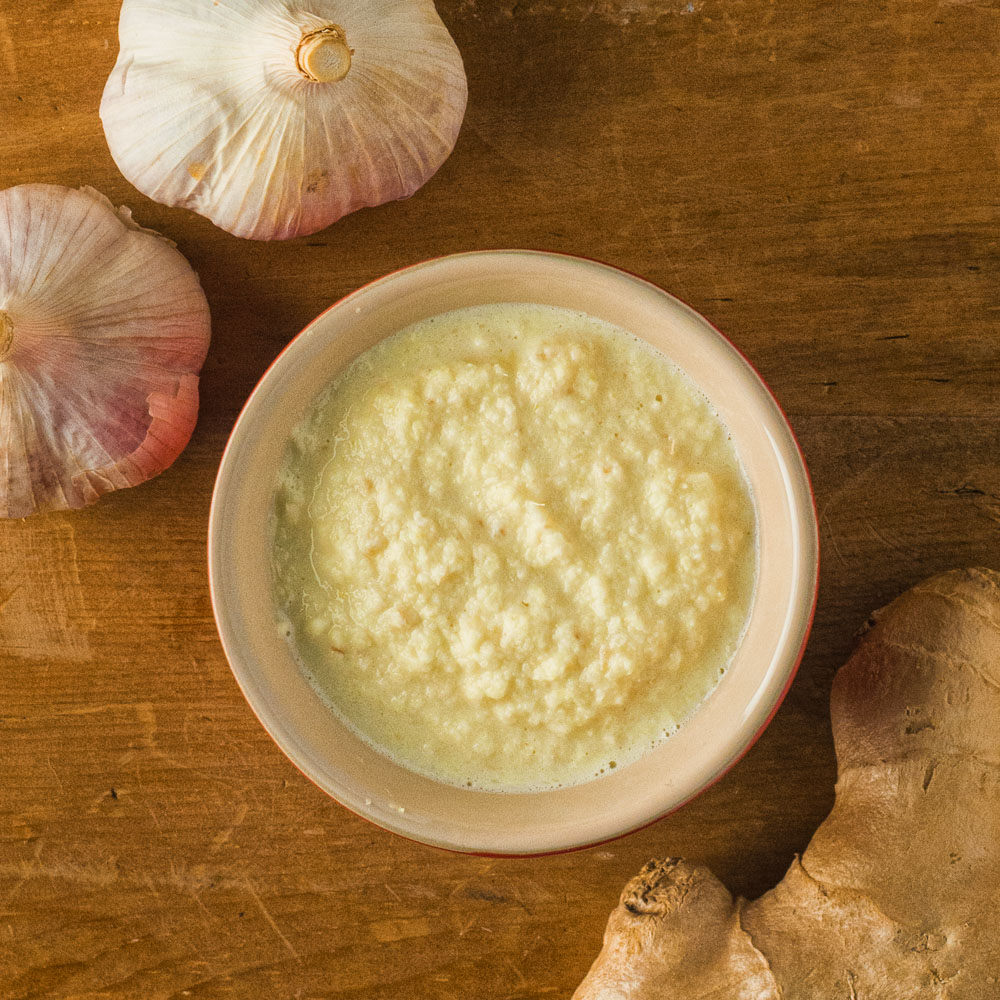
Garlic ginger paste . You can make it or you can buy it. It’s easy to make and homemade tastes way better.
Some you may not be so familiar with
Mix powder – t his is the house spice base in the restaurant. It’s a mix of pretty common spices. It’s house-made curry powder. You can use mine or you can come up with your own. All the recipes in this blog are tested with mine.
Kasoor methi – this is dried fenugreek leaves and they use it in pretty much everything. This one I expect will require a trip to an Indian market. It comes in small boxes.
Panch phoran – Bengali 5 spice. You can buy this pre-mixed or make it yourself. It is equal portions of cumin seed, brown mustard seed, nigella seed, fenugreek seed and fennel seed. The spices are whole. It is not meant to be a powder.
Madras curry powder – this is used in a few of the hotter curries.
Kashmiri chili powder – this is a pretty mild chili powder that imparts a bright red colour. Cayenne is much hotter. You can try substituting 1/4 cayenne with 3/4 paprika.
Black cardamom – this is a whole spice. It’s bigger than green cardamom and has a bit of a smoky flavour. Get it at Indian grocery stores.
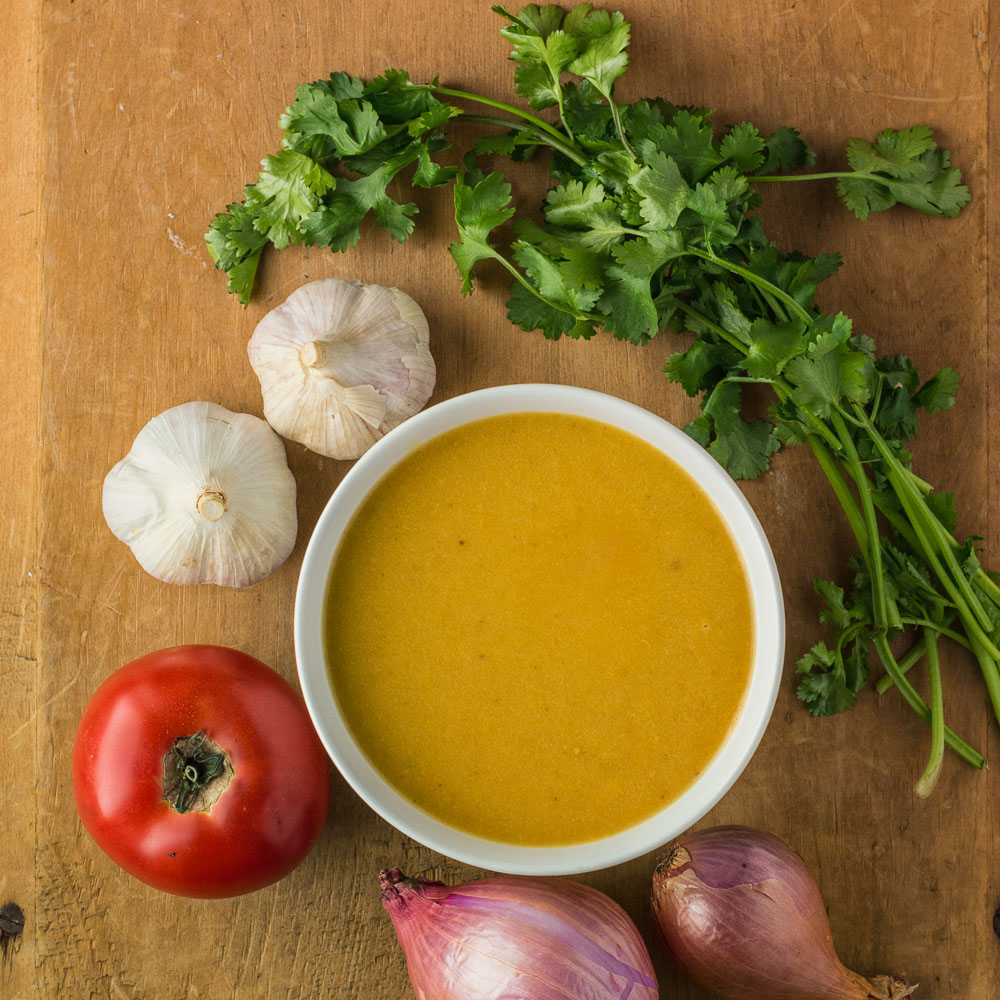
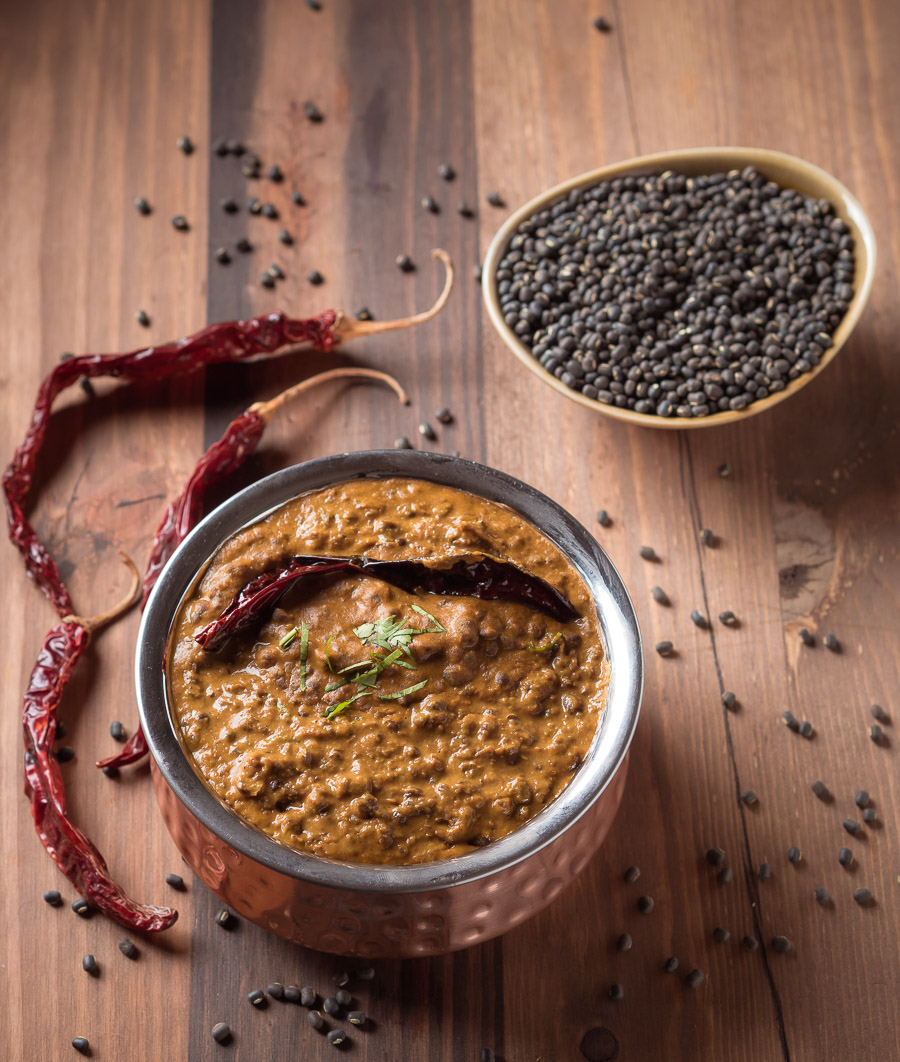
Curry base – this is the secret to making Indian restaurant curry. You can make a batch of it and freeze it in ziplock backs or small containers. You can’t make this style of curry without curry base.
Curry leaves – these are not what curry powder is made from. Think of it as an herb. It’s popular in South Indian cooking and it’s worth seeking out. It’s only good fresh. Dry tastes like nothing. If you can’t get fresh, leave it out. Get it at Indian grocery stores.
Pre-cooked meat – cooking in this style relies on having the meat or poultry pre-cooked. That’s the other secret. Even the vegetables are pre-cooked.
Restaurant style curry means your poultry or meat is pre-cooked
This isn’t a big deal. It’s a time saver really. It also prevents the liquids from the meat diluting your curry. There’s flavour in those juices. That’s true. Everything is a tradeoff…
For chicken, simply cut up the boneless chicken (I like thighs) into big bite size chunks. Put them in a pan with a teaspoon or so of curry powder, add salt to taste then cover in chicken stock.
Simmer until the chicken is just barely done. It will cook another 5 minutes when you cook the curry.
For lamb or beef, cut the meat into big bite size chunks. Brown the meat as you would for stew. Add some curry powder and salt, then cover with stock.
Simmer until tender – about an hour for lamb and two hours for beef. You can freeze the lamb or beef so you don’t have to do this every time. I use a food saver. Works great.
The gear
You don’t need anything particularly fancy. A cheap 10 1/2 inch aluminum skillet is nice to have. You can get those at a restaurant supply store for next to nothing.
Aluminum conducts heat almost as well as copper so it works well. Being able to control heat is pretty important when you are making Indian restaurant curry at home. You can use stainless multi-ply cookware as well. That’s just stainless on the inside and outside with an aluminum core. Similar thermal characteristics. Maybe not quite the same but close.
Downside is that cooking restaurant curries tends to be a hard on the pans so you will probably discolour or stain the pans over time.
I personally don’t care. I’m hard on my stuff. But if you want everything super shiny maybe a cheap aluminum beater pan is better for you. I don’t recommend cast iron though. That’s a heavy pan. Slow to heat up and slow to cool down. You can get into trouble with a cast iron pan. Not saying it’s impossible. But I would never do it willingly.
A roughly 6 ounce ladle is handy as well. The recipes typically call for 6 oz of curry base at a time. If you get into this seriously and start surfing the forums recipes often read “add a ladle of curry base”.
Some small bowls for your prepped ingredients is another nice to have. That’s about it.
How to cook Indian restaurant style curry
Indian restaurant style curry is all about prep and technique. You may screw up the first couple times. As long as you don’t burn the spices, your screw ups will still be really, really good. Probably as good as your local Indian restaurant.
When you get it though, you will be head and shoulders above all but the best Indian restaurants in town. When you get this you will amaze your friends. You will amaze yourself!
Do your prep
Chop any onions, cilantro, tomato etc that you need. Mix your tomato paste with water. Have your garlic ginger at the ready. Combine the dry powdered spices in a small bowl. In another bowl ready your whole spices (cardamom, cinnamon stick, bay leaf etc).
Prepare your coconut powder by mixing it with water. Read your recipe carefully and understand what you are doing before you start.
Pre-heat your curry base. If you are cooking one curry, you can heat it in the microwave. If you are cooking a feast keep it simmering on the stove.
This technique relies on caramelizing the onions in the base. The base needs to be hot for this to work. I don’t understand why this is important. But it is. I’ve tried with cold base. It doesn’t work.
Cook the curry
Read this once to get familiar. It’s worth it to get your groove. The general directions to cook curry are also found in each Indian restaurant curry recipe.
Pre-heat your pan over medium heat. A gas stove helps but it’s not essential. Add the oil to the pre-heated pan. You want to see it shimmer but not smoke like crazy. If it smokes, stop and let it cool a bit.
If the Indian restaurant curry recipe calls for whole spices they go in first. Just for 10 or 15 seconds. That’s all it takes. They will start to crackle a bit. If the recipe called for diced onion it goes in next. Cook the onion until it’s softened and the edges just start to colour.
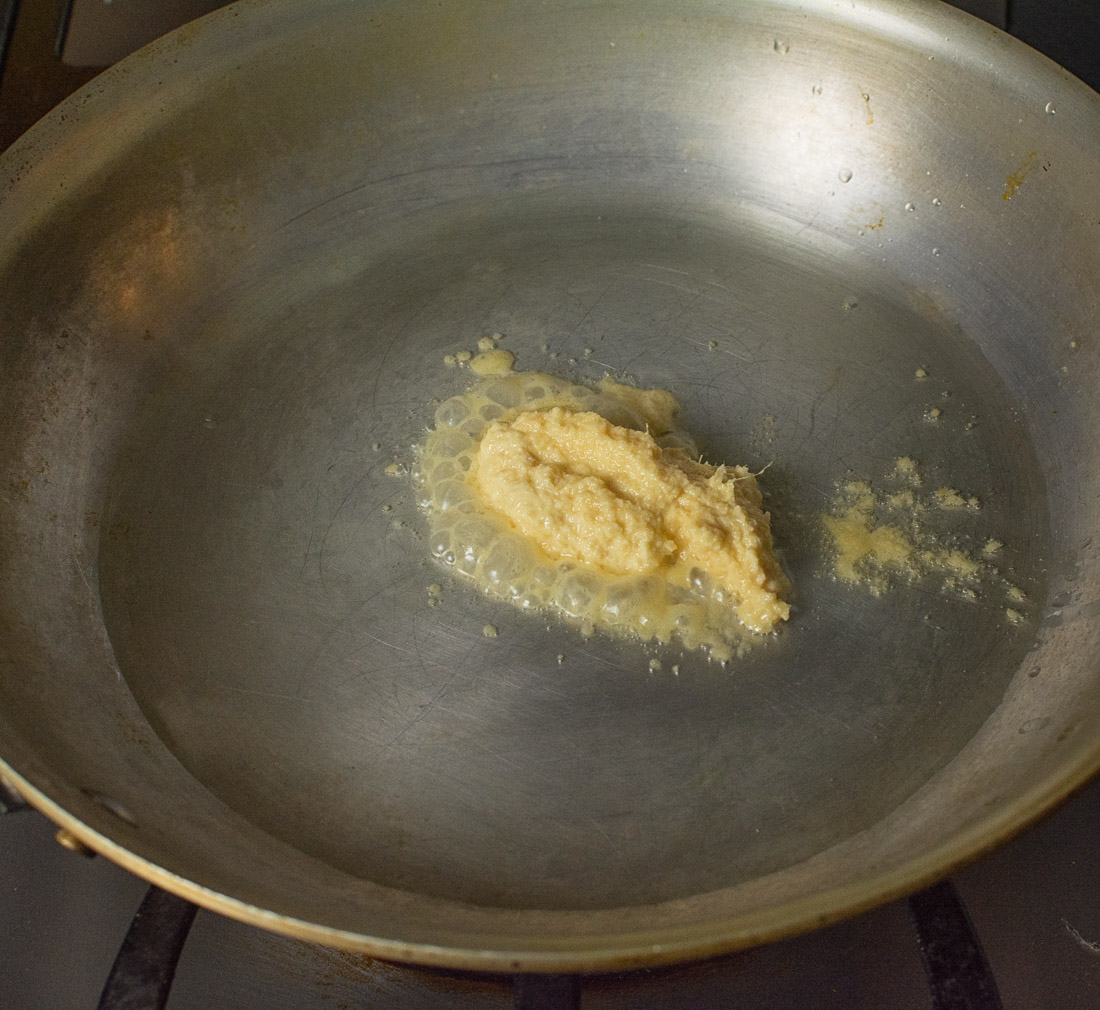
Add your garlic ginger paste. You want it to bubble and sputter but not burn.
Getting the heat right is critical when you add your spices
When it stops sputtering (30 seconds or so) turn down the heat and add the dry, powdered spices. Some recipes may have you add the kasoor methi first and everything else shortly after.
This is the critical step when cooking Indian restaurant curry at home. Stir constantly. If the spices look like they are at risk of burning turn the heat down. If you have an electric cooktop pick the pan up off the heat. You don’t want to let the spices burn but you do want them to cook through.
Cooking the spices will get rid of the raw spice taste. If the spices burn, just chuck everything and start again. There’s no fixing that. It will happen to you. It did to me at least.
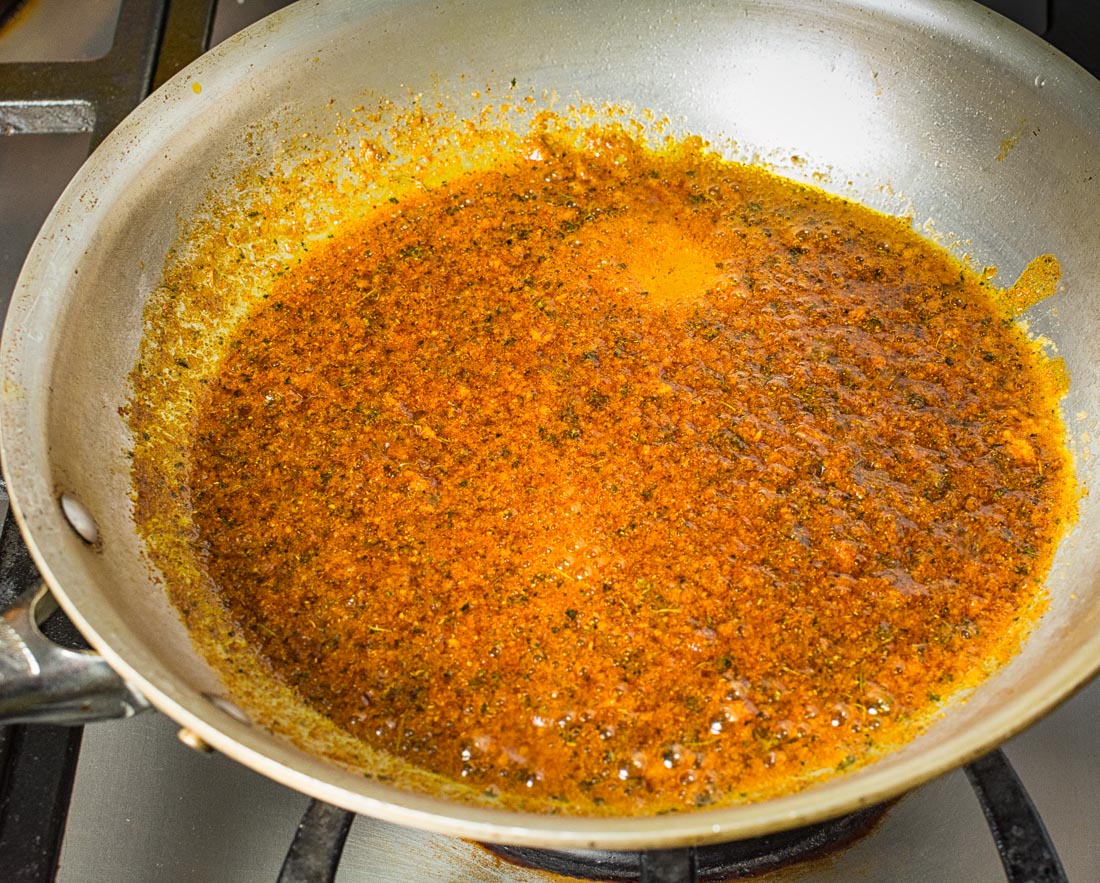
After cooking the spices for about thirty seconds, add the tomato paste water mix and turn up the heat. If the recipe doesn’t call for tomato paste add a splash of curry base.
Stir constantly until bubbles form. The oil may separate at this point. That’s good. You want that. This takes about 30-45 seconds.
The curry base is where the magic happens
Next comes about 3 oz (half a ladle’s worth) of curry base. Add it in and give it a stir. Cook it until the bubbles form again. This takes anywhere between 30-60 seconds.
Now add about 6 oz (a full ladle) of the curry base. Cook it, stirring occasionally, until the bubbles form again. This takes around 90 seconds, depending on your heat.
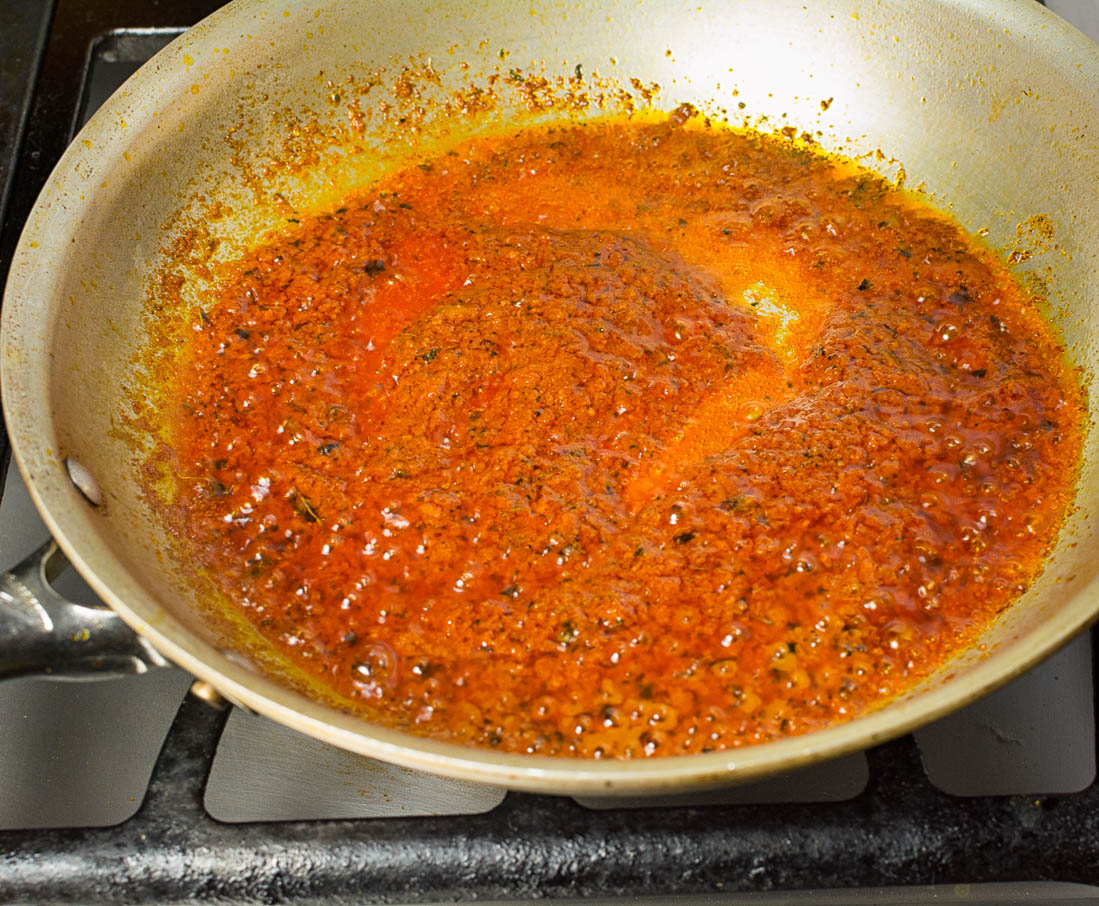
Add a second full ladle and repeat. When the bubbles form, turn the heat down to a simmer.
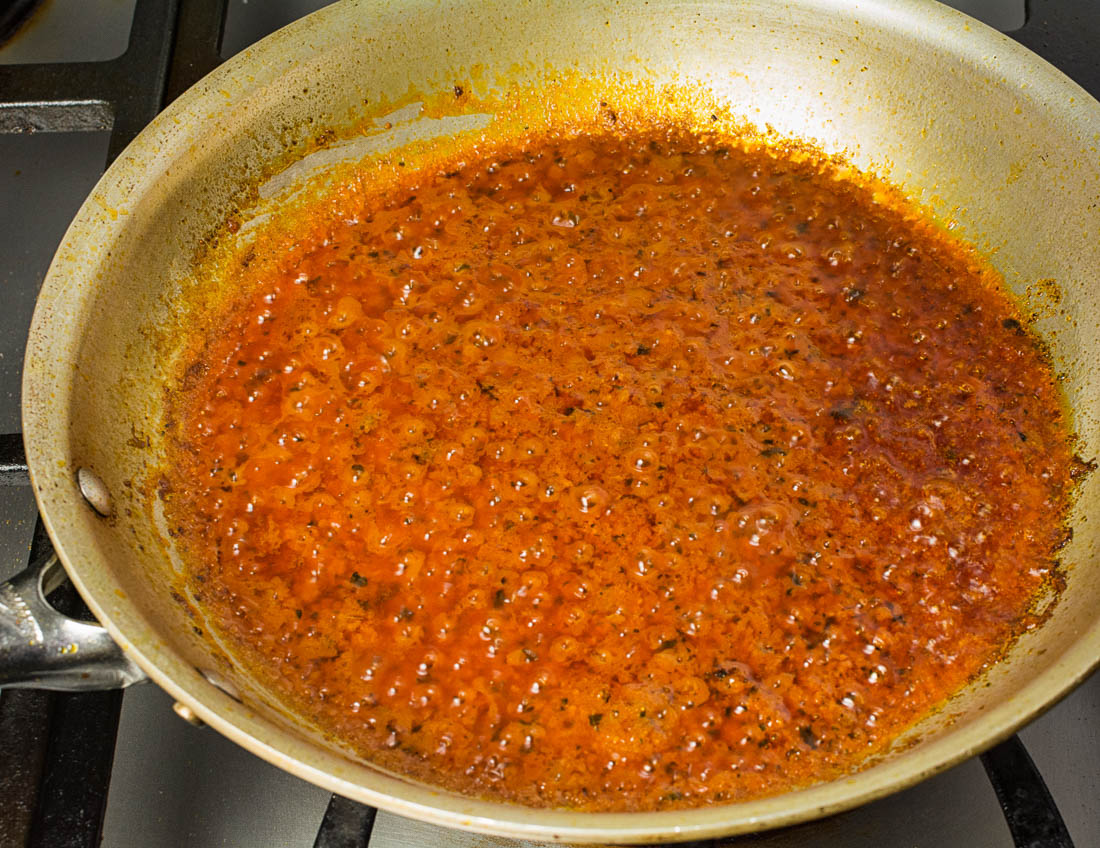
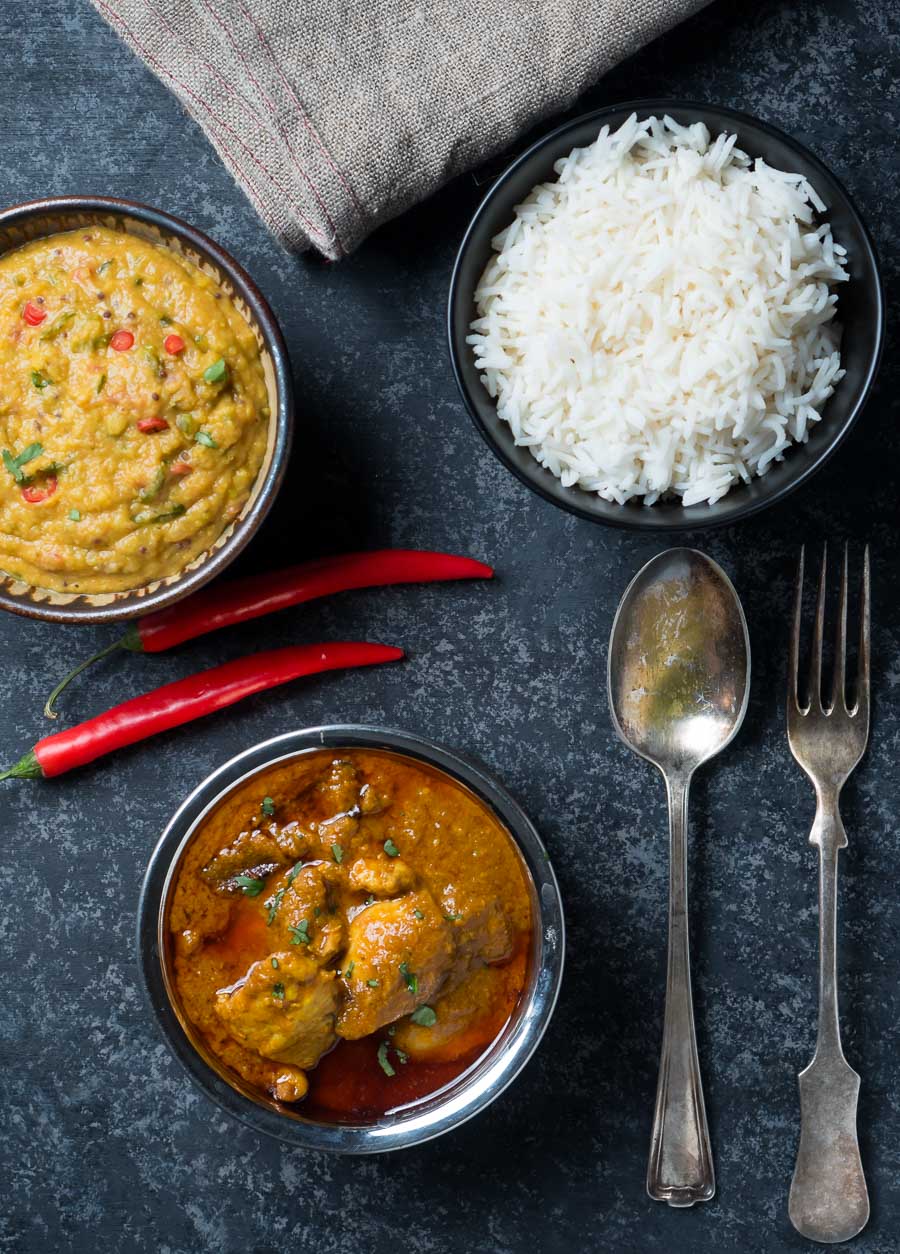
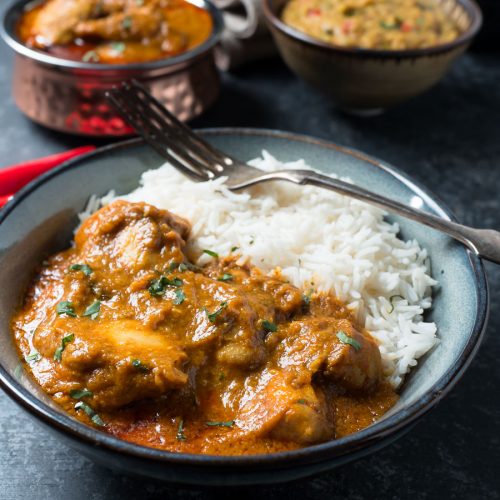
Now comes the pre-cooked meat or vegetable portion Usually, it’s around 8-10 oz of meat per curry. Add it in and stir. Let simmer a few minutes.
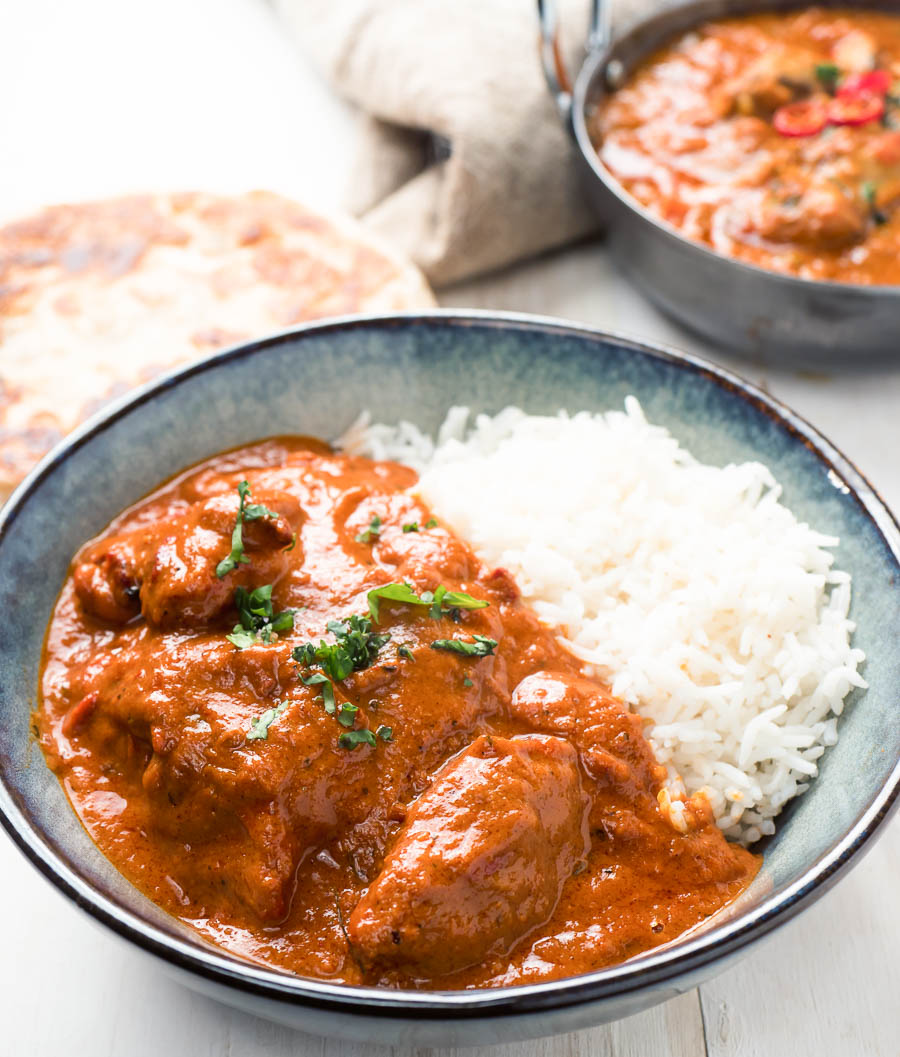
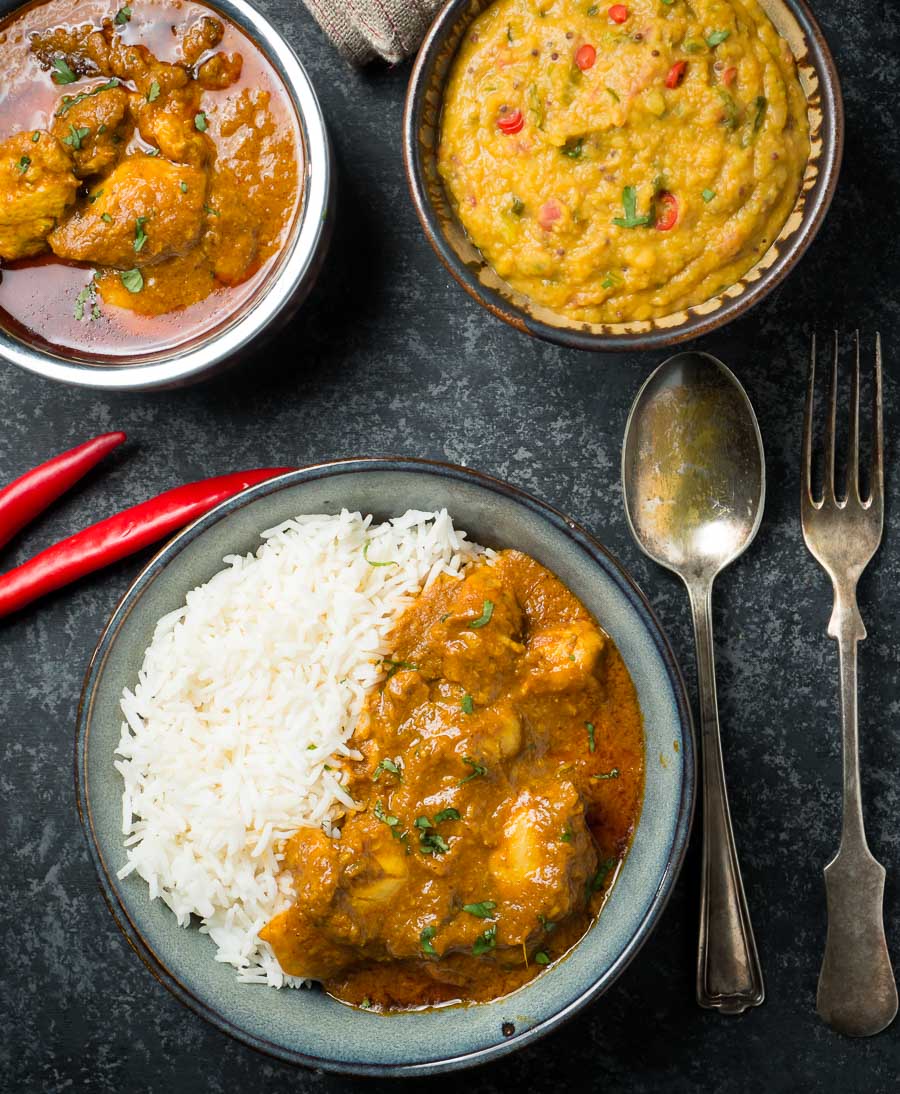
At this point add in the finishing touches (lemon juice, coriander leaf, garam masala, coconut milk etc). Give it a final stir, check for salt and serve your Indian restaurant curry with rice, naan or chapatis.
That’s it. It may seem a bit daunting at first but you can do it. You’ll be cranking out really impressive Indian restaurant curry at home in no time!
Related recipes
Curry base
Garlic ginger paste
Indian spice mix
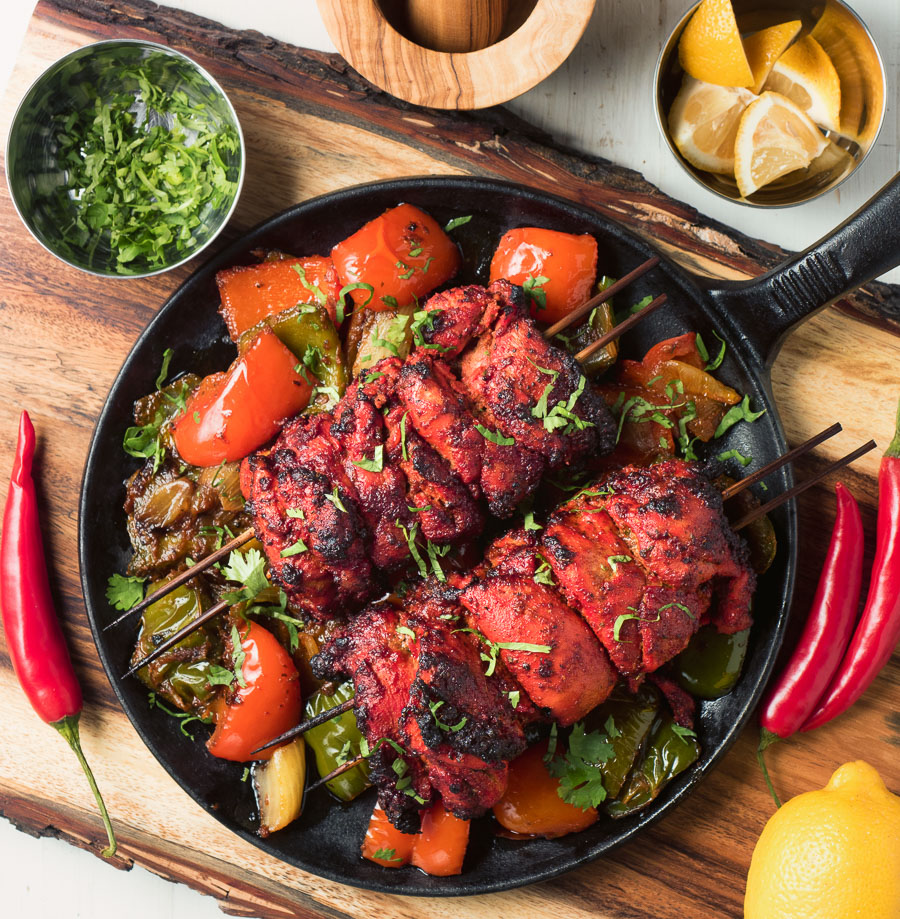
Chicken tikka masala
Madras curry
Dhansak curry
Chicken jalfrezi
Vindaloo curry
Bhuna curry
There are many Indian restaurant curries on the this site and more are being added all the time.
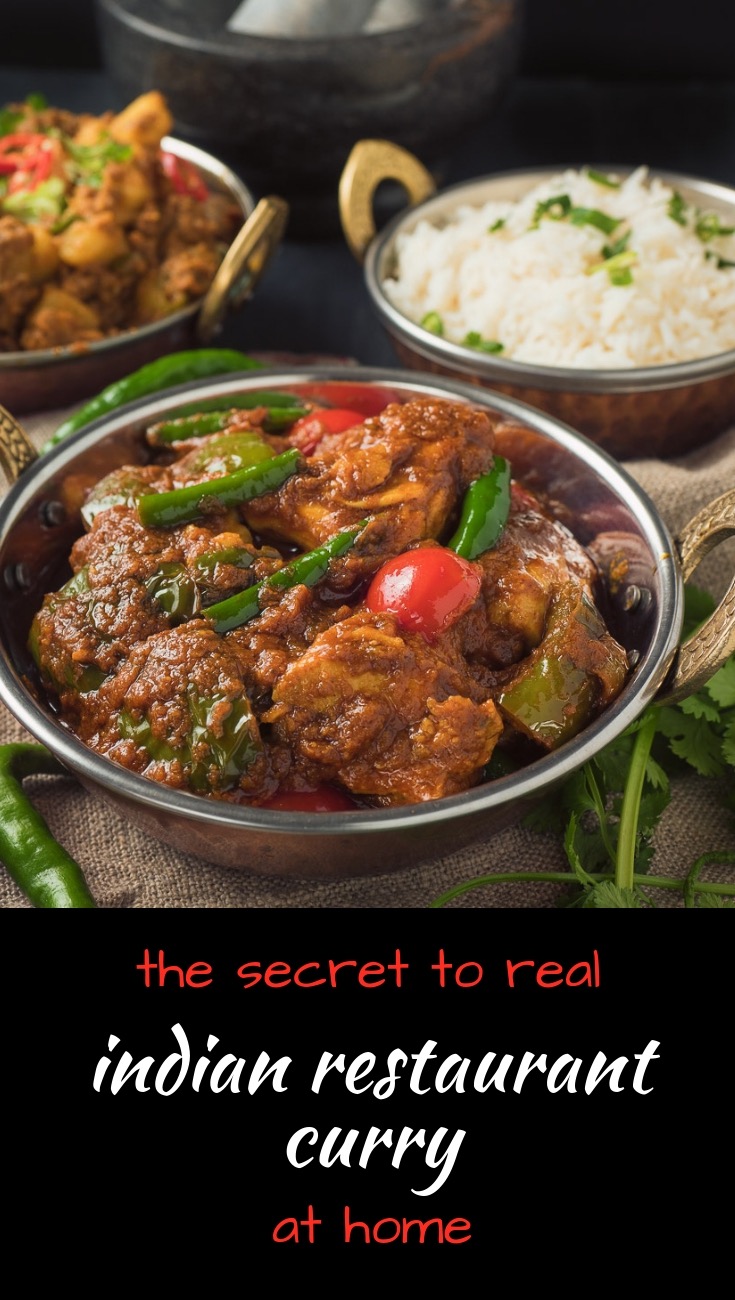
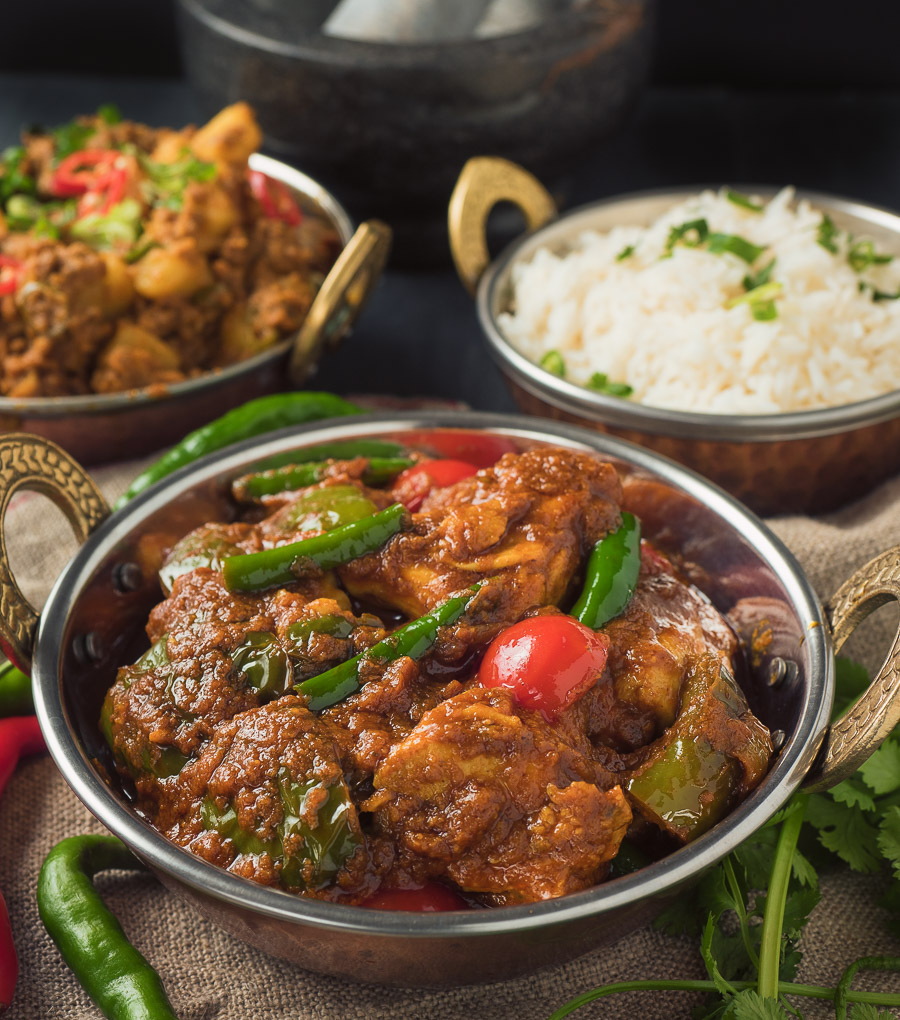
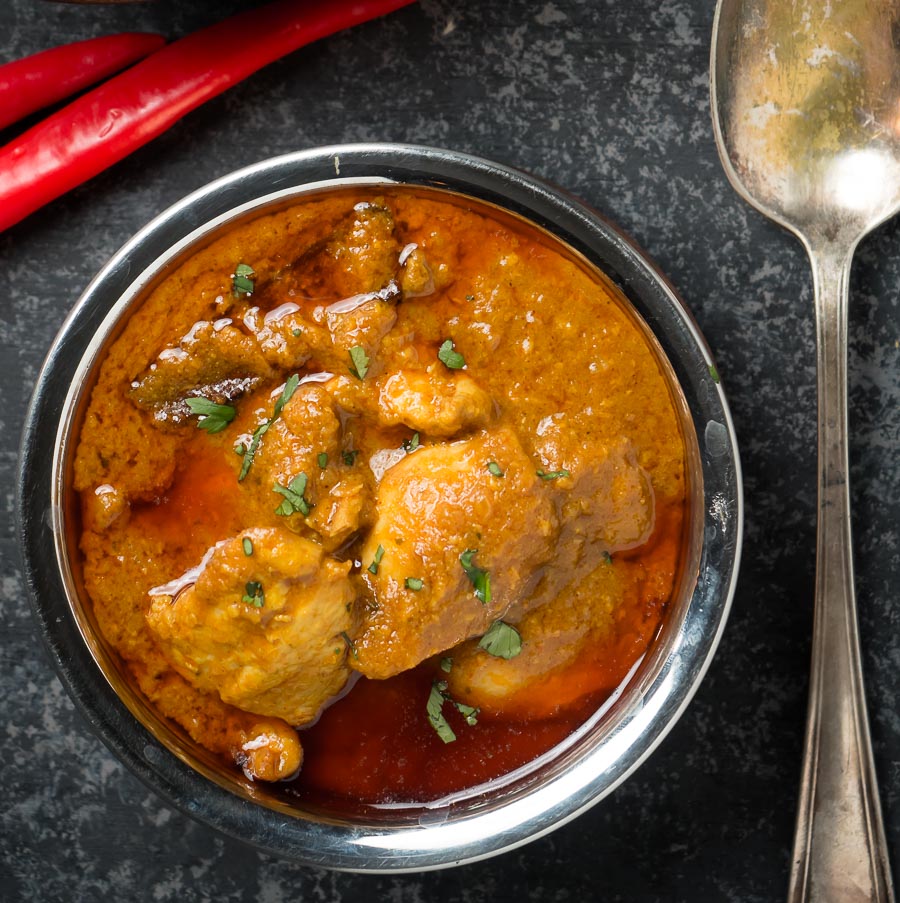
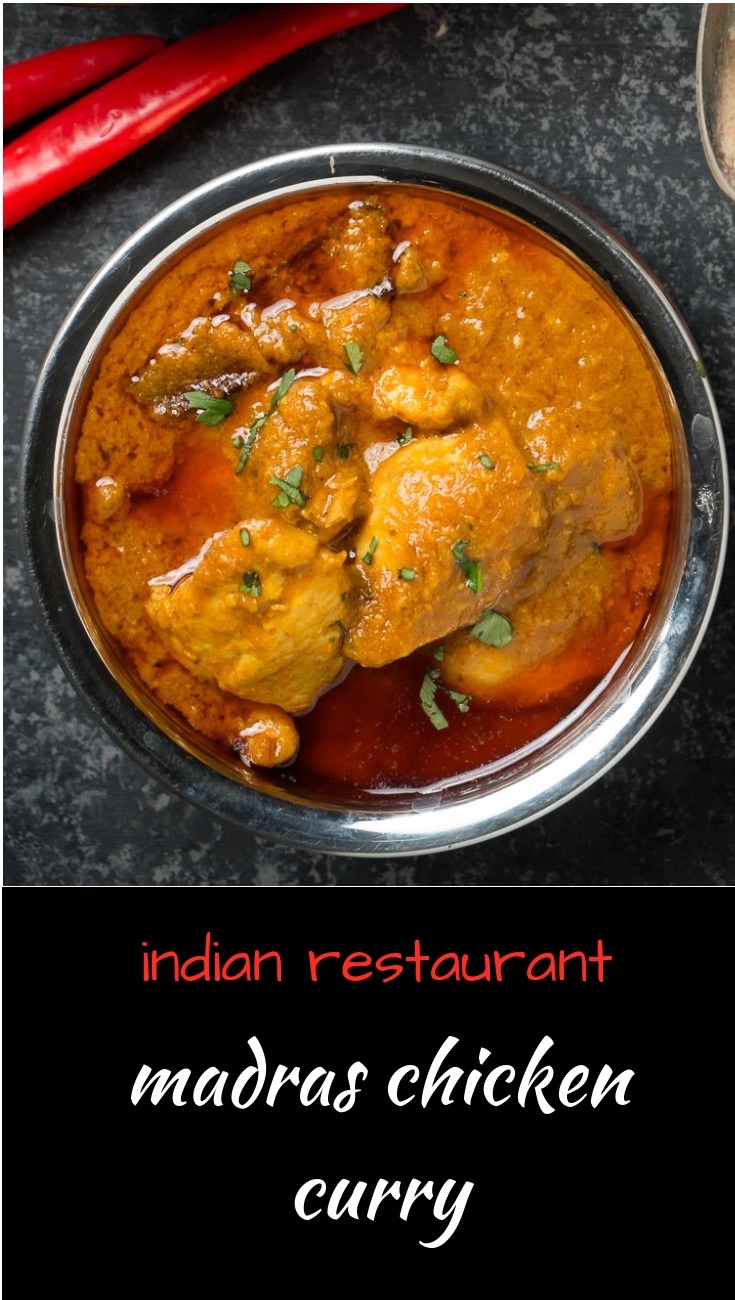
Indian restaurant madras curry is one of the great ones. Madras curry is on every single restaurant menu for a reason. It’s absolutely delicious.
It’s on the hotter end of the scale. A spicy curry. It can even be a really spicy curry. Some restaurants go a little overboard I find. I like blazing hot madras curry. But not everybody does.
So this version isn’t so hot – medium spicy really. That’s the nice thing about cooking it yourself. You control the heat.
Like it blazing hot? Add more kashmiri chili powder or use one the hotter Indian chili powders. Want your kids to eat it? Roll the kashmiri chili back a bit. It’s up to you.
This is how they do it in restaurants
This madras curry is done in the restaurant style. Like you get when you eat out. Pretty much exactly. It’s all about the prep. Cooking it takes 10 minutes.
Restaurants don’t have big pots of curry sitting around hoping somebody will come and order it. They cook to order.
It’s totally different from home style cooking. Homestyle is about low and long braises. Restaurant style is about speed and efficiency. But with lots of flavour.
Curry base is the secret
Curry base is a game changer. It’s the way they do it. The foundation of Indian restaurant style cooking. Amazing stuff.
Indian curries generally rely on caramelized onions. That’s what makes them what they are. You need to get that into your dish. And curry base is how restaurants do it. For madras curry. For pretty much all curries.
There’s not much to curry base. It’s basically a whole lot of boiled onions with some flavouring. Tastes like a weak onion curry soup. Bland.
You’d never guess that something so bland can become so good. That’s where the technique comes in.
High heat and enough oil makes Indian restaurant madras curry work
The key to making this work is heat. High heat. At the right time. When the curry base hits the pan you want it caramelize. Fast.
It’s a balancing act. The oil can’t be too hot when you bloom the spices. They will burn. Medium heat. Garlic ginger paste goes in next. Tomato after that.
Once you have some wet ingredients in your pan your spices are safe. That’s when you crank it. High heat.
Curry base goes in a bit at a time. You don’t want to cool your pan down too much. Maybe half a ladle at first. Then a full ladle. Then the rest. Somehow it works if you do that.
Read the Indian restaurant curry technique guide
There’s a post that covers the technique and the ingredients you need here . Do yourself a favour. Read it. It will help you understand what you are trying to do.
The recipe below does cover madras curry accurately. If you’ve made a few curries in this style you should have no problem. But if you are just getting started read the guide. It makes things so much easier.
Do your prep before you get started. Make your curry base and have some heated and ready to go. Pre-cook your meat. Measure out your ingredients. Have everything at hand. Put on some old clothes – making restaurant curries is messy stuff.
Watch the video
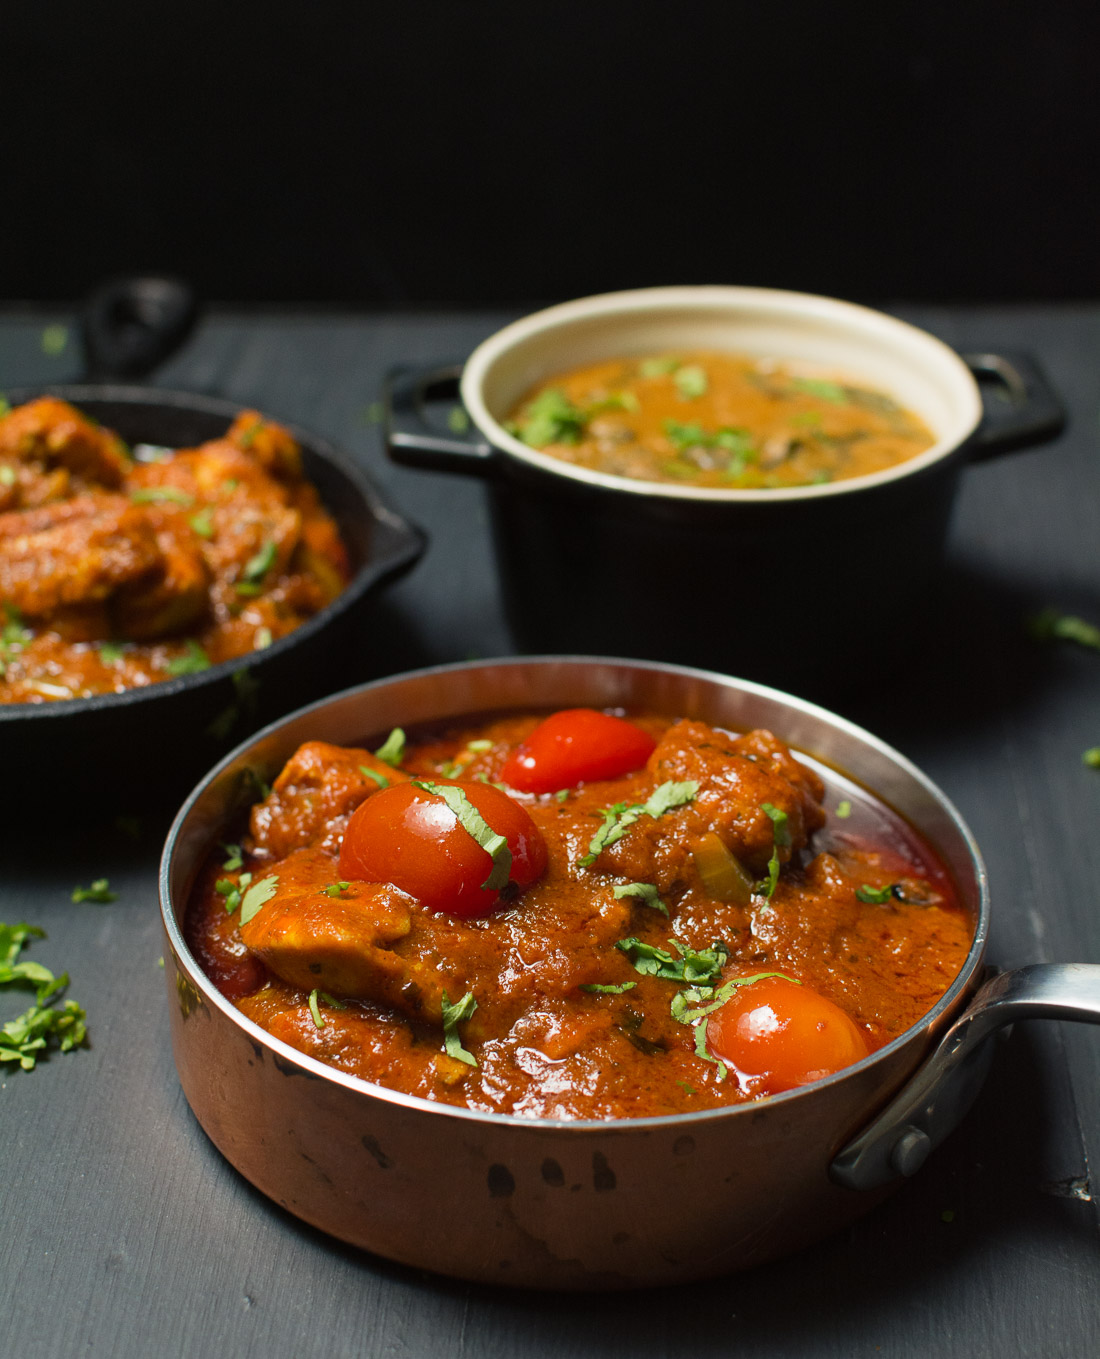
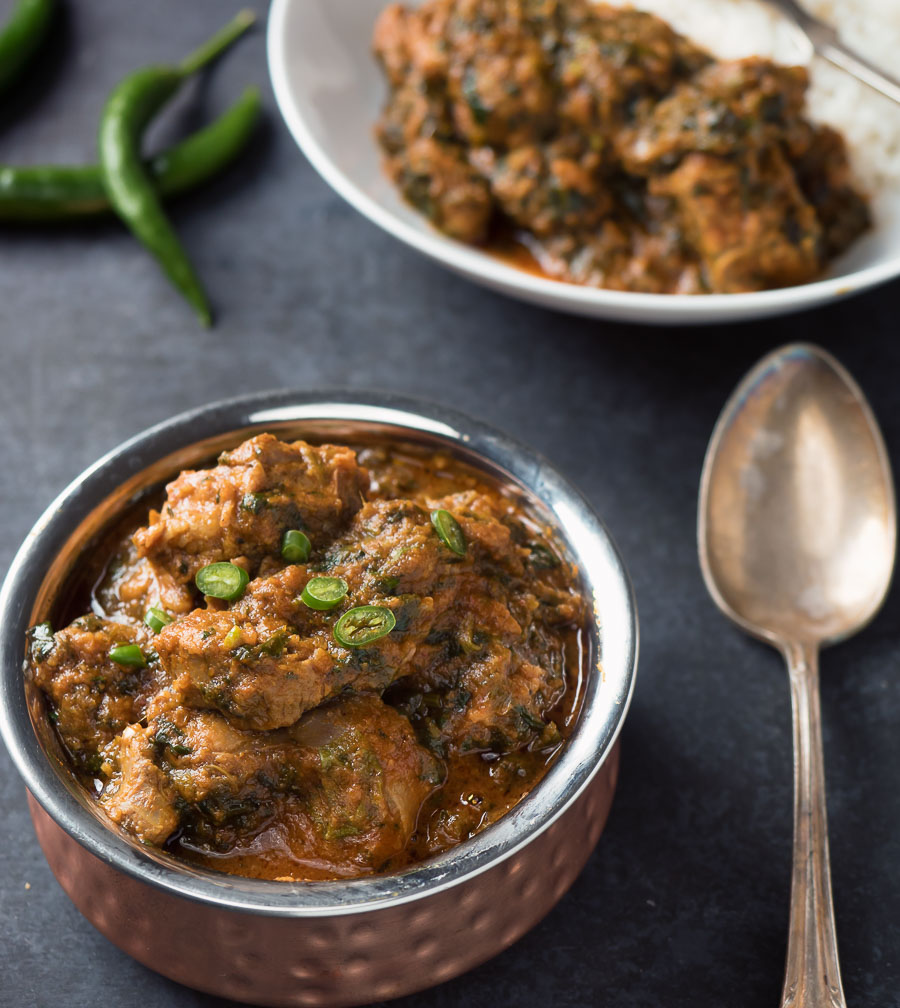
Chicken madras doesn’t have to be chicken
Almost all the restaurant style curries on glebekitchen can be made how you like. This is a chicken madras. But you can make it with lamb or beef just as easily. You can even make it with chickpeas or masoor dal for a vegetarian option.
Chicken madras is my favourite but lamb is a close second. And a madras curried dal is third. That’s me. You can do what you want. Make this your madras curry. Whatever you want. Just make it.
Madras curry is a spicy dish that’s sure to please. At the top of my list. If you are a fan this is for you. If you haven’t tried it before now is the time.
indian restaurant madras curry
Ingredients
The spice mix
- 1 tsp indian restaurant spice mix or curry powder – recipe link below
- 2 tsp hot madras curry powder or use more indian restaurant mix powder if you don’t have any madras curry powder
- 1 tsp kashmiri chili powder or 1/4 tsp cayenne mixed with 3/4 tsp paprika
- 1/2 tsp kasoor methi – dried fenugreek leaves
- 1/2 tsp kosher salt
The curry ingredients
- 4 Tbsp oil
- 2 inch piece of cassia bark or cinnamon stick
- 2 Tbsp onions minced
- 1 Tbsp garlic/ginger paste – recipe link below
- 1 Tbsp tomato paste with enough water to dilute to the consistency of pasatta
- 15 oz curry base – recipe link below
- 10-12 oz pre-cooked chicken or lamb
- 1 Tbsp coconut milk powder in enough water to get to coconut milk consistency (optional)
- 1 tsp fresh lemon juice – about 1/6 of a lemon
Instructions
- Make the spice mix.
- Dilute the tomato paste with enough water to get to the consistency of passata.
- Dilute your coconut milk powder enough with water to get it to the consistency of coconut milk.
- Heat your frying pan (don’t use non-stick) briefly over medium heat. Add the oil.
- When the oil starts to shimmer add the cinnamon stick. Toss is around the pan for about 15 seconds until bubbles start to form around it. It may crackle a bit.
- Add the onions and stir constantly until the edges of the onions start to brown. This takes about a minute.
- Next comes the garlic ginger paste. Add it into the pan and cook it, stirring constantly, until it stops sputtering.
- Turn down the heat and add the spice mix. This is the critical step. Stir it constantly for 30 seconds. If it starts to darken lift the pan off the heat. You want the spice mix to cook in the oil but not burn.
- Turn the heat up to medium high. This is important. The heat is what caramelizes the onion base and gives the curry it’s Indian restaurant flavour. As you become more comfortable with this technique try pushing it. Add the diluted tomato paste and stir until bubbles form (the oil will likely separate). This takes around 30 seconds to one minute depending on the heat.
- Add 3 oz of curry base. Stir until bubbles form (little craters really), around 30 seconds. Think lively boil. Watch the edges of the pan. The curry can stick here. Sticking is OK. Just scrape it back into the base. Burning is bad.
- Now add 6 oz of curry base and stir briefly. Let it cook until the bubbles form again. This takes 1-2 minutes.
- Add the rest of the curry base and let cook until the bubbles form. Add the lemon and diluted coconut milk powder. Turn the heat down to low and add the pre-cooked lamb, beef or chicken.
- Let the curry simmer for about 5 minutes. If it gets too thick add a bit more curry base. Don’t add water.
- Garnish with a bit of chopped fresh cilantro and serve.
