This is serious soup. Streamlined. But still serious. Hu tieu. My way.
This is not a traditional version. It’s not true to anyone’s roots. This is all the things I like about hu tieu. And none of things I don’t like.
I love pork. So that works. And this is pork two ways even. I’m pretty happy about that. Asian broth soups? That always works for me. Noodles? Very much so. Quail eggs? Definitely.
Pork liver? I can take it or leave it. So I’m leaving it. Pork heart? Not my favourite. I’m just not big on offal. So it’s out. The really nasty bits? Sorry. Another time maybe. But probably not.
I’m unrepentant. I’m bad that way. But as far as I can tell there’s no right or wrong way to make hu tieu. Everybody does it differently. So I feel good calling this hu tieu.
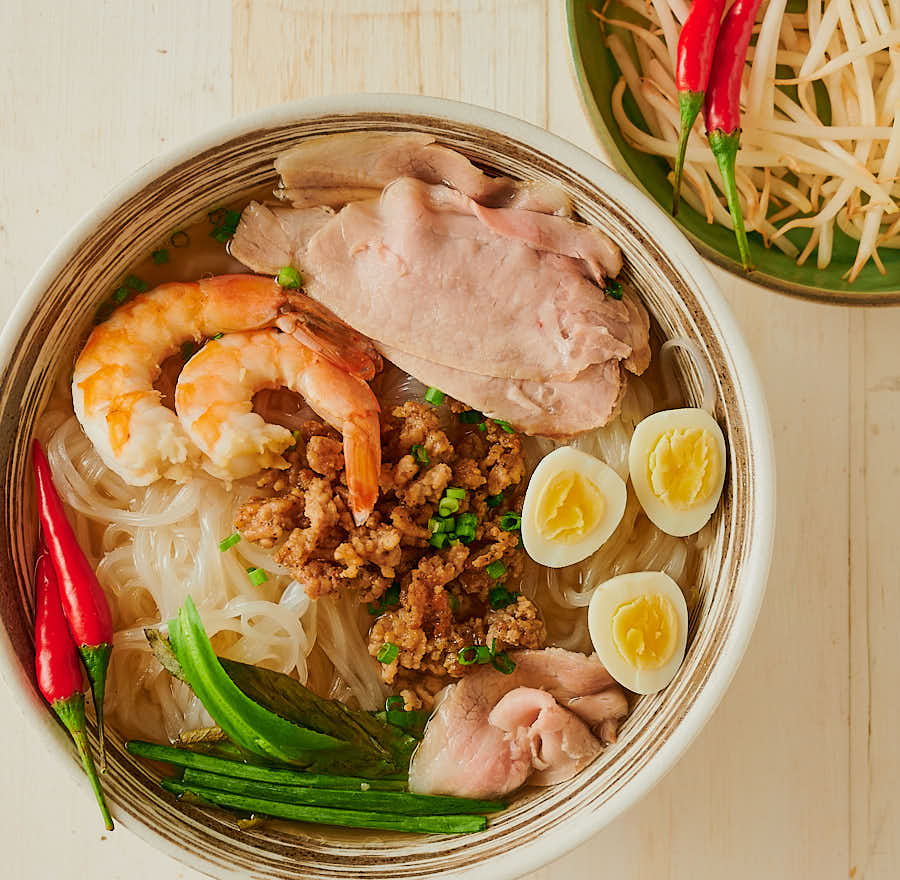
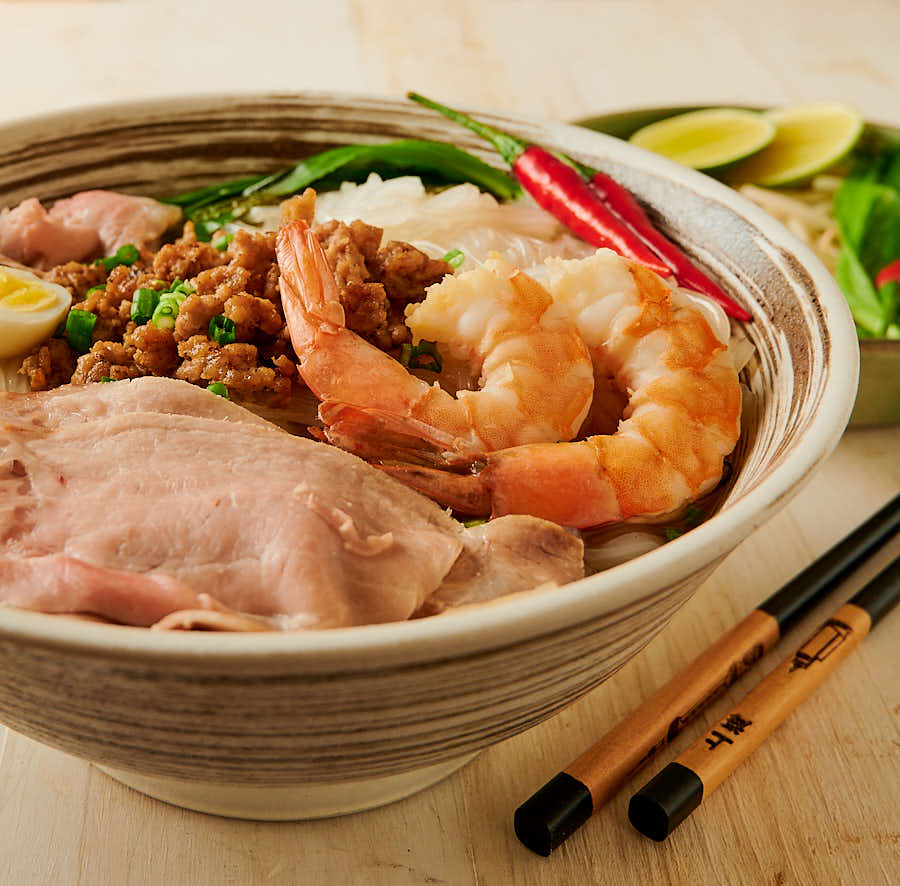
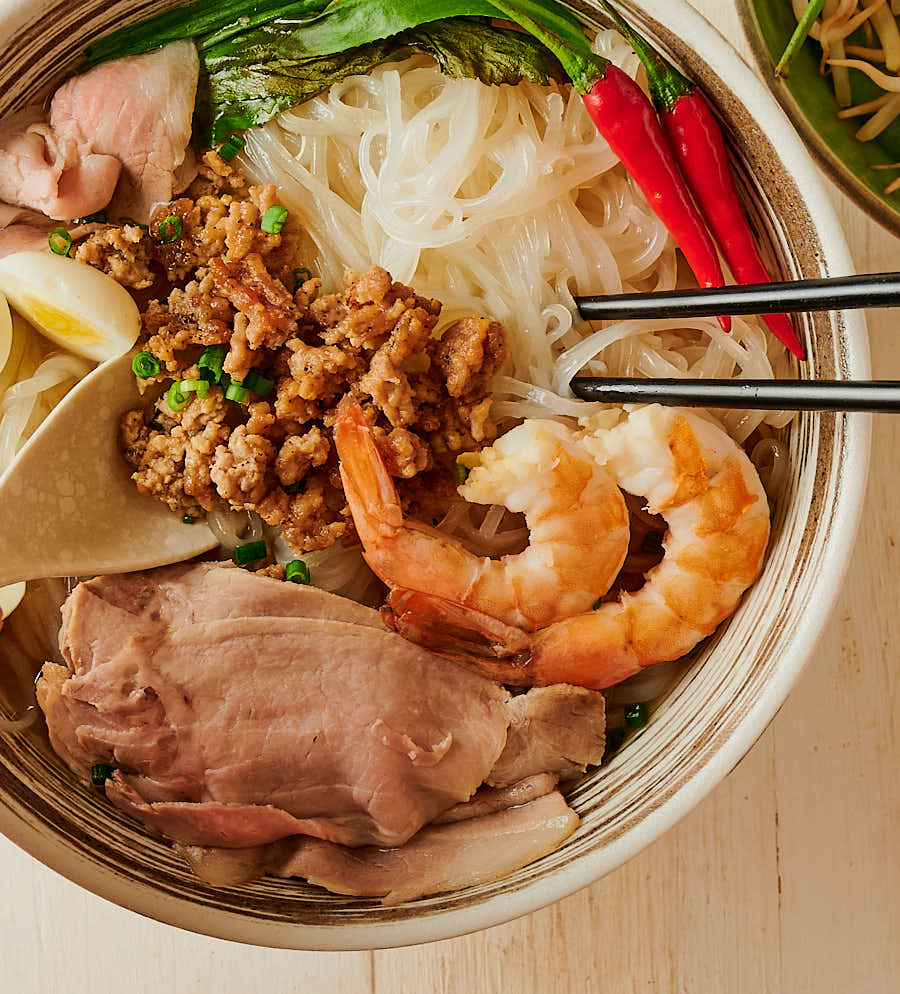
This is a richly flavoured pork broth soup with chewy noodles. Wonderful, wonderful chewy noodles. Sliced pork. And fried pork. Quail eggs. Shrimp. And fish sauce. Noodle soup. My way.
Hu tieu all about the broth
This is not lightly flavoured pork broth. Not vaguely pork flavoured water. This is big pork broth. Really big. Sledgehammer big. Because that’s the way I like it.
There are recipes out there that say you should simmer the pork bones for two hours. I don’t understand that at all. Wishful thinking maybe.
You can’t rush gold. Twelve hours is about right. To extract maximum flavour. You paid for those bones. Get your money’s worth.
That’s stage one. Maximum flavour extraction from bones. But there’s stage two. And you know you want stage two.
Poach pork shoulder in stage one. Double stock. It’s almost too much. Crazy intense.
It’s all about the noodles too
You can make hu tieu with rice noodles. That’s allowed. You might even get away with wheat noodles. Maybe. Maybe not. But the real deal? Hu tieu noodles.
Hu tieu noodles are made with tapioca. Yes. You read that right.
I know. That doesn’t sound great. But it is. Amazing in fact. They’re a bit chewier than rice noodles. In a really good way.
A bit more flavour too. And they pick up the flavour of the broth better. Key takeaway? You need to try hu tieu noodles. Everybody needs to try hu tieu noodles.
You won’t find them in a grocery store. Takes a trip to an Asian grocer. Totally worth it. You should find them in the same spot as the rice noodles.
They actually say hu tieu on the package. It’s not always easy to find things in an Asian market if you don’t read the language. So thank you for making it easy.
For the record I won’t ever make this dish with anything else. Tapioca noodles rule. That’s three words I never thought I’d write. But I am converted.
Hu tieu is actually pork broth with chicken
Hu tieu isn’t just pork broth. There’s chicken in there too. And I have a short cut. Start with some chicken stock.
Chicken stock. Not cubes. Not pots. Nothing powdered. Nothing radioactive yellow. No iridescent green flakes.
Real chicken stock. Made from chickens. You can buy chicken stock. Or you can make it. For this soup I buy it.
It comes in one litre tetra packs where I am. Not as good as homemade. No doubt about that. But it is good enough. Because the pork flavour is dominant.
I always choose the no sodium version. Because I like to control the salt. This recipe is no exception.
Double boil your bones for clear broth
Counter-intuitive. And yet culinary genius. Want clear broth? Double boil your bones. I use that trick for all my Asian broths.
It’s easy. Add enough cold water to a pot to cover the pork bones. Bring to a boil. Let it go for five minutes.
You’ll almost immediately see a bunch of gunk come to the surface of the water. Coagulated proteins if you want to get technical.
Doesn’t really matter what you call it. Nobody wants gunk in their broth.
There’s gunk on the bones too. And it has to go. Dump the water and bones into the sink. Run the cold water. Scrub. Get your hands dirty.
Return those freshly cleansed bones to the pot. Cover them with water and chicken broth. And simmer gently. Gunk free broth rules. Seriously.
On the matter of dried shrimp
I’ve tried making hu tieu a few ways. The local Vietnamese restaurants won’t tell me their secrets. They are zero fun that way.
But it isn’t really that hard to figure out. It’s a mostly porky broth. With a hint of seafood.
I’ve tried doing this with dried shrimp. And charred squid. Too intense for me. Completely overpowers the pork flavour.
So I’m careful about it. Cautious even. Timid? Maybe.
I want a hint of seafood. Killer pork broth is real work. And that’s the flavour I want in my bowl.
So I ditch the dried shrimp. Or I add only the daintiest amount. And I don’t leave it in for long. Depends on my mood.
And I don’t bother with the charred squid. I have other things I’d rather use squid for. Told you this wasn’t your mother’s recipe…
Pork done two ways
How much pork can you get into one bowl of soup? Turns out a lot. That makes me smile.
Hu tieu with pork two ways. Plus the broth. Pork three ways. That makes me smile more.
There’s pork shoulder. Poached in pork broth. For deeper flavour. Sliced thin. Like pho. That’s just tasty stuff.
And there’s browned ground pork. Seasoned with garlic, black pepper and fish sauce. Yes. Fish sauce.
Never fear the fish sauce. Embrace it. Totally makes this dish. Totally makes a lot of Thai and Vietnamese dishes.
Pork. Pork. And more pork. My kind of soup.
Hu tieu my way
I’m making no claims this is an authentic hu tieu recipe. This is not the definitive edition. Not even close.
What it is is really tasty noodle soup. I might not win at the Saigon master chef awards. But I am going to enjoy my dinner. And I hope you do too.
Hu tieu. Vietnamese pork noodle soup. Amazing stuff. Worth it to try the noodles alone. But so much better than that.
Hu tieu
Equipment
- 1 seriously big pot 10 litres big if you have it.
Ingredients
The pork broth (a double batch – makes around 14-16 cups of broth)
- 4 lbs pork bones meaty pork bones – neck is good if you can get it
- 1 onion cut in half
- 1 oz ginger
- 4 cups no sodium chicken stock the stuff from a tetra pack will do. A bouillon cube will not. See note.
- 10-12 cups water enough to cover everything solid in the pot by around an inch
The pork shoulder
- 1 lb pork shoulder
- 8 cups pork broth from above
- 1 tsp kosher salt
- 1/2 tsp Ajinomoto aka monosodium glutamate. This is optional but it is really good.
The minced pork
- 1 lb minced pork aka ground pork depending where you live
- 2 tbsp neutral oil canola, vegetable, safflower etc
- 1/4 tsp black pepper
- 1 clove garlic crushed
- 1 tsp fish sauce
The hu tieu broth
- 8 cups pork broth the stuff you cooked the pork shoulder in
- 1 tsp dried shrimp (very optional). If you want the seafood version do it. If you tasted the pork broth and think it’s the best thing ever just leave it out.
- 2 tbsp fish sauce Do not fear the fish sauce!
- salt to taste It won’t need much. May not need any at all. Your call. That’s why they call it to taste…
The hu tieu
- 12 oz hu tieu noodles – or rice noodles but you really need to try hu tieu noodles!
- the hu tieu broth – the 8 cups you added the fish sauce to
- 6 quail eggs
- 8 shrimp 31-40 count (31 to 40 per pound)
- the sliced pork
- the ground pork
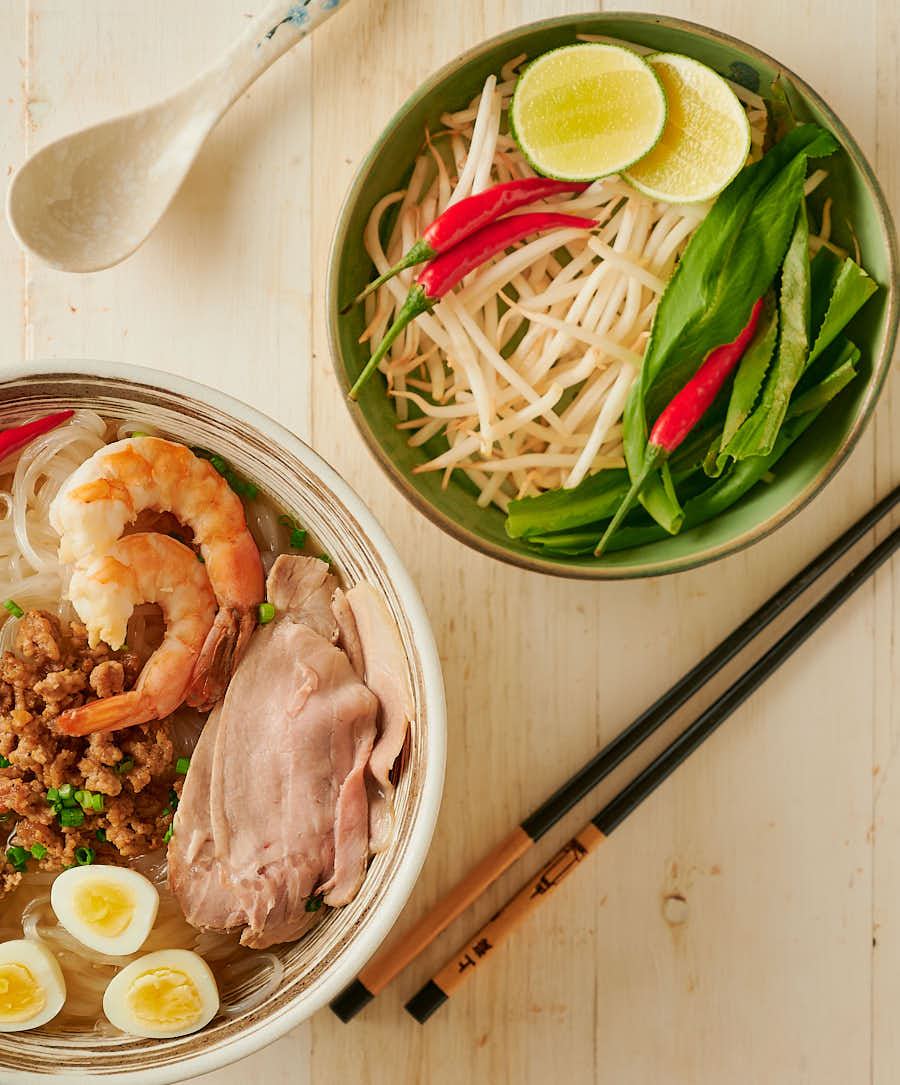
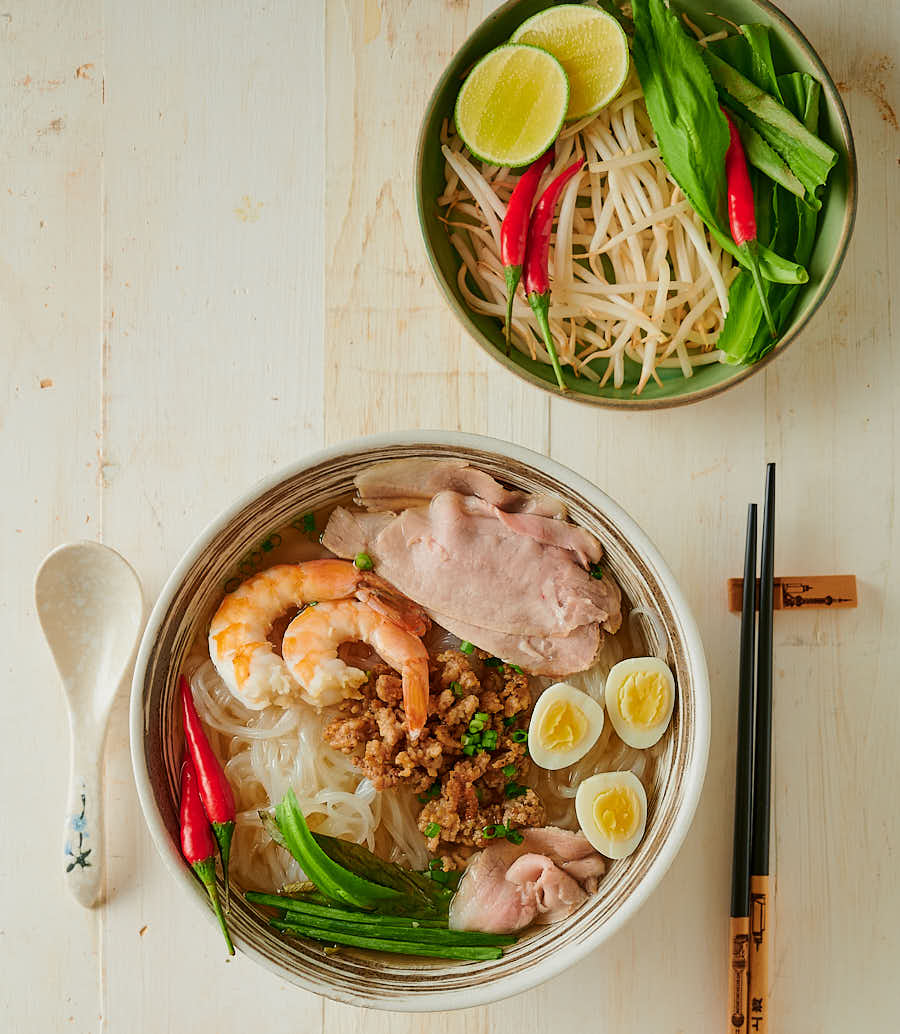
- garnishes (green onion, sliced shallots, a little fresh chili – whatever you like)
Instructions
Make the broth
- Clean your sink. Seriously. That’s part of the recipe.
- Grab a really big pot. Put the pork (and chicken if using) bones in the pot and add water until everything is submerged. This is not the water/chicken stock in the recipe ingredients. You will be chucking this water.
- Bring to a boil. Not a raging boil but not a simmer either. Cook somewhere around 5-7 minutes. You will see a bunch of pretty grim looking goop (that’s the scientific term) form on the surface. Getting rid of that is why you are doing this. OK – it’s actually coagulated protein. Not goop. I like goop better.
- While the bones are coming to a boil char the ginger and onion. People say use a gas burner on your stove. That is messy. Or they say use the oven. That takes way too long. I use my barbecue. You just toss it on and let fire do its thing. If I’m really jammed for time I’ve been known to use a blowtorch. Not saying that’s a good idea though. But I run with scissors so…
- Dump the bones into the sink. Clean the pot. Put the pot next to the sink. And start cleaning the bones under running water. One by one. Any bits of additional goop stuck to the bones need to go. As you clean them drop them into the pot.
- Toss the charred onion and ginger to the pot.
- Add the chicken stock and enough water to cover everything by about an inch. Bring to a gentle simmer. At this point you want to pay attention. The goal is a nice clear broth. Don’t let it boil hard. A nice, gentle simmer.
- Simmer for 12 hours. Or more. For real. You aren’t making stew. You are extracting maximum flavour. That takes time. The goal is for any meat on the bones to taste like nothing. All the flavour in the broth. That’s the goal.
- After you have convinced yourself you’ve extracted all the flavour remove the pot from the heat. Remove the bones (tongs and a slotted spoon work well for this. Strain into a clean bowl. I use a fine mesh strainer for broths.
- You should wind up with about 16 cups of broth or enough for 8 bowls of hu tieu. This is a double batch. I like to freeze half for another day. If you want to make 8 cups total just half all the broth ingredients.
Prepare the pork shoulder
- Pick a pot that will hold the pork and the stock and ensures that the pork will remain submerged as it poaches.
- Combine the stock, salt and ajinomoto. Bring to a simmer.
- Add the pork. Poach the pork (you want the surface of the liquid moving but not bubbling) until it reaches an internal temperature of 145F.
- Remove and set aside. You now have 8 cups of pure liquid gold.
Prepare the minced pork
- Heat the oil in a large skillet over medium low heat.
- Add the garlic and cook until fragrant. You don’t want it to brown so be careful.
- Crumble the pork into the pan and raise the heat to medium. Break it up with whatever tool you like for this kind of stuff. I love my wooden spatula.
- Speak the pork out into an even layer. Resist the urge to stir constantly. You want it to brown some. When the pork is cooked through and you have some nice brown bits add the pepper and fish sauce. Stir to combine.
- Cook another 30 seconds or so. Turn off the heat and remove the pork from the pan using a slotted spoon. Leave the fat behind.
- Set the minced pork aside.
Prepare the quail eggs
- Bring a small pot half filled with water to a rolling boil. Have a timer set for 4 minutes.
- Turn the heat down and add the quail eggs. Lowering them into the pot with a slotted spoon works well. Immediately start the timer.
- Adjust heat to maintain a lively simmer.
- While the eggs cook prepare an ice water bath. Combine some ice (around one cube per egg) and enough water to cover the cubes by about 1 inch in a bowl large enough to also hold the quail eggs. Set the ice bath next to the stove.
- When the timer shows 15 seconds remaining grab your slotted spoon and move the eggs from the pot to the ice bath.
- When the eggs are well chilled peel and set aside. There is a membrane between the egg and the shell. Peeling goes much better if you can grab that membrane and lift the shell from the egg.
Prepare the shrimp
- Bring a small pot of well salted water to a boil.
- Add the unpeeled shrimp. Cover. Remove the pot from heat. Let stand for 6 minutes.
- While the shrimp cook prepare an ice bath.
- After 6 minutes transfer the shrimp from the pot to the ice bath.
- When the shrimp are chilled peel and set aside.
Make the hu tieu
- Put a large pot of water on to boil. You need this to cook the noodles.
- Slice the pork shoulder about as thin as you can manage. Think deli meat thin.
- Slice the quail eggs in half.
- Prep your garnishes.
- Bring the hu tieu broth to a gentle simmer.
- Add the noodles to the pot of boiling water. Cook until no longer firm to the bite. For me (and the specific brand of hu tieu noodles) this takes 3 minutes and 45 seconds. Different brands cook differently. If in doubt cook a small quantity to dial in your brand. Asian noodles are really annoying that way. I have to do this all the time. It’s totally worth it though. 30 seconds can make the difference between great and glop.
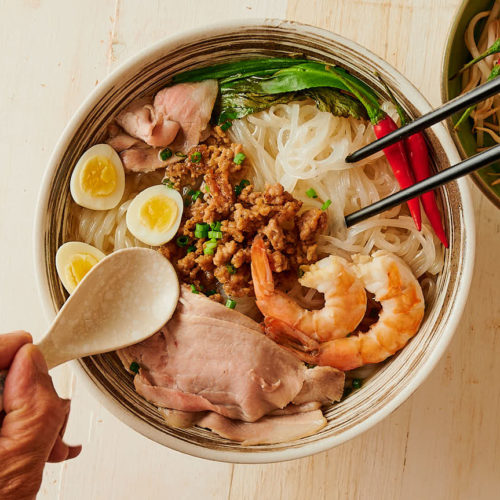
- To serve divide the noodles between 4 bowls. Top with sliced pork. Ladle 2 cups of hu tieu broth over top. Add the eggs, minced pork and shrimp. Garnish as desired and serve.
Notes
Nutrition
Hu tieu
Equipment
- 1 seriously big pot 10 litres big if you have it.
Ingredients
The pork broth (a double batch - makes around 14-16 cups of broth)
- 4 lbs pork bones meaty pork bones - neck is good if you can get it
- 1 onion cut in half
- 1 oz ginger
- 4 cups no sodium chicken stock the stuff from a tetra pack will do. A bouillon cube will not. See note.
- 10-12 cups water enough to cover everything solid in the pot by around an inch
The pork shoulder
- 1 lb pork shoulder
- 8 cups pork broth from above
- 1 tsp kosher salt
- 1/2 tsp Ajinomoto aka monosodium glutamate. This is optional but it is really good.
The minced pork
- 1 lb minced pork aka ground pork depending where you live
- 2 tbsp neutral oil canola, vegetable, safflower etc
- 1/4 tsp black pepper
- 1 clove garlic crushed
- 1 tsp fish sauce
The hu tieu broth
- 8 cups pork broth the stuff you cooked the pork shoulder in
- 1 tsp dried shrimp (very optional). If you want the seafood version do it. If you tasted the pork broth and think it’s the best thing ever just leave it out.
- 2 tbsp fish sauce Do not fear the fish sauce!
- salt to taste It won’t need much. May not need any at all. Your call. That’s why they call it to taste…
The hu tieu
- 12 oz hu tieu noodles - or rice noodles but you really need to try hu tieu noodles!
- the hu tieu broth - the 8 cups you added the fish sauce to
- 6 quail eggs
- 8 shrimp 31-40 count (31 to 40 per pound)
- the sliced pork
- the ground pork
- garnishes (green onion, sliced shallots, a little fresh chili - whatever you like)
Instructions
Make the broth
- Clean your sink. Seriously. That’s part of the recipe.
- Grab a really big pot. Put the pork (and chicken if using) bones in the pot and add water until everything is submerged. This is not the water/chicken stock in the recipe ingredients. You will be chucking this water.
- Bring to a boil. Not a raging boil but not a simmer either. Cook somewhere around 5-7 minutes. You will see a bunch of pretty grim looking goop (that’s the scientific term) form on the surface. Getting rid of that is why you are doing this. OK - it’s actually coagulated protein. Not goop. I like goop better.
- While the bones are coming to a boil char the ginger and onion. People say use a gas burner on your stove. That is messy. Or they say use the oven. That takes way too long. I use my barbecue. You just toss it on and let fire do its thing. If I’m really jammed for time I’ve been known to use a blowtorch. Not saying that’s a good idea though. But I run with scissors so…
- Dump the bones into the sink. Clean the pot. Put the pot next to the sink. And start cleaning the bones under running water. One by one. Any bits of additional goop stuck to the bones need to go. As you clean them drop them into the pot.
- Toss the charred onion and ginger to the pot.
- Add the chicken stock and enough water to cover everything by about an inch. Bring to a gentle simmer. At this point you want to pay attention. The goal is a nice clear broth. Don’t let it boil hard. A nice, gentle simmer.
- Simmer for 12 hours. Or more. For real. You aren’t making stew. You are extracting maximum flavour. That takes time. The goal is for any meat on the bones to taste like nothing. All the flavour in the broth. That’s the goal.
- After you have convinced yourself you’ve extracted all the flavour remove the pot from the heat. Remove the bones (tongs and a slotted spoon work well for this. Strain into a clean bowl. I use a fine mesh strainer for broths.
- You should wind up with about 16 cups of broth or enough for 8 bowls of hu tieu. This is a double batch. I like to freeze half for another day. If you want to make 8 cups total just half all the broth ingredients.
Prepare the pork shoulder
- Pick a pot that will hold the pork and the stock and ensures that the pork will remain submerged as it poaches.
- Combine the stock, salt and ajinomoto. Bring to a simmer.
- Add the pork. Poach the pork (you want the surface of the liquid moving but not bubbling) until it reaches an internal temperature of 145F.
- Remove and set aside. You now have 8 cups of pure liquid gold.
Prepare the minced pork
- Heat the oil in a large skillet over medium low heat.
- Add the garlic and cook until fragrant. You don’t want it to brown so be careful.
- Crumble the pork into the pan and raise the heat to medium. Break it up with whatever tool you like for this kind of stuff. I love my wooden spatula.
- Speak the pork out into an even layer. Resist the urge to stir constantly. You want it to brown some. When the pork is cooked through and you have some nice brown bits add the pepper and fish sauce. Stir to combine.
- Cook another 30 seconds or so. Turn off the heat and remove the pork from the pan using a slotted spoon. Leave the fat behind.
- Set the minced pork aside.
Prepare the quail eggs
- Bring a small pot half filled with water to a rolling boil. Have a timer set for 4 minutes.
- Turn the heat down and add the quail eggs. Lowering them into the pot with a slotted spoon works well. Immediately start the timer.
- Adjust heat to maintain a lively simmer.
- While the eggs cook prepare an ice water bath. Combine some ice (around one cube per egg) and enough water to cover the cubes by about 1 inch in a bowl large enough to also hold the quail eggs. Set the ice bath next to the stove.
- When the timer shows 15 seconds remaining grab your slotted spoon and move the eggs from the pot to the ice bath.
- When the eggs are well chilled peel and set aside. There is a membrane between the egg and the shell. Peeling goes much better if you can grab that membrane and lift the shell from the egg.
Prepare the shrimp
- Bring a small pot of well salted water to a boil.
- Add the unpeeled shrimp. Cover. Remove the pot from heat. Let stand for 6 minutes.
- While the shrimp cook prepare an ice bath.
- After 6 minutes transfer the shrimp from the pot to the ice bath.
- When the shrimp are chilled peel and set aside.
Make the hu tieu
- Put a large pot of water on to boil. You need this to cook the noodles.
- Slice the pork shoulder about as thin as you can manage. Think deli meat thin.
- Slice the quail eggs in half.
- Prep your garnishes.
- Bring the hu tieu broth to a gentle simmer.
- Add the noodles to the pot of boiling water. Cook until no longer firm to the bite. For me (and the specific brand of hu tieu noodles) this takes 3 minutes and 45 seconds. Different brands cook differently. If in doubt cook a small quantity to dial in your brand. Asian noodles are really annoying that way. I have to do this all the time. It’s totally worth it though. 30 seconds can make the difference between great and glop.
- To serve divide the noodles between 4 bowls. Top with sliced pork. Ladle 2 cups of hu tieu broth over top. Add the eggs, minced pork and shrimp. Garnish as desired and serve.
Notes
Nutrition
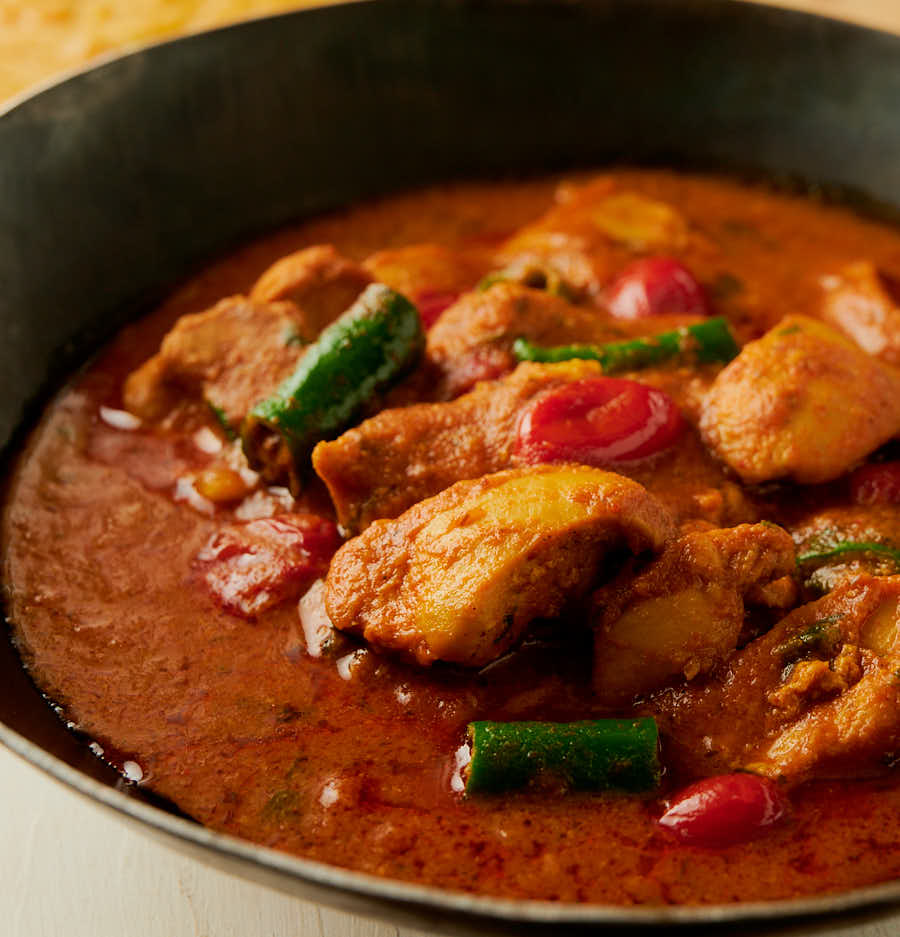
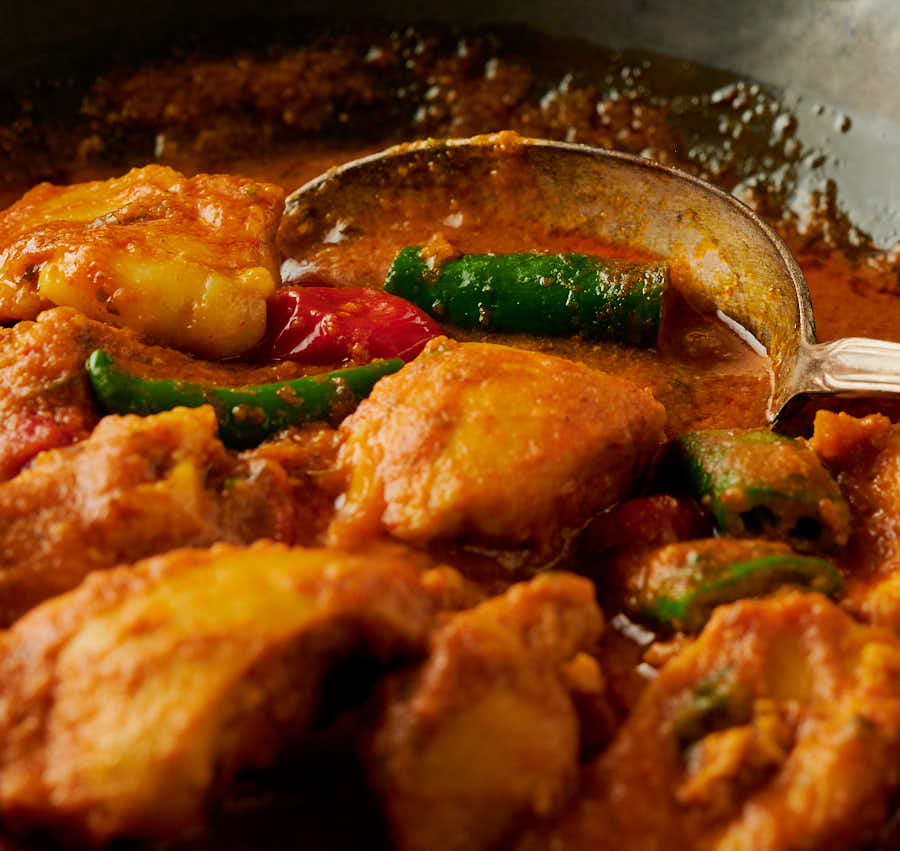
Chicken masala curry. Ready in 30 minutes. Deep flavours. Straightforward ingredients. And a crazy tasty Indian restaurant gravy.
This is what would happen if the chef at your local Indian restaurant was craving comfort food. Chef’s special chicken. It’s probably already on the menu.
It’s actually what happens when I crave comfort food. Tomatoes, onion, garlic, ginger, green chilis and spice all wrapped up in a lush sauce. Curry in a hurry.
Chicken masala is not tikka masala
You’ve probably already figured this out. But I want to be clear. This has nothing to do with chicken tikka masala. Nothing at all.
There’s no tandoori chicken. No cream. No coconut. So now you know. Don’t say you weren’t warned.
This is a classic Indian chicken curry. But with that smooth restaurant sauce you crave.
Straight forward. Simple spices. You can probably get everything in this curry at your local supermarket.
Except maybe the green chilies. But you could substitute jalapeños if you have to. Will be different. But still great.
Go with smaller pieces. And use less. Jalapeños have a bit more bite.
30 minute chicken masala is inspired by homestyle cooking
The inspiration for 30 minute chicken masala comes from an old book by Julie Sahni. The ingredients line up pretty closely.
Except the green chilies. This dish screams for green chilies. That’s not her. That’s glebekitchen.
What changes is how the ingredients come together. Ingredients matter. But technique matters more. Makes this version completely different.
Ms Sahni’s dish is traditional. This version moves solidly towards restaurant cooking. And restaurant results.
If this was on a menu at your local Indian restaurant it would read “Succulent morsels of chicken with Chef’s special blend of spices, tomatoes, fenugreek leaves and green chilies”.
The truth in advertising version? “Chef’s mom’s chicken curry that she made me for my birthday when I was young that I turned into a restaurant dish”.
I do love the descriptions though. Always good for a laugh.
Takeaway flavours at home
Indian restaurants approach cooking in a way that has absolutely nothing to do with the four hundred twenty seven million Indian recipes online. That’s a fact. Mostly.
The whole internet is about traditional Indian cooking. Restaurants do things differently. Surprisingly differently.
This isn’t quite the way they do it. But it’s close. Very close. Nearly Indian restaurant. And it takes 30 minutes. Start to finish.
A lot of the techniques used come from Indian restaurant style.
Blooming spices to extract maximum flavour?
Absolutely.
Frying onion gravy to make that smooth sauce you crave?
That’s here too.
What isn’t here is the prep. The hours of prep. Restaurants cook for scale. And that means having everything ready for service.
Restaurants can crank out curries in 10 minutes flat. They have adapted. Nobody is going to wait two hours for their dinner.
There is a ton of prep that goes into that. Gravies. Masala pastes. Spice blends. Pre-cooked protein. All fundamental in an Indian restaurant kitchen.
If you want to go the distance there is a whole section on Indian restaurant cooking here on glebekitchen. It’s a fun little rabbit hole. If you have the time.
Don’t have the time? Or the inclination? This will get dinner for 4 on the table in 30 minutes.
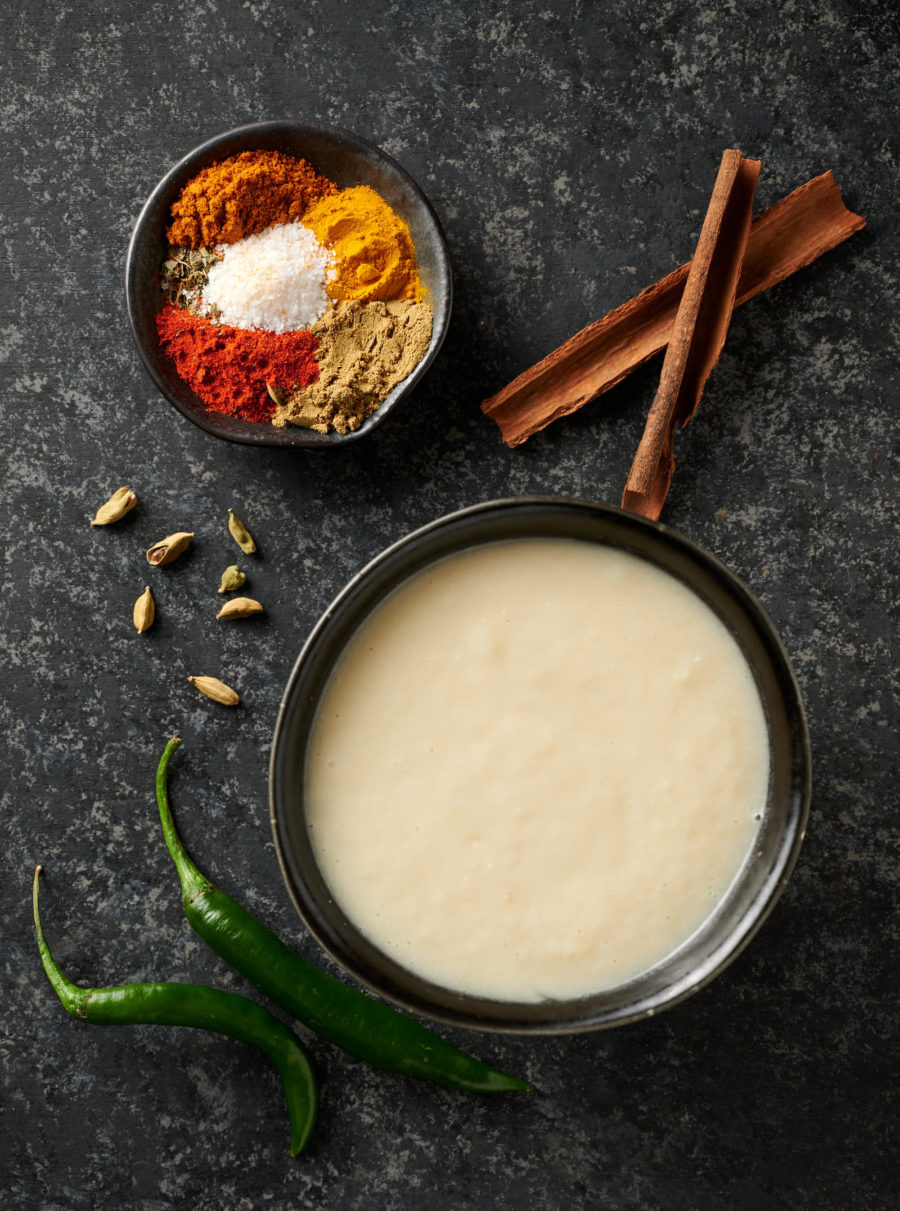
Onion paste makes this chicken masala possible
Restaurants use this stuff called curry base or gravy to make their dishes. It’s basically a whole lot of boiled onions blended up to make a sauce. Takes a couple hours to make.
Onion paste is that other way. The backbone of curry in a hurry. Microwave curry gravy. Instant curry base. I’m pretty sure this is a glebekitchen original.
This recipe is a re-tread. First published in 2019. Part of a nearly restaurant series. I I thought it would be a hit. But very few seemed to get where I was coming from.
Which was making restaurant style curries in 30 minutes from a standing start. So this is a new series of fast, easy Indian dishes.
This is marketing. No doubt about that. But I’m hoping people get it this time. Give it a go. Who doesn’t want great curry in 30 minutes? I know I do.
The curry snobs will hate this. It challenges dogma. Not exactly the same as pure restaurant technique. So it must be wrong.
I’m not too worried though. I have a whole section of restaurant curries for them. And I don’t really like the curry snobs anyway. Small-minded thinkers block progress.
Microwaved onions instead of boiled onions. Maybe a few less trace spices. Not quite the same a restaurant style.
But you can make it on a Tuesday. WIth zero prior planning. That works for me. I have a day job too.
And for what it’s worth I took new pictures for this update. And I think I made the recipe instructions a bit more amusing.
Give yourself the time you need
This recipe can be done in 30 minutes. That’s how long it takes me. But that doesn’t mean you have to get it done in 30 minutes.
This isn’t a contest. The only prize is your dinner. It’s a good prize. But you get it no matter what.
Cook at your own pace. If it takes you 35 minutes that’s OK. 40 minutes is OK too.
The important thing is you enjoy your time in the kitchen. Don’t stress. This is supposed to be fun. Try to keep that in mind.
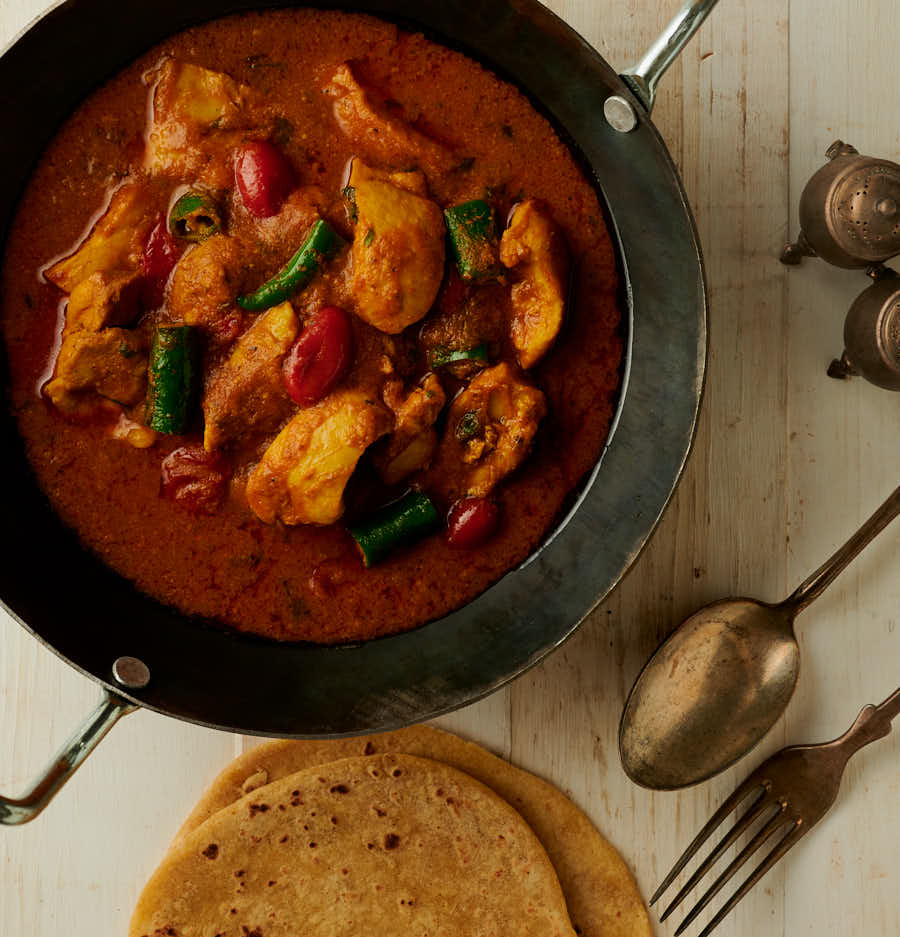
Chicken masala on the table in 30 minutes (or thereabouts)
Chicken masala is a straight down the middle chicken curry. And that’s a good thing. It has all the backbone flavours you expect. And the delicious bite of green chili.
Not complicated. Not too many crazy ingredients. Straight forward flavours that just works. This is a solid, tasty chicken curry.
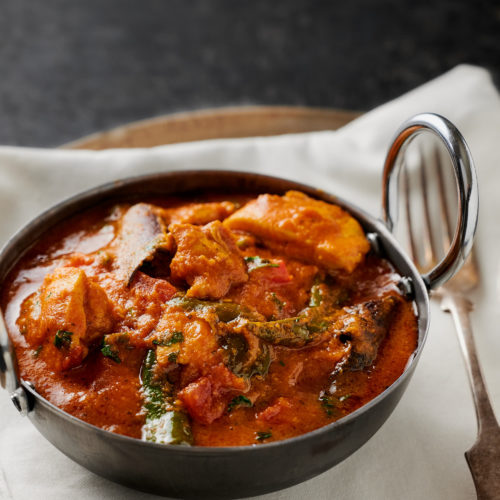
Chicken masala is not a flashy dish. Not famous either. But don’t let that stop you.
It’s a classic chicken curry. Which means really tasty. And a restaurant style sauce. On the table in 30 minutes. Or maybe 34 minutes if things don’t go perfectly.
That should be enough to make you smile. Makes me smile anyway. Great curry for everyone. Fast.
30 minute chicken masala curry
Ingredients
The onion paste
- 2 cups onions – coarsely chopped
- 2 tbsp vegetable oil
- 1 cup water
chicken masala
- 6 boneless skinless chicken thighs cut into 3 pieces per thigh.
- 1 tsp indian restaurant mix powder – see notes. Or just use a commercial curry powder. That works too.
- 2 tsp cumin powder
- 1 tsp turmeric powder
- 1 tsp mild kashmiri chili powder
- 1 tsp kasoor methi – dried fenugreek leaves
- 1 tsp kosher salt – use a bit less if you are using table salt
- 2 inch piece of cinnamon bark – also called cassia bark
- 4 green cardamom pods
- 2 tbsp garlic ginger paste – see notes
- 2-3 green chilies cut into large pieces
- 2 tbsp tomato paste plus enough water to dilute it to the consistency of tomato sauce
- 4 tbsp vegetable oil
- 1/4 cup tomatoes – diced
- 2-3 tbsp cilantro – coarsely chopped
Instructions
The onion paste
- Chop your onions coarsely. And by coarsely I mean 1/2 inch pieces. No point going any finer. Just wasting time…
- Place the onions in a microwave safe dish and cover with cling wrap. Punch a hole in the top. Microwave at 70 percent until the onions are soft and translucent. This takes about 10 minutes in an 1100 watt microwave oven.
- Remove the onions from the microwave. Be careful. They will be hot. Like burn you with the steam hot. Let them cool slightly.
Do your prep
- Do your prep while the onions are in the microwave.
- In a small bowl, combine the indian restaurant mix powder or curry powder, turmeric, kashmiri chili powder, cumin, kasoor methi and salt. This is your spice mix.
- Get your blender out. Get the pan on the stove. Measure out your ingredients. Cut up the chilies. Dice the tomatoes. Dilute the tomato paste.
- Cut the chicken into big bite size pieces. I like 3-4 pieces per thigh. Thighs are just better. More fat. More flavour. And more forgiving.
- The microwave should ding any second now. Place the onions, 2 tbsp vegetable oil and 1 cup of warm water in a blender and puree until smooth. Leave the paste in the blender. There is no point making more dishes here…
Make the chicken masala
- Heat 4 tbsp vegetable oil in a pot over medium heat until it shimmers.
- Toss in the cinnamon bark and green cardamom. Let cook about 20-30 seconds. You will see little bubbles forming around the bark.
- Add the garlic ginger paste and green chilies. Stand back. Cook until the garlic ginger paste stops spluttering.
- Turn the heat to medium low. Add the spice mix. That’s the mix you made above and put in the small bowl. Stir continuously until it starts to smell really good. It This takes around 30-40 seconds. Watch it carefully. If you burn the spices at this point you have to start over. This is called blooming the spices. It is one of the big secrets to Indian cooking. It’s also why you you need to add all the oil specified in this recipe. Things will go poorly for you if you try shave calories.
- Add the diluted tomato paste and stir to combine. Turn the heat up to medium. Cook for 1 minute.
- Add half the onion paste and turn the heat up to medium high. Just dump it out of the blender. Stir to combine. Cook for about a minute.
- Add the rest of the onion paste and stir again. Cook, stirring occasionally for about 4 minutes. Don’t worry if it looks dry. The chicken will release juices as it cooks. Instant delicious.
- Turn the heat down to medium low. Add the chicken and stir. Cover and simmer until the chicken is done. It’s done when you measure the internal temperature and it says 170F, about 10-15 minutes. I can’t tell you how long this takes. I don’t know how big your chicken pieces are. I also don’t know how hard things are simmering in your pan. An instant read thermometer is a handy thing to have here. It’s actually a great thing to have period. Great chefs use them. You should use them too.
- If the curry is a bit thick add a bit of water or chicken stock and stir. You are after a saucy consistency like you get in a restaurant.
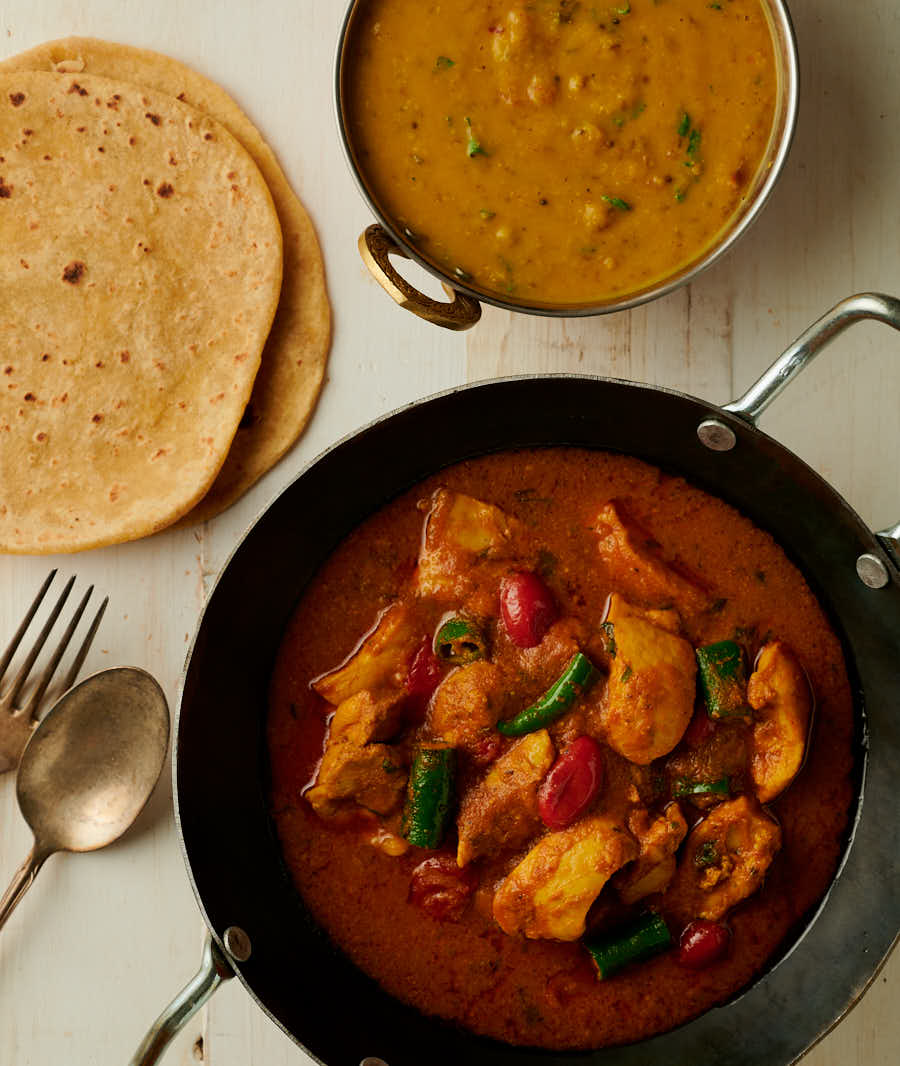
- Add the diced tomatoes and cilantro. Let the chicken masala simmer another minute or so. Basically you are just warming the tomatoes through. Taste for salt and adjust as needed.
- Garnish with a bit more cilantro if desired. This dish goes great with a simple tarka dal, chapattis and rice.
