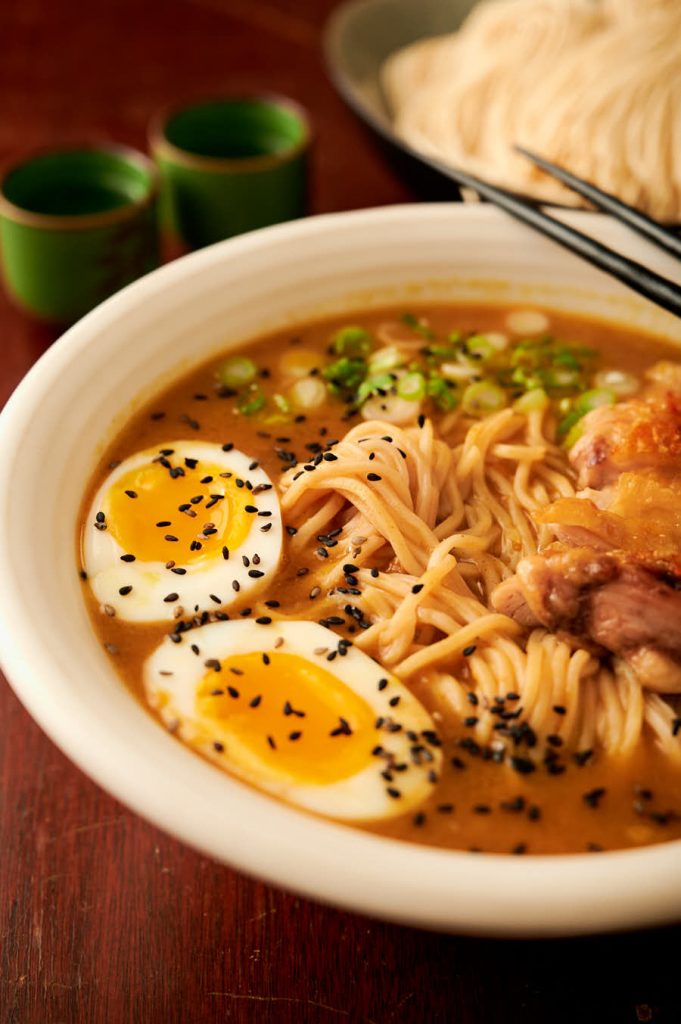
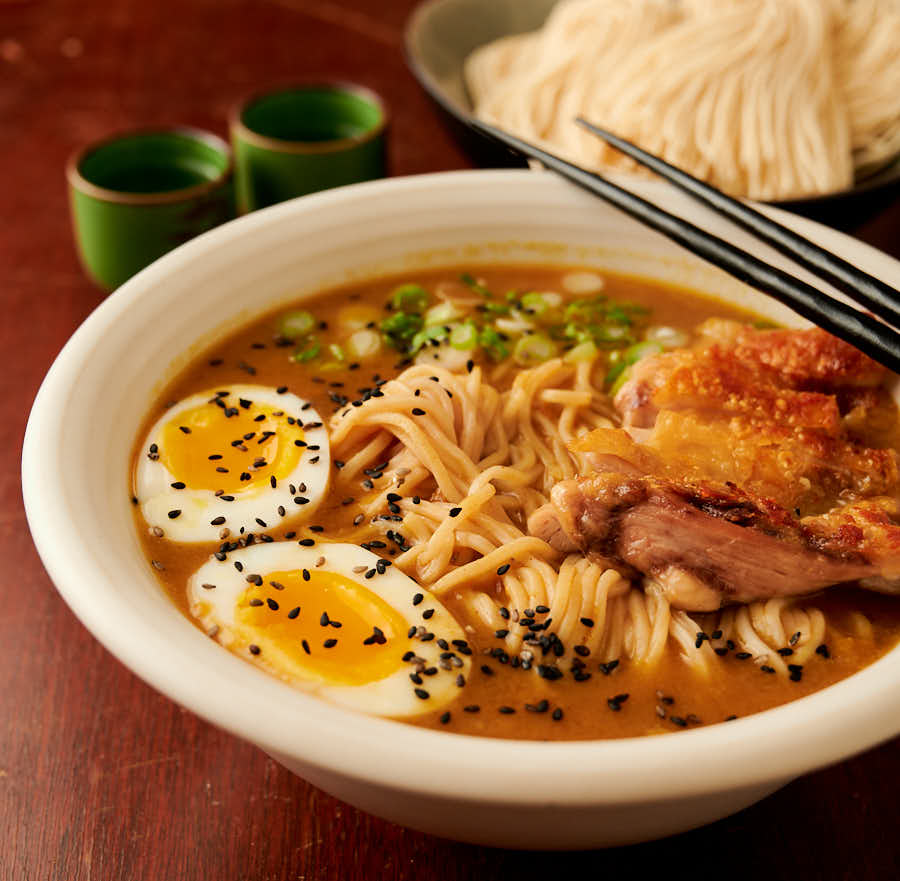
If you love ramen and you love curry then curry chicken ramen could be your new favourite.
Ramen noodles. Crispy golden chicken. A perfect egg. And a Japanese curry broth. Tasty stuff.
I love ramen noodles. Crazy about them. Tonkotsu ramen is one of my all time favourite things to eat. Seriously. It’s an addiction.
But tonkotsu broth takes 12 hours to make. The chashu pork is no joke either. Labour of love. Totally worth it. But tough for a Wednesday night dinner. Unless you start making Wednesday dinner on Tuesday.
So I look for easier ways to get my ramen fix. I don’t do instant ramen anymore. I want better. Way better. And curry chicken ramen fits the bill.
Curry chicken ramen is weeknight dining
This is not a difficult recipe. It doesn’t take forever. Once the chicken is done cooking it’s a 10 minute meal.
You can have dinner on the table in under 40 minutes from the time your oven is pre-heated. Not bad for something seriously delicious. Time well spent.
You need to be organized though. This isn’t putting a frozen lasagna in the oven. It’s still cooking. You can’t get something for nothing. It just doesn’t work that way.
Japanese curry cubes make it easy
It may not be the most famous but Japanese curry is really good eating. It’s different from Indian but familiar. Milder for sure. A hint of fruit.
Japanese curry is worth making from scratch. If you can cook Indian you can make it. I make it regularly. If you get into Japanese curry you should try it.
But even Japanese don’t always make it from scratch. They have a secret weapon. Curry roux cubes. And they use their secret weapon a lot.
Go to an Asian store that has a good Japanese section. And look at how much shelf space the curry cubes get.
I’ll save you a trip. It’s a lot. A wall of curry cubes. Literally. That should tell you something. This is a thing. Like the frozen pizza aisle.
Don’t get me started on that though. Frozen pizza – bad. Curry cubes – good. At least I think so.
No need to take my word for it. Ask your Japanese friends. That’s how I found out about it. Asked for a curry recipe. Got a strange look. And told “just use the cubes. Everyone does.”
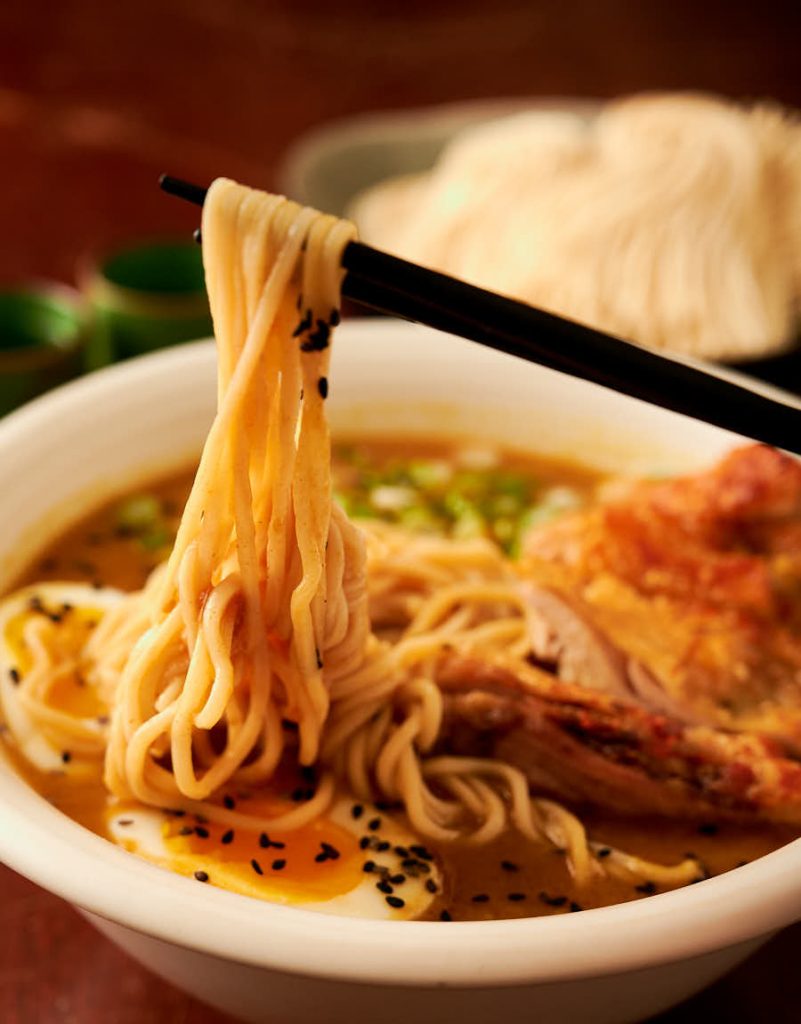
The right noodles matter
Noodles are the backbone of any ramen dish. So it’s worth seeking out the best noodles you can get.
Ramen noodles are different from other noodles. They are alkalinated. Look for some sort of carbonate in the list of ingredients. That isn’t some sort of bad thing.
It’s what makes ramen noodles what they are supposed to be. Gets that wonderful ramen texture. Makes them special.
In order of preference I like fresh ramen noodles best. But they can be hard to come by. And they aren’t consistent. But if you can find good ones they are great. I’m lucky. I have a supply.
You can get dried ramen noodles at most Asian grocers. I use those too. Imported from Japan. They work well for curry chicken ramen. Not quite like good fresh noodles. But close enough to keep me happy.
What I don’t recommend are instant ramen noodles. The just add water and wait three minutes stuff. They are not right for this recipe.
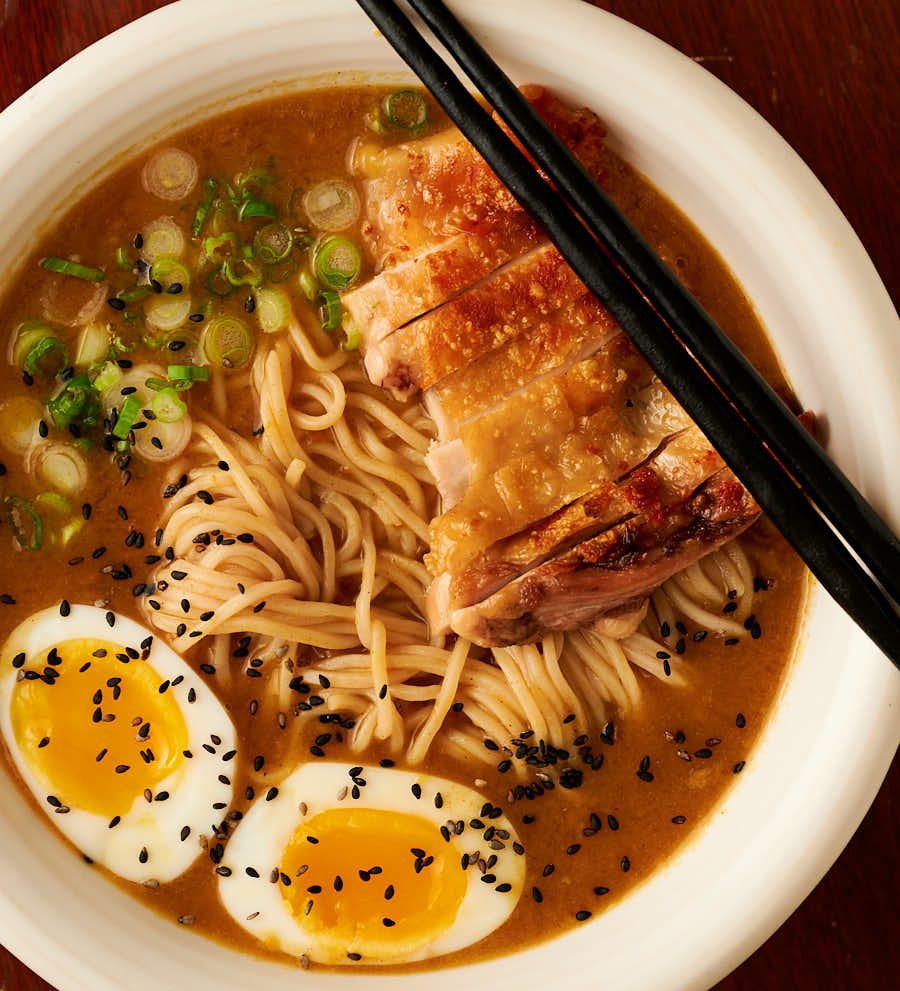
Depth of flavour comes from roasting the chicken
It isn’t exactly conventional. Roasted chicken ramen. But the depth of flavour roasting brings is what makes curry chicken ramen work.
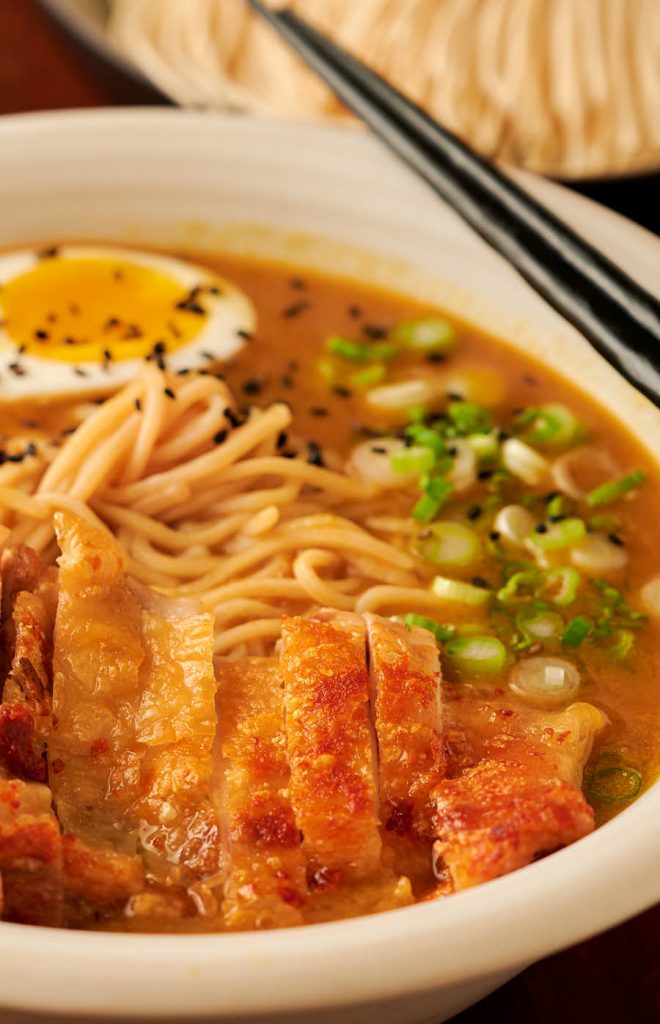
It’s about the skin. Crispy chicken skin is hard to beat. But it’s also about what’s going on in the pan.
Fond is the name for those wonderful little bits you get when you roast chicken. Or beef. Or pork. Any protein really. It’s the basis of a good pan sauce.
And it’s the basis of good chicken ramen. Not traditional. But it brings it together. I’m always looking for that extra bit of flavour. And fond is what does it here.
Curry chicken ramen is what’s for dinner – any night of the week
Dinner during the week doesn’t have to be takeout. Or something from the frozen aisle.
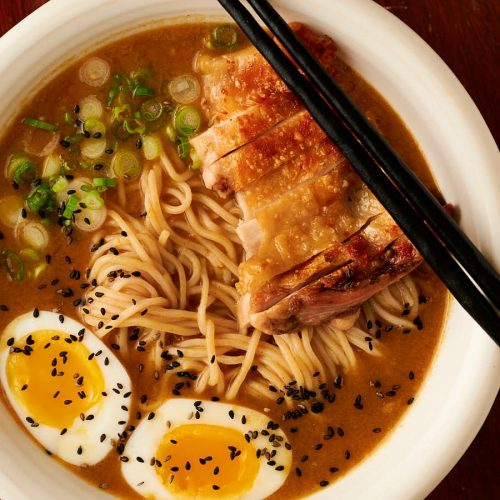
Roast some chicken thighs. Boil some eggs. Cook some noodles. Toss in some Japanese curry cubes. That’s it.
Not as easy as picking up the phone. I get that. But you get ramen for dinner. And curry. And crispy chicken. In one bowl.
That’s like the triple crown of weeknight dinners. For me anyway. Next time you reach for the phone make curry chicken ramen instead. You won’t regret it.
Curry chicken ramen
Ingredients
- 3 boneless chicken thighs – with the skin left on.
- salt to season the chicken
- 3 1/2 cups no sodium chicken broth – homemade is always a nice touch
- 2 large eggs – you really want fresh eggs here
- 2 Japanese curry cubes – Golden Curry seems to be a pretty popular brand
- 8 oz fresh ramen noodles
- a bit of oil to rub on the chicken
- green onion and sesame seeds to garnish
Instructions
- Put a big pot of water on to boil to cook the noodles. Pre-heat your oven to 375F. Put an ovenproof skillet large enough to hold the chicken in the oven to pre-heat.
Medium boiled eggs
- Gently lower the eggs into the boiling water (the water for the noodles) and cook for 6 1/2 minutes for large eggs. 7 1/2 minutes for extra large eggs.
- After 6 1/2 (or 7 1/2 depending on the size of the eggs) minutes place the eggs in a bowl of ice water to cool. You want them to cool quickly to stop the yolks from hardening.
- Peel the eggs and set aside.
Cook the chicken
- You can ask your butcher to bone out the chicken thighs or do it yourself. The important thing is the skin stays on. Rub the chicken with a bit of vegetable oil and season with salt.
- Remove the skillet from the oven. Be careful. The handle is hot. Putting a bar towel on the handle to remind you is never a bad idea. This is one burn you can live without.
- Place the chicken, skin side up, in the skillet and return to the oven.
- Cook until the chicken reaches an internal temperature of about 170F. This takes 12-15 minutes. Remember – that handle is hot.
- Flip the chicken so the skin side is down and place the pan over medium heat. Fry about a minute. You just want the skin to crisp up and turn golden. Remove the chicken from the pan and tent with foil. Set aside.
- Spoon off the fat. Leave the darker liquid and any fond in the pan. That stuff is serious flavour.
Make the broth
- Deglaze the pan with a bit of chicken stock. Scrape up any those little bits in the bottom of the pan. Add about two cups of stock. Bring to a simmer.
- Place the cubes in the stock, remove from the heat and cover. Let it sit for 5 minutes.
- Uncover and look. The cubes should be melted at this point. Stir them into the stock. It isn’t easy to get the curry cubes fully melted and smooth. You will likely have to chase little bits around your pot. I’ve tried all sorts of approaches. This is the best I’ve figured out so far but it isn’t perfect.
- Add the remaining stock and simmer for about 4-5 minutes.
- While the stock simmers cook the ramen noodles per the instructions on the package.
- Drain the noodles.
To serve
- Slice each egg in half lengthwise. Be careful. The yolks still have a bit of runny texture.
- Divide the noodles across two bowls. Ladle the broth into the bowls. Slice the chicken into strips (use a sharp knife so you get skin and chicken in each slice) and arrange the chicken overtop the noodles and pour half the broth into each bowl. Add the eggs, submerging slightly to warm them through.
- Garnish with green onion and sesame seeds and dig in!
Nutrition
Curry chicken ramen
Ingredients
- 3 boneless chicken thighs - with the skin left on.
- salt to season the chicken
- 3 1/2 cups no sodium chicken broth - homemade is always a nice touch
- 2 large eggs - you really want fresh eggs here
- 2 Japanese curry cubes - Golden Curry seems to be a pretty popular brand
- 8 oz fresh ramen noodles
- a bit of oil to rub on the chicken
- green onion and sesame seeds to garnish
Instructions
- Put a big pot of water on to boil to cook the noodles. Pre-heat your oven to 375F. Put an ovenproof skillet large enough to hold the chicken in the oven to pre-heat.
Medium boiled eggs
- Gently lower the eggs into the boiling water (the water for the noodles) and cook for 6 1/2 minutes for large eggs. 7 1/2 minutes for extra large eggs.
- After 6 1/2 (or 7 1/2 depending on the size of the eggs) minutes place the eggs in a bowl of ice water to cool. You want them to cool quickly to stop the yolks from hardening.
- Peel the eggs and set aside.
Cook the chicken
- You can ask your butcher to bone out the chicken thighs or do it yourself. The important thing is the skin stays on. Rub the chicken with a bit of vegetable oil and season with salt.
- Remove the skillet from the oven. Be careful. The handle is hot. Putting a bar towel on the handle to remind you is never a bad idea. This is one burn you can live without.
- Place the chicken, skin side up, in the skillet and return to the oven.
- Cook until the chicken reaches an internal temperature of about 170F. This takes 12-15 minutes. Remember - that handle is hot.
- Flip the chicken so the skin side is down and place the pan over medium heat. Fry about a minute. You just want the skin to crisp up and turn golden. Remove the chicken from the pan and tent with foil. Set aside.
- Spoon off the fat. Leave the darker liquid and any fond in the pan. That stuff is serious flavour.
Make the broth
- Deglaze the pan with a bit of chicken stock. Scrape up any those little bits in the bottom of the pan. Add about two cups of stock. Bring to a simmer.
- Place the cubes in the stock, remove from the heat and cover. Let it sit for 5 minutes.
- Uncover and look. The cubes should be melted at this point. Stir them into the stock. It isn’t easy to get the curry cubes fully melted and smooth. You will likely have to chase little bits around your pot. I’ve tried all sorts of approaches. This is the best I’ve figured out so far but it isn’t perfect.
- Add the remaining stock and simmer for about 4-5 minutes.
- While the stock simmers cook the ramen noodles per the instructions on the package.
- Drain the noodles.
To serve
- Slice each egg in half lengthwise. Be careful. The yolks still have a bit of runny texture.
- Divide the noodles across two bowls. Ladle the broth into the bowls. Slice the chicken into strips (use a sharp knife so you get skin and chicken in each slice) and arrange the chicken overtop the noodles and pour half the broth into each bowl. Add the eggs, submerging slightly to warm them through.
- Garnish with green onion and sesame seeds and dig in!
Nutrition
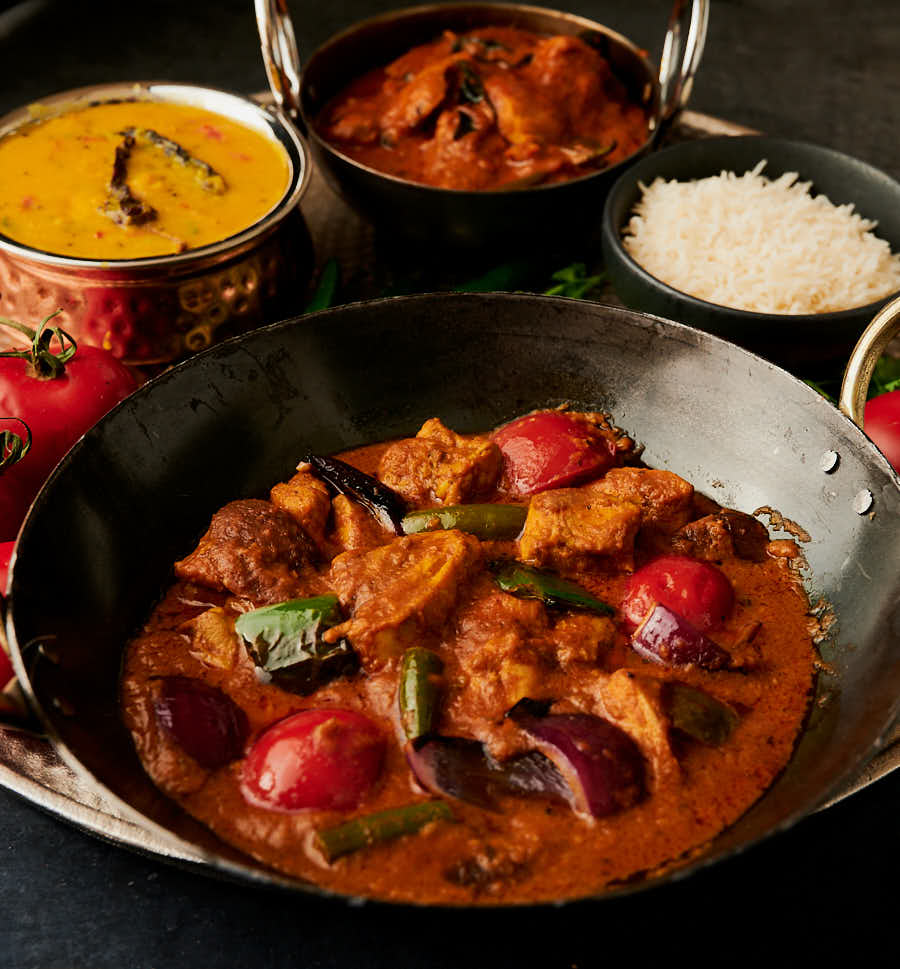
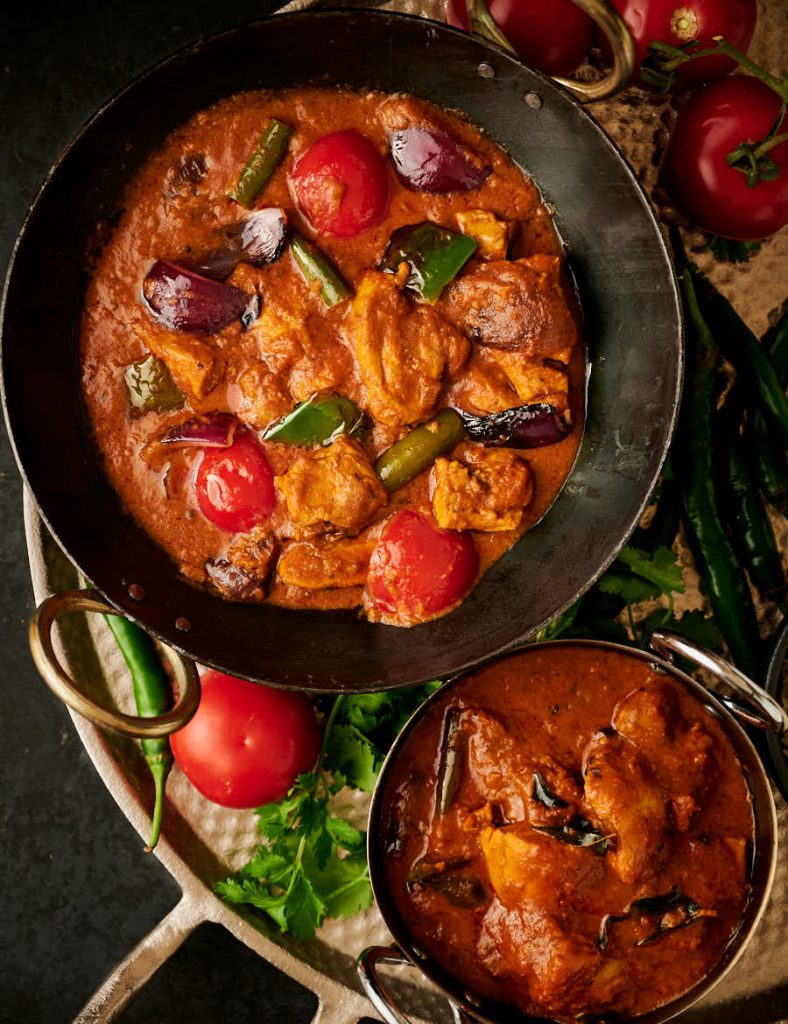
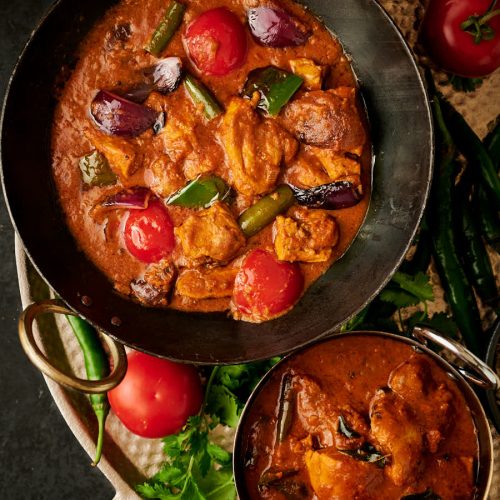
Indian restaurant chicken jalfrezi. Big, bold flavours. Just like they serve at your favourite Indian restaurant. Except this is one you can make it yourself.
This isn’t one of those recipes that promise to come close to Indian restaurant jalfrezi. This is the way they do it in restaurants. Seriously. Exactly like they make chicken jalfrezi in restaurants.
The whole approach might seem a little different from what you’ve seen before. That’s because it’s not fakeaway. This is the real deal. Restaurant technique. Restaurant results.
If you go for it you will surprise yourself. Could even be an “aha” moment. I know it was for me. Took me years to figure this out.
Full disclosure – this is an updated post. I’ve rewritten it, taken new pictures and added a video. But the recipe itself has not changed in any way.
Restaurant technique for restaurant results
The first thing you need to know restaurant style is completely different. There’s no slow browning of onions. That lush sauce? It comes from using a thing called curry base .
Curry base is this kind of weak onion soup. Vaguely curry flavoured. Not particularly tasty on its own.
Bland by design really. Think of it as the canvas you paint your curries on. The spices. The chilies. The onions. The peppers. That’s how you take curry base and make a great chicken jalfrezi.
The Maillard reaction is the secret weapon here. When the curry base hits the hot oil magic happens.
Actually science happens. Amino acids, reducing sugars and heat. That generates millions of flavour compounds. It’s the same thing that happens when you brown meat. Or bake bread. It touches your life every day.
And it’s what makes restaurant style curry technique possible.
Bloom your spices for maximum flavour
Blooming spices is a fancy way of saying fry your spices in oil. That’s another key restaurant technique.
There are oil soluble flavour compounds in powdered spices. Blooming the spices extracts that flavour into the oil. And that oil carries those flavours into every bite.
That smell that wafts out of Indian restaurants as you walk by? That’s the smell of blooming spices. And it makes a big difference.
Watch your heat. If it looks like things are going sideways pick up the pan. Get it off the heat.
You need enough oil in the pan to do this. You want the spices well coated in oil. Spices bubbling in oil.
This is not diet food. And cutting back on the oil is going to get you in trouble. The spices will stick. Or burn. If you burn your spices you are starting over. There’s no fixing that.
Do it right though, and you will be making curries that amaze.
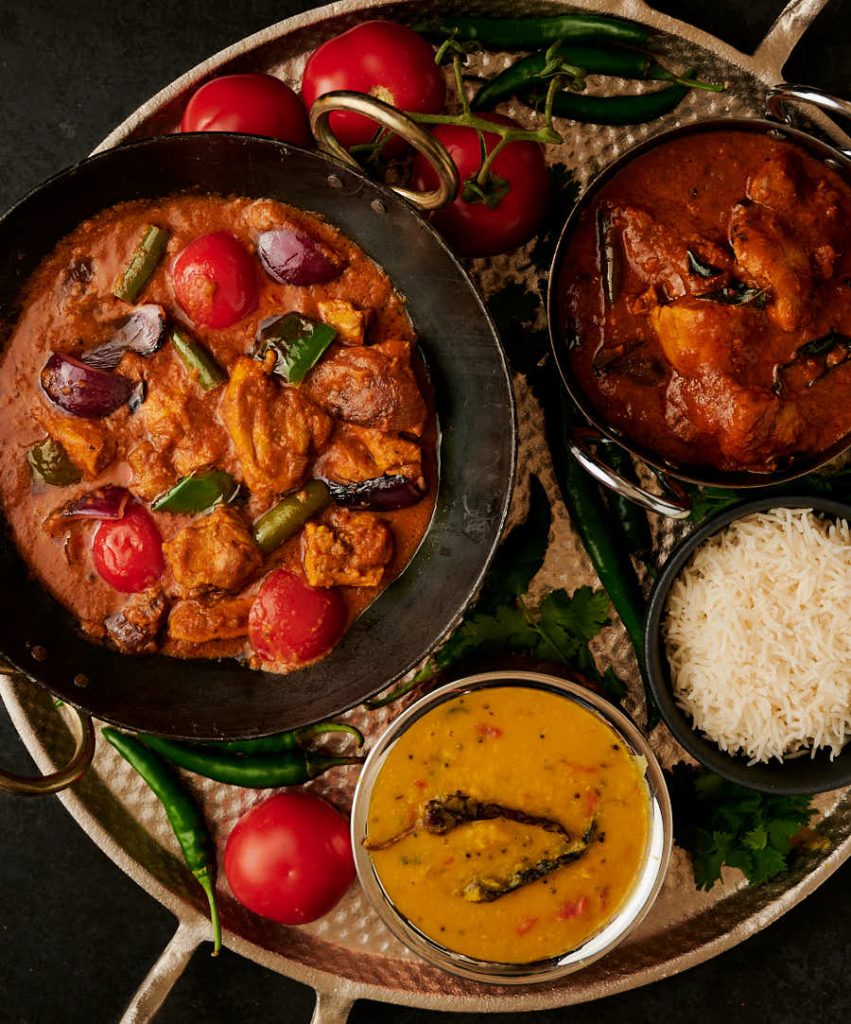
Blistered peppers make great chicken jalfrezi
I used to wonder why I didn’t always love Indian restaurant chicken jalfrezi. Sometimes it was great. A really fabulous dish. Other times I’d be asking someone to pass me the tarka dal instead.
Took me a long time to figure out what the difference was. Where the magic came from. Turns out it comes from a hint of smoky flavour. Simple once you know.
That smoky flavour comes from frying the peppers and onions hard. You want to see the skin of the peppers blister. The edges of the onions turn brown. That’s the trick. Nothing to it.
That’s what makes Indian restaurant chicken jalfrezi special. So push it a bit. Really go for it.
Restaurant style Indian cooking means restaurant prep
This is cooking restaurant style. That means 10 minutes start to finish. There’s not time to wander of to chop things once you’ve started. You need to move like they do in restaurants.
And you need to be ready like they are in restaurants. They have everything prepped and ready to go. You do to.
The French call this mise en place. That means everything in its place. Vegetables chopped. Spices measured out. Chicken pre-cooked. Curry base warming at the side.
Everything ready to go. It’s not hard if you take the time to do your prep. It’s a trainwreck waiting to happen if you don’t.
Don’t let that scare you. It’s 10 minutes of prep. And then you are good to go. It’s fun cooking this way. And the results will amaze you. Nothing here not to like.
I have some things to help you make the jump. There’s a guide to Indian restaurant technique complete with a video explaining things in detail.
You can do this. You should do this. It’s a bit of a leap. But once you’re on the other side you will never look back.
Indian restaurant chicken jalfrezi. Try it. You may never go for takeaway again…
indian restaurant chicken jalfrezi
Ingredients
The spice mix
- 2 tsp indian restaurant spice mix or curry powder – recipe link below
- 1 tsp kashmiri chili powder or 1/4 tsp cayenne mixed with 3/4 tsp paprika
- 1 tsp kasoor methi – dried fenugreek leaves
- 1/2 tsp tandoori masala
- 1/2 tsp kosher salt
The curry ingredients
- 4 Tbsp neutral oil – e.g vegetable oil
- 1/2 cup coarsely chopped green pepper
- 1/2 cup coarsely chopped onion
- 1 Tbsp garlic/ginger paste – recipe link below
- 1 Tbsp tomato paste with enough water to dilute to the consistency of pasatta
- 1 Tbsp cilantro stems – finely chopped
- 15 oz curry base – recipe link below
- 10-12 oz pre-cooked chicken or lamb
- 2 finger hot green chilies cut into half then split
- 4 cherry tomatoes halved
Instructions
- Make the spice mix.
- Dilute the tomato paste with enough water to get to the consistency of passata.
- Heat your frying pan (don’t use non-stick) briefly over medium heat. Add the oil. Use all the oil specified. It’s important.
- When the oil starts to shimmer add the onions and green peppers and stir every few seconds. You want the green peppers to be skin side down as much as possible. Fry until the pepper starts to blister and the onion edges turn brown.
- Next comes the garlic ginger paste and the cilantro stems. Add them into the pan and cook it, stirring constantly, until the garlic ginger paste stops sputtering.
- Turn down the heat and add the spice mix. This is the critical step. Stir it constantly for 30 seconds. If it starts to darken lift the pan off the heat. You want the spice mix to cook in the oil but not burn.
- Turn the heat up to medium high. Add the diluted tomato paste and stir until bubbles form (the oil will likely separate). This takes around 30 seconds to one minute depending on the heat.
- Add 3 oz of curry base. Stir until bubbles form (little craters really), around 30 seconds. Watch the edges of the pan. The curry can stick here.
- Now add 6 oz of curry base and stir briefly. Let it cook until the bubbles form again. This takes 1-2 minutes.
- Add the rest of the curry base and let cook until the bubbles form. Turn the heat down to low and add the pre-cooked lamb, beef or chicken and the green chilies.
- Let the curry simmer for about 5 minutes. If it gets too thick add a bit more curry base. Don’t add water. Add the cherry tomatoes and cook until they are heated through.
- Garnish with a bit of chopped fresh cilantro and serve.
