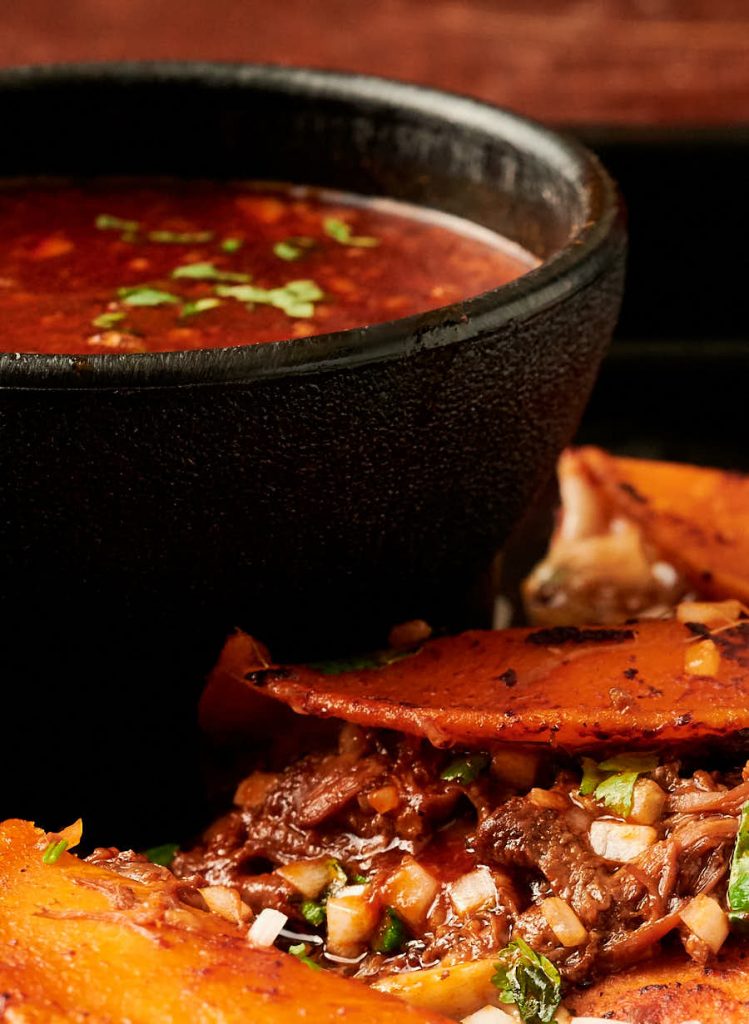
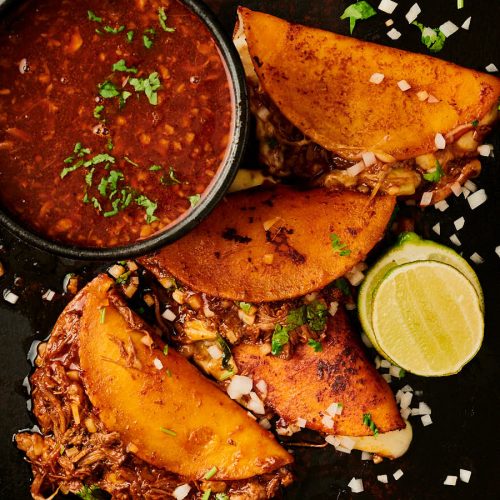
Birria tacos are hands down the craziest tacos ever. Birria. Melted cheese. Fried tortillas. Onions. Cilantro. Lime. Amazing.
And all that gets dipped in an unbelievably delicious sauce. That’s the consomé. It’s just diabolical.
Think I’m overselling? I don’t. Birria tacos are a thing for a reason. A very good reason.
Birria tacos start with birria de res con consomé
I love all Mexican food. But I don’t think there’s anything that can quite touch a good birria de res. Barbacoa comes close. Cochinita pibil does too. A really good mole is hard to beat.
But a well executed birria de res con consomé is a cut above. Serious, serious business.
If you’ve never tried it think about the best chili you’ve ever had. Now think of the best stew you’ve ever had.
Put those concepts together and you’ll start to have an idea what birria de res is all about. It’s a fairly demanding recipe. But so worth it.
Ever eat something that made you lick the plate? This is in that class. Lick the plate. Lick the spoon. I’d stick my head in the pot if I could make it fit.
The beef is wonderfully seasoned. But it’s the consomé that makes it what it is. A mix of guajillo, ancho and morita chilies. Really good beef stock. Tomatoes. And the flavour of the beef.
Now imagine if you took that and make birria tacos? That’s magic in a tortilla.
The quesa taco is some kind of genius
Birria tacos came out of Tijuana. Made it big in Los Angeles. And now the word is spreading around the world. They call it the quesa taco. Because it’s somewhere between a taco and a quesadilla.
Regular birria tacos takes everything nice and slam it into one bite. One glorious, wonderful bite. I’m a huge fan.
When you put the whole quesa taco thing on top though? That’s a culinary experience.
Imagine for a second.
Take a nice fresh corn tortilla. Dip it into the chili broth from the birria de res. The sauce I’d lick off your plate in front of my mother.
Fry that dipped tortilla. So it’s a bit crispy.
Add some cheese. Gooey melted cheese. I could stop here and it would rock my world. But it’s just getting started.
Top the cheese with beef. Drizzle it with bit of sauce. Fold it over and fry it a bit longer. So it gets that perfect – not quite crunch – toothy goodness.
Think that’s off the scale? Read on. There’s more. Told you this was diabolical.
It’s the consomé dip makes this one crazy taco
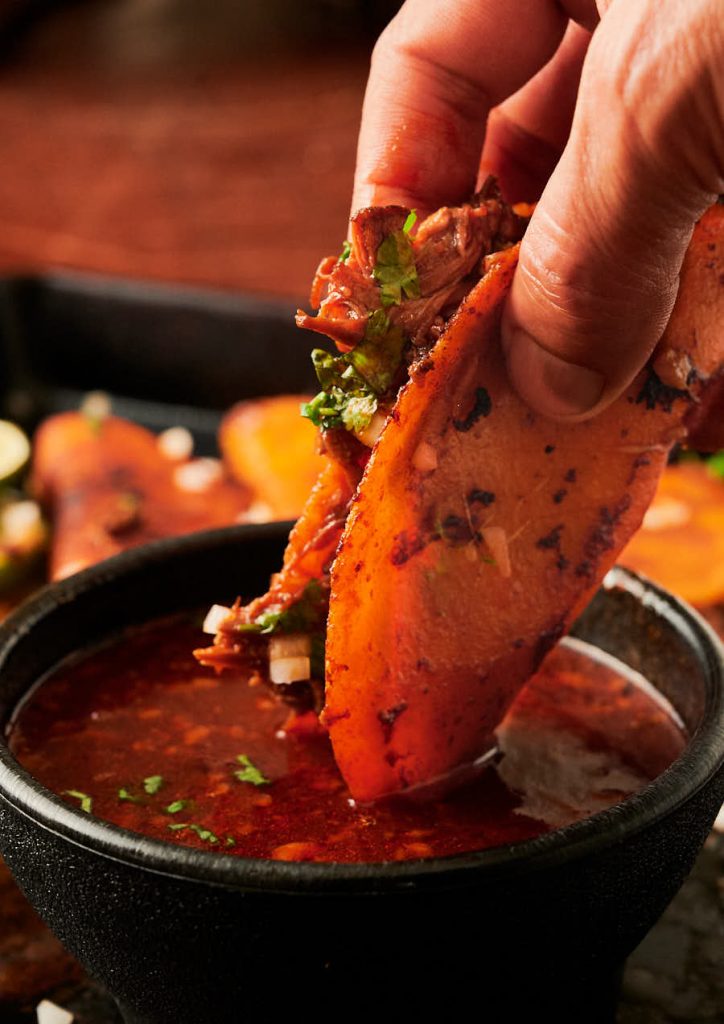
Take that crispy, beefy wonderful taco. Dip it in the consomé. And put that in your mouth.
The sauce runs all over your hands. Down your face maybe. You lick your fingers. Maybe even the back of your hand. Not elegant. But so good.
Go ahead. Do it. Live large. It’s good for the soul.
At the end you have a bowl of consomé. It might have a few sheds of beef in it from the taco. Or a bit of cheese.
That bowl of consomé is the final glory. The thing that pushes this right over the top. You drink the consomé. Truly decadent. Absolutely wonderful.
Birria tacos. Messy. Fun. Incredibly delicious. Everyone needs to try these. Buy them. Or make them. Just find a way to eat them. Your mouth will thank you.
birria tacos
Equipment
- Non-stick skillet(s)
Ingredients
- 16 corn tortillas
- 16 oz queso oaxaca shredded. A grated full fat mozzarella works is a pretty good substitute. Something mild that melts easily is what you are after.
- birria de res con consomé – recipe link below
- 1 white onion finely diced
- 1 bunch cilantro finely diced
- 4 limes quartered
Instructions
Make your birria de res ahead of time
- Birria de res is a braised beef recipe. It takes time. Hours. Don’t think this is a 30 minute recipe start to finish. It’s 30 minutes after you make your birria de res. That takes hours.
birria tacos – quesa tacos
- Pre-heat your oven to 225F. You will need it to keep the tacos warm as you make them. Or you can just feed people as they come out of the pan. That’s fun standing in the kitchen type dining with friends.
- Figure out how many flat tortillas will fit in your pan(s). This is your “at a time” number. Now figure out how many folded over (look at the pictures) tacos will fit in your pan(s). This is your batch size. Your batch size number should be double your “at a time” number.
- Separate (strain) your birria de res. Shed the beef if you haven’t already. Thin your consomé. so it’s about the consistency of whole milk. You should have lots. Keep your consomé warm in one saucepan. Keep the beef warm in another saucepan. You are ready to go.
- If you are a semi-confident cook you can run two pans at once. It’s not that hard. Non-stick is important for this recipe. I don’t recommend non-stick often but this is one of those times.
- Pre-heat your skillet over medium low heat. Film your non-stick skillet(s) with a little oil. Dip a tortilla in the consomé. You want it completely coated. Place it in the pan. Repeat until you have reached your “at a time” number.
- Fry for one minute. Flip the tortillas (be careful not to tear them). Add about an ounce of grated/shredded cheese. Let it melt. That should take about 90 seconds to 2 minutes. Don’t be tempted to crank the heat to speed this up. You don’t want to burn the tortillas.
- Once the cheese is melted you have decision to make. You can sprinkle a bit of onion and cilantro over the cheese so it’s in the taco. Or you can leave it out at this point and just sprinkle it on the cheesy edge once it’s cooked. Or both. Up to you. I’ve tried it different ways and I don’t have a strong preference. It’s hard not to make this taste incredible.
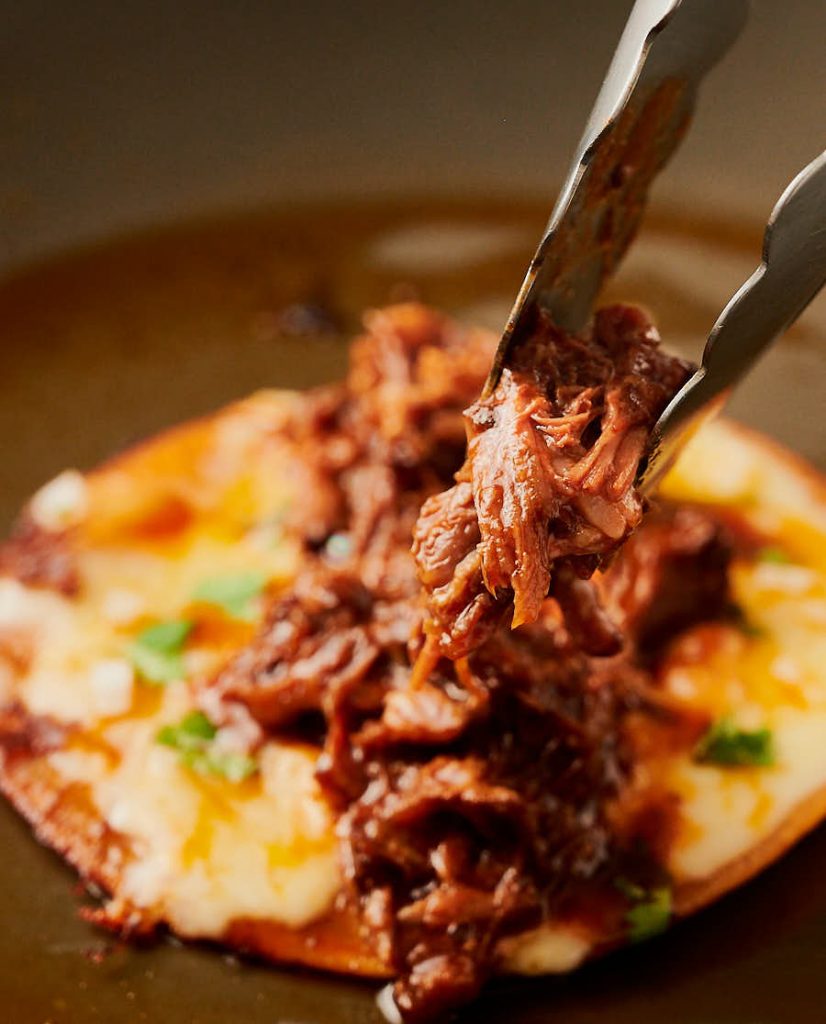
- After you have made the decision add enough birria beef to cover one half of the tortilla. Don’t look at the picture where I put it in the middle. I wasn’t thinking – just wanted a nice picture. My bad there. Sorry.
- Drizzle a bit of consomé on the beef and fold the side without the beef over the side that does. Think quesadilla here. Remove from the pan. Set aside and repeat the whole process.
- If your pan is dirty wipe it out. A dirty pan make tortillas stick. Sticking tortillas rip. Ripped tortillas make grumpy cooks. So wipe out your pan. And be happy.
- At this point you will have one of your batches done. Set that aside and repeat the whole process again. And again. Until it’s all done.
- You want to move fairly quickly at this point. Return one batch to the pan to warm through. Transfer that batch to the oven. Repeat until your last batch is in the pan. That batch doesn’t go in the oven. Pull the rest of them from the oven and serve.
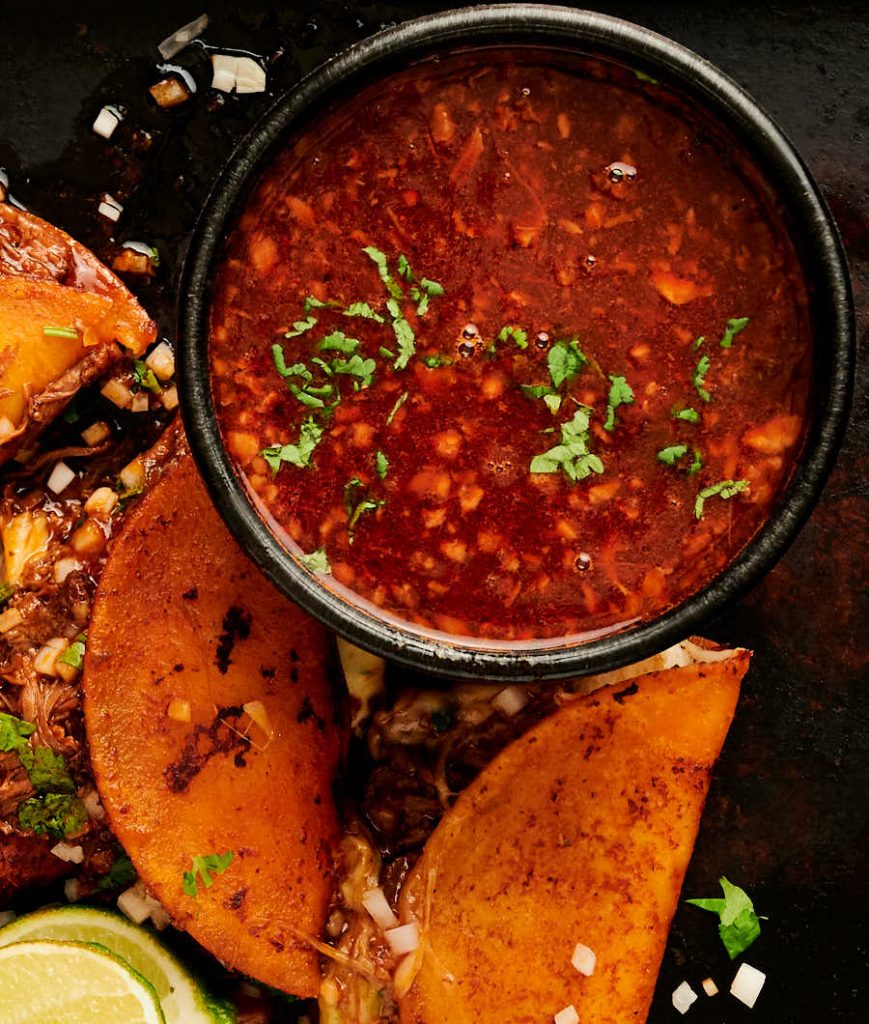
- To serve place two tacos on the plate. Serve with a small bowl of consomé and a lime wedge or two. Tell your guests to dip the taco in the consomé and then take a bite. Dip again. Another bite. Like a beef dip sandwich done Mexican style. Messy. Delicious. Fun.
Notes
Nutrition
birria tacos
Equipment
- Non-stick skillet(s)
Ingredients
- 16 corn tortillas
- 16 oz queso oaxaca shredded. A grated full fat mozzarella works is a pretty good substitute. Something mild that melts easily is what you are after.
- birria de res con consomé - recipe link below
- 1 white onion finely diced
- 1 bunch cilantro finely diced
- 4 limes quartered
Instructions
Make your birria de res ahead of time
- Birria de res is a braised beef recipe. It takes time. Hours. Don’t think this is a 30 minute recipe start to finish. It’s 30 minutes after you make your birria de res. That takes hours.
birria tacos - quesa tacos
- Pre-heat your oven to 225F. You will need it to keep the tacos warm as you make them. Or you can just feed people as they come out of the pan. That’s fun standing in the kitchen type dining with friends.
- Figure out how many flat tortillas will fit in your pan(s). This is your “at a time” number. Now figure out how many folded over (look at the pictures) tacos will fit in your pan(s). This is your batch size. Your batch size number should be double your “at a time” number.
- Separate (strain) your birria de res. Shed the beef if you haven’t already. Thin your consomé. so it’s about the consistency of whole milk. You should have lots. Keep your consomé warm in one saucepan. Keep the beef warm in another saucepan. You are ready to go.
- If you are a semi-confident cook you can run two pans at once. It’s not that hard. Non-stick is important for this recipe. I don’t recommend non-stick often but this is one of those times.
- Pre-heat your skillet over medium low heat. Film your non-stick skillet(s) with a little oil. Dip a tortilla in the consomé. You want it completely coated. Place it in the pan. Repeat until you have reached your “at a time” number.
- Fry for one minute. Flip the tortillas (be careful not to tear them). Add about an ounce of grated/shredded cheese. Let it melt. That should take about 90 seconds to 2 minutes. Don’t be tempted to crank the heat to speed this up. You don’t want to burn the tortillas.
- Once the cheese is melted you have decision to make. You can sprinkle a bit of onion and cilantro over the cheese so it’s in the taco. Or you can leave it out at this point and just sprinkle it on the cheesy edge once it’s cooked. Or both. Up to you. I’ve tried it different ways and I don’t have a strong preference. It’s hard not to make this taste incredible.
- After you have made the decision add enough birria beef to cover one half of the tortilla. Don’t look at the picture where I put it in the middle. I wasn’t thinking - just wanted a nice picture. My bad there. Sorry.
- Drizzle a bit of consomé on the beef and fold the side without the beef over the side that does. Think quesadilla here. Remove from the pan. Set aside and repeat the whole process.
- If your pan is dirty wipe it out. A dirty pan make tortillas stick. Sticking tortillas rip. Ripped tortillas make grumpy cooks. So wipe out your pan. And be happy.
- At this point you will have one of your batches done. Set that aside and repeat the whole process again. And again. Until it’s all done.
- You want to move fairly quickly at this point. Return one batch to the pan to warm through. Transfer that batch to the oven. Repeat until your last batch is in the pan. That batch doesn’t go in the oven. Pull the rest of them from the oven and serve.
- To serve place two tacos on the plate. Serve with a small bowl of consomé and a lime wedge or two. Tell your guests to dip the taco in the consomé and then take a bite. Dip again. Another bite. Like a beef dip sandwich done Mexican style. Messy. Delicious. Fun.
Notes
Nutrition
Hotel style chicken tikka vindaloo. It had to happen. Every huge flavour I could come up with. Thrown together in one crazy tasty curry.
Naga chicken tikka. Homemade vindaloo paste. And hotel gravy. Completely over the top.
This one has it all going on. A little spicy. A little sour. Real depth of flavour. I know I’m hyping it up. But I’m not worried. This is serious business. Master class time.
Homemade vindaloo paste
I used to wonder why my vindaloos weren’t awesome. Tried all sorts of things. Just could not get it. Truth be told – it made me a bit crazy.
Took me talking my way into one of the better Indian restaurant kitchens in town to figure it out. The chef said four words. Four simple words. Four magic words.
We use a paste.
There it was. A little insert pan on the line. A light came on in my head. The clouds parted. The sun shone down. Angels sang. Problem solved.
It isn’t hard to make. You can make batches of vindaloo paste and freeze it. Store it right next to your hotel gravy. So you’re ready to go any time.
The one tricky thing to find might be kashmiri chilies. But they are important. Don’t just randomly substitute another dried red chili.
Kashmiri chilies are big on flavour. Without the crazy heat. So you can use lots of them without blowing a hole in the back of your head.
Your Indian grocer will have them. Or get them online. Try hard. Did I mention it’s important?
There’s a lesson here as well. Restaurants respond to enthusiasm. If you are genuinely interested in something – just ask. It works.
Naga chicken tikka
I have a full on tandoori marinade recipe. It’s based on a lesson I got in a tikka restaurant in Bangalore. See? Enthusiasm works everywhere.
This is a simpler version. But one that works well for spicy curries. Naga pickle adds some fire. And some magic.
It’s fast. Easy. You can cook it in the oven. I still like it better over charcoal. No surprise. I like everything over charcoal. But it’s not critical. The naga adds enough flavour. Even for me.
The idea of making this dish with the naga tikka came from a long-time reader and very talented cook. He made it part of his curries. A lot of his curries. I’m just spreading the word. Andy and Hellen – thank you.
There’s a party appetizer here too
I’ve put in a little extra chicken in this recipe. Because I know you’ll want to snack. I do it. Can’t help myself. So I built buffer right into this recipe. Why fight it? Enjoy.
When you do try a piece or two think about how it could be an appetizer. With beer. Or drinks. Just take that chicken tikka. Drizzle the pan juices overtop. Put out some toothpicks or little skewers.
And let people graze. It’s a tasty little spice bomb. If your guests need something to cool things down again think about a dip to go with it.
Something creamy. Yoghurt based. I have some ideas. A little glebekitchen twist. Will do a post on this before long.
Hotel gravy – for the win
There are two popular approaches to cooking Indian at home. Traditional is the one you know. Pretty much every recipe on the internet is traditional.
Restaurant style is the other. It’s a little more esoteric. But it’s how they make curries in a restaurant environment. There are lots of those recipes here. Look for anything labelled restaurant on glebekitchen.
That’s how Indian restaurants cook. Not sort of. Not almost. For real. If you want what they are making in restaurants where you live this is how they do it.
And then there’s hotel style. That’s how they do it at the really posh restaurants. Bigger. Bolder. Deeper flavours.
If you cook traditional style there are things that will seem familiar. If you cook restaurant style you’ll feel at home too. This is somewhere in between.
It’s more work than regular restaurant style. Up front anyway. Which is why you don’t see it everywhere. More work means more labour. More labour means higher costs.
Restaurants work to price point. That’s business. But I don’t. And probably you don’t either. So go for it.
I’m pretty sure you won’t regret it. Hotel style chicken vindaloo is probably the most demanding curry on the blog to date. Not complicated.
But it will take real effort. Remember. Good things come to those that do. Really good things.
Chicken tikka vindaloo
If you want to make a great vindaloo use a homemade vindaloo paste. It makes a big difference. Do it restaurant style or hotel style or homestyle.
Doesn’t really matter. That paste is going to make a big difference. That is secret number one.
If you want to go the distance though. If you want to make the a truly memorable vindaloo. One that people talk about. For months. Try this one. Hotel style is secret number two. Naga chicken tikka? That’s just icing on the cake.
chicken tikka vindaloo
Ingredients
Quick naga chicken tikka
- 4 chicken thighs – boneless, skinless. Cut each thigh into 3 even pieces.
- 2 tbsp tandoori masala – available from any Indian grocer. Look for a brand that isn’t all salt.
- 1 tsp kasoor methi – dried fenugreek leaves, crumbled between your fingers
- 1/2 tsp kosher salt
- 1/4 tsp naga pickle – available from most Indian grocers. You can push this bit if you like the heat. Naga pickle is incredibly tasty and incredibly hot. Fine line to walk…
- 2 tbsp vegetable oil
Vindaloo paste
- 8 kashmiri chilies
- 1 large shallot chopped
- 2 tbsp garlic ginger paste
- 1 tsp kashmiri chili powder
- 1 tsp cumin powder
- 2 tsp malt vinegar
- 2 tbsp vegetable oil
- water to get it to puree if needed. Add a little bit at a time.
The spice mix
- 1 tsp Indian restaurant spice mix – recipe link below
- 1-2 tsp kashmiri chili powder
- 1 tsp paprika for colour more than anything else
- 1 tsp kasoor methi – dried fenugreek leaves
- 1/2 tsp kosher salt
tikka vindaloo curry
- 3 tbsp vegetable oil – any neutral oil is fine
- 2-3 kashmiri chilies – dried red chilies
- all the vindaloo paste from above
- 1 cup Indian hotel curry gravy – recipe link below. Dilute it with 3-4 tbsp of chicken stock. If you only have powder or cubes use water. That stuff is not stock.
- the naga chicken tikka or whatever tikka you feel like using
- 1 tsp tamarind paste – paste is not concentrate. They are very different. Don’t use concentrate.
- 1/2 tsp sugar – jaggery or brown sugar
Instructions
Do your prep
- Make your spice mix. Make your vindaloo paste. Make your naga chicken tikka.
- Note that the ingredients said dIlute your curry gravy with 3-4 tablespoons of water or chicken stock. You need to dilute it because the chicken is going in pre-cooked.
Make your quick naga chicken tikka
- Combine the tandoori masala, kasoor methi, salt, naga pickle and oil in a bowl large enough to hold all the chicken.
- Add the chicken and combine with the marinade. Use tongs. This stuff will stain your fingers. Nobody wants that.
- Marinate for about an hour if you have time. Pre-heat your oven to 400F while this is going on. Place a sturdy baking sheet in the oven to pre-heat. No skewers, aluminium foil or mess required here. Easy.
- Transfer the chicken (again, use tongs) to that pre-heated, sturdy baking sheet and place in the oven. Cook for about 6 minutes. Flip all the pieces and return to the oven. Cook until the internal temperature of the chicken reaches 165F. This should take another 4-8 minutes or so. Really depends on how big your chicken thigh pieces are. Set aside.
Make your vindaloo paste
- Stem and seed the kashmiri chilies (the ones for the paste – not the ones you will put in your curry).
- Soak the stemmed and seeded chilies in really hot water for a few minutes. Drain and do it again. You may need to do it a third time. At the end you want the chilies hydrated. That means soft. Take the time to get this right. It’s important.
- Combine all the paste ingredients in your blender. Add a bit of water and see if you can get it to puree. It will fight you. Add a little more water. Try again. You’ll probably need to scrape down the sides and fight back. Eventually you’ll get a paste. Keep going. You want the paste to be smooth. This is a good reason to make big batches. There’s a link in the notes below.
Make the tikka chicken vindaloo curry
- Heat the oil in a medium sized frying pan over medium heat until the oil just starts to shimmer.
- Add the remaining 2-3 kashmiri chilies. You should see little bubbles forming around them. Cook for about 30 seconds.
- Turn your heat down to medium low and add your spice mix. This is why you added 3 tablespoons of oil. You want to fry your spices in the oil. If you skimp on the oil you risk your spices sticking or burning. If your spices burn here you are starting over. Or eating terrible curry. Your choice. Personally, I would start over and try never to make the same mistake again.
- Cook the spices for about 30-45 seconds.
- Stir in the vindaloo paste. Fry, stirring constantly, until it starts to darken. This should take 2-3 minutes. Watch your heat. You don’t want it too hot.
- Add the Indian hotel curry gravy. Stir it really well. Get get the oil to combine with the curry gravy. You want everything mixed together at this point. Bring to a simmer and reduce the heat to maintain that simmer.
- Add the tamarind paste and stir.
- Cover loosely and keep simmering for about 5 minutes.
- At this point you need to decide whether you want the sugar or not. A little sweetness is a nice touch. I like it. And I don’t really like sugar in general. Notice there are exactly zero desserts on this blog. Should tell you something…
- You will also need to adjust the consistency of the sauce. It will be thick. The paste makes a difference. I like about 3 tablespoons of additional liquid at this point, maybe even a little more. This is personal preference. Go for what you like.
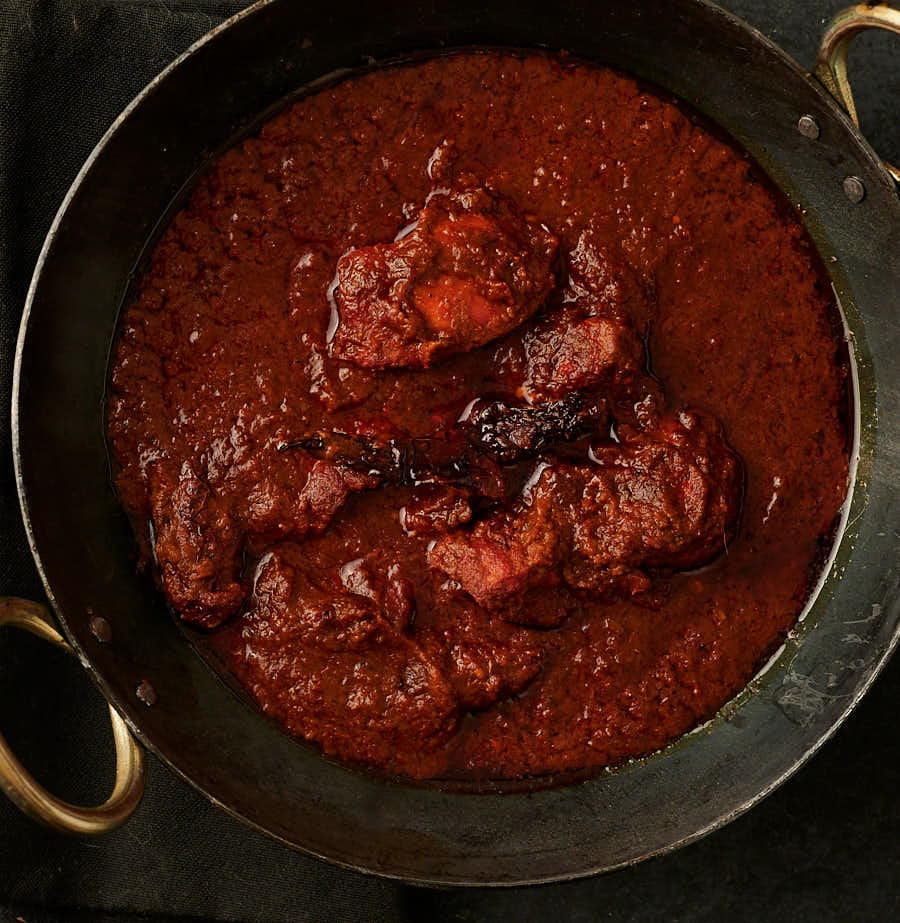
- Add the naga chicken tikka. Continue to cook for about 1 minute to warm the chicken through. When the chicken is warmed through dinner is ready.
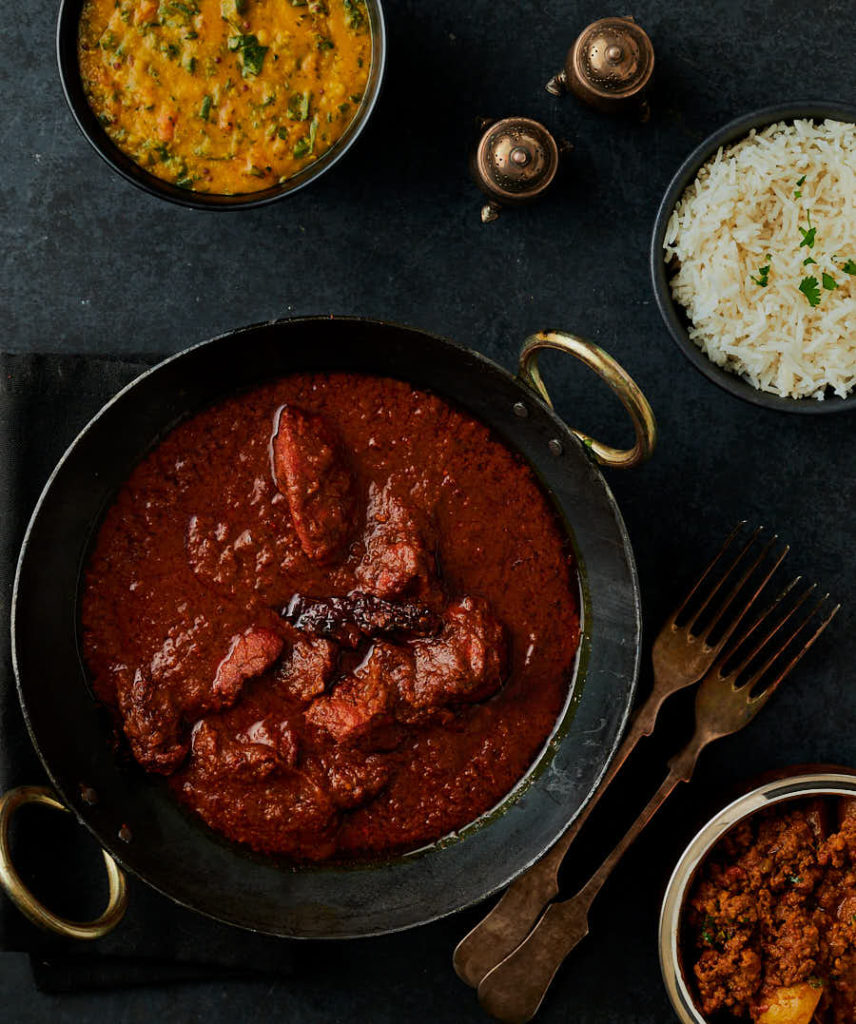
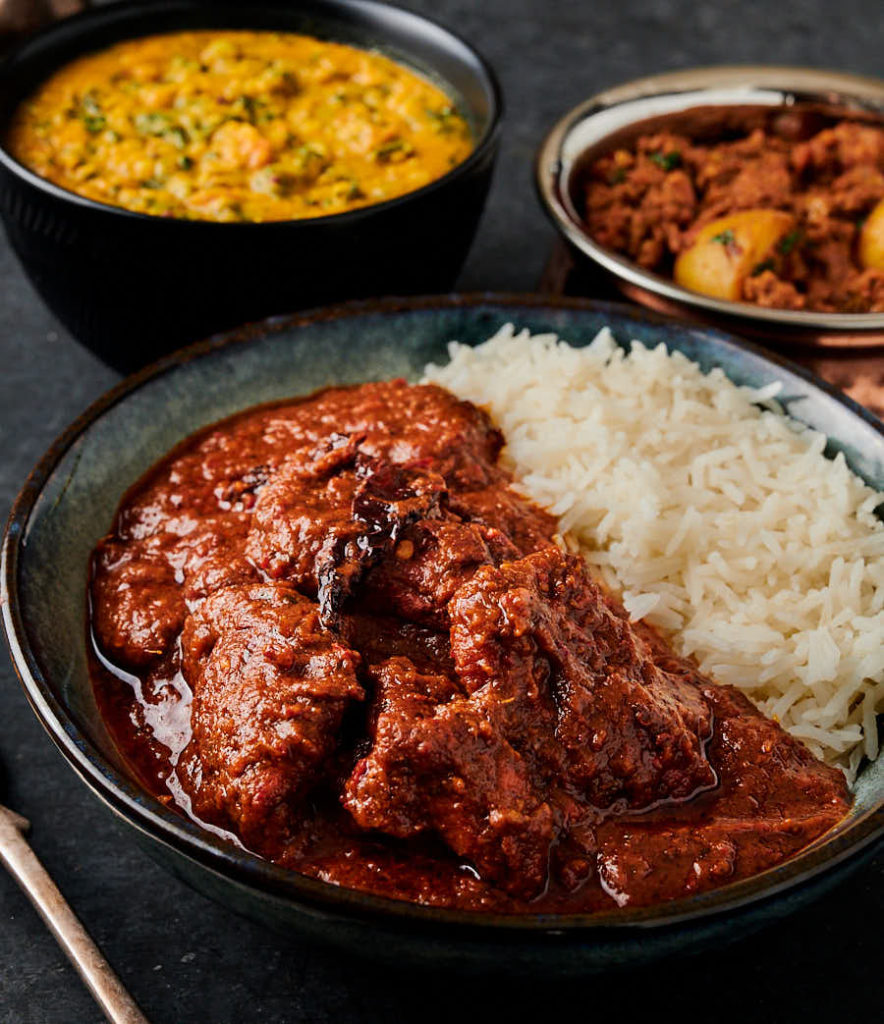
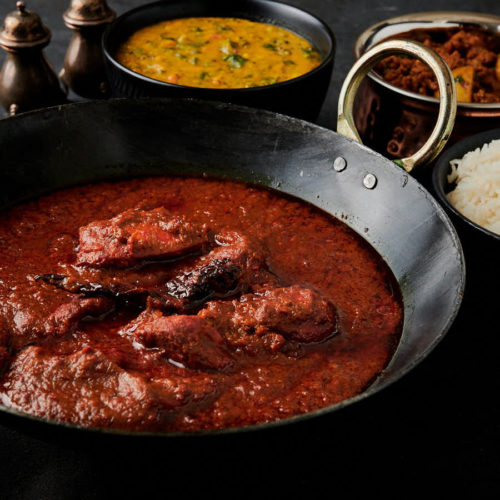
- Serve with rice or parathas and a nice dal if you like. That’s an aloo keema in the pictures if you’re wondering. That was good too.
