Birria de res con consomé is one of the truly great dishes from Mexico. Beef and chilies come together in a way you have to experience to really understand.
This is a world class cooking. I’d put it up against any stew. Or daube. Or gulyas. You name it.
Complex chili flavours. Really deep beef flavour. Think about that for a second. That is a serious combination. Birria is like nothing out there.
Makes amazing tacos. Or those quesatacos that everyone is talking about. That recipe is coming shortly. I’m thinking it would make an incredible wet burrito. Haven’t tried that one yet.
It’s party food. Food best served to good friends. Shared. Doesn’t have to be a special occasion though. It works any time you feel like putting a smile on everyone’s face.
Great birria is about building layers of flavour
I know. I talk about this a lot. Too much probably. But it’s my thing. Can’t help myself.
I love building layers when I cook. And this is a dish that really lets you do that. This isn’t your every day birria recipe. I’m pushing a little harder. Because I always want more.
Brown the beef. There’s a huge amount of flavour right there. The Maillard reaction. Look it up. It’s why you love stew. Or bread. Or pretty much anything roasted.
The Maillard reaction is food science. But it’s flavour magic.
Fry your onions. Not sure why this isn’t the normal way. Authentic versions have you boil them. There’s more Maillard my way.
Fry your chilies a bit to soften them. This is a bit like toasting them on a comal but easier. Less risk of burning.
Simmer the chilies with the aromatics. Don’t just soak them. That’s not me. It’s pure Mexican home cooking technique.
Use top notch homemade beef stock. The best you can get. This is a big one. There is so much flavour there. It really makes a difference.
If you don’t want to make your own ask your butcher. They probably make it in house.
Whatever you do don’t use bouillon cubes. Please don’t. That will work against you. Water is a better choice. Grocery store beef broth isn’t a lot better.

The sauce is the thing
A good birria de res is one of the best things you can put in your mouth. I think anyway.
Dried chilies. Onions. Garlic. Fire-roasted tomatoes. Spices. Great beef stock. And the depth of flavour that can only come from slowly braised beef.
If all this doesn’t have you drooling there’s something wrong. Stop reading and go make something else. Or give this a try. See what you’ve been missing.
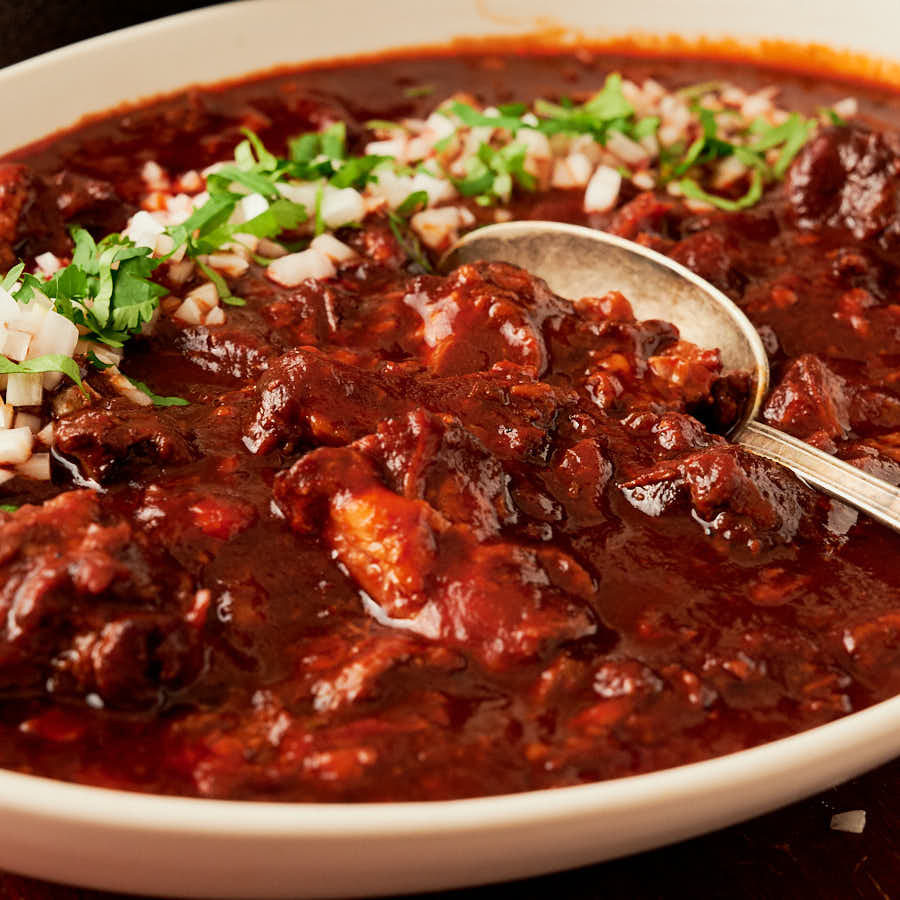
There’s a price to pay though. You need to strain the chili puree. There’s no way around it.
Guajillos are a thin-walled chili. So the skin to flesh ratio is high. That means there’s going to be little bits of that tough skin in your sauce.
You could just overlook it. Put up with it. Some people would be fine with that.
But I’m not. So I strain. It’s a drag. But it’s worth it. I get silky smooth sauce. Like at a fancy restaurant.
Put on an episode of something you like to watch. This will take a while. Five minutes at least. Probably more. But it’s work that is so worth it.
If you’re going to invest hours making birria what’s another 5 minutes?
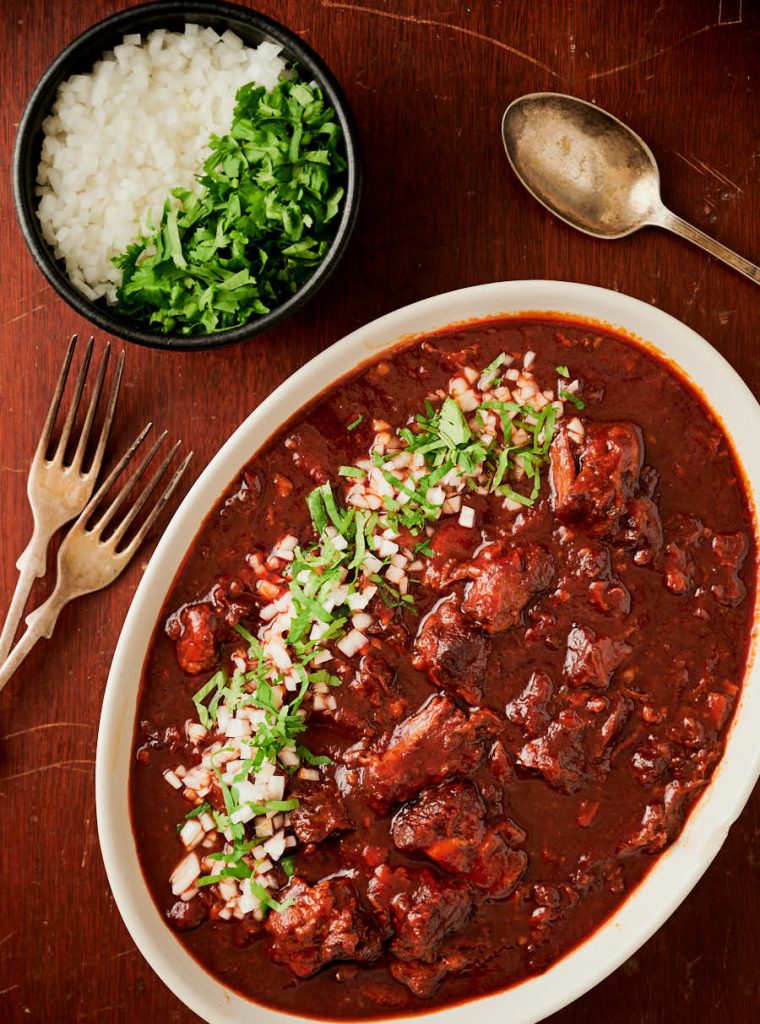
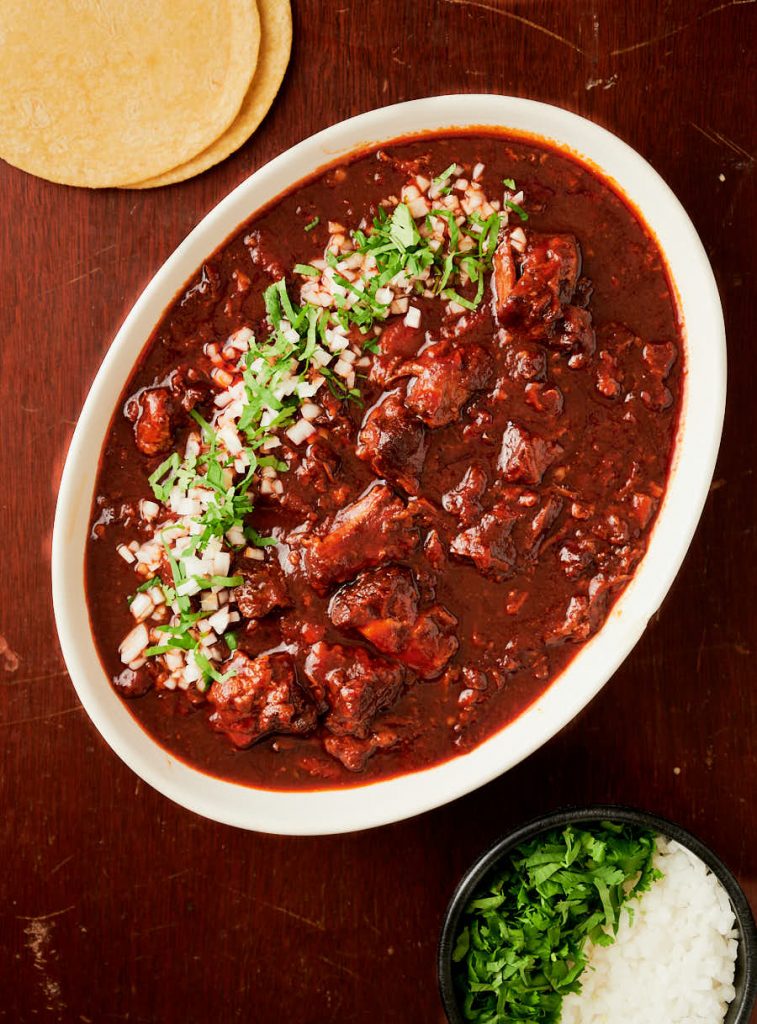
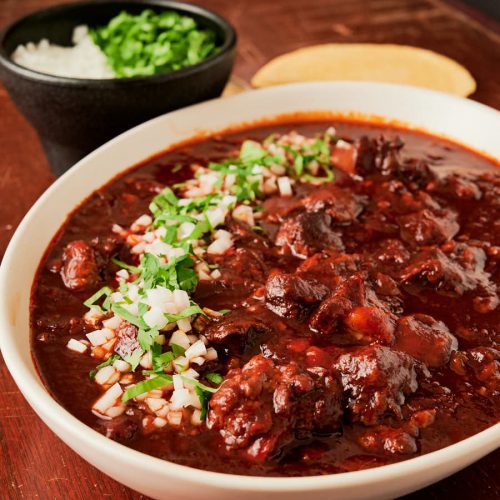
Birria de res con consomé – with sauce
There are a few ways to eat birria de res. You can serve it as an amazing stew. Try it this way and you’ll see why it’s festive food. It’s rich. Decadent even. Think of the best stew you’ve ever had. Birria plays at that level.
A little cilantro and onion. A squeeze of lime. A couple fresh corn tortillas. That’s dinner for a king. Or queen. Serious stuff. It’s almost too much. Right on the edge of completely over the top.
Good for when you’ve been outdoors all day. When you come with a full body hunger. A little bit hangry even.
Or when you feel like completely spoiling yourself. And you can deal with the food coma that comes afterwards. Because it will come. No getting around that. Unless you have more self control than I do.
This isn’t the consommé you know
Consommé is a clarified stock. A classic French preparation. With two “m”s. If you are thinking this has anything to do with that you are in for a surprise. They are both liquid. But that’s where it ends.
Consomé is a lush, super rich and super flavourful sauce. It has texture. Coat a spoon thick. My version anyway.
It’s rich. And bold. In a balanced sort of way. This isn’t fancy clarified stock. This is rustic food. Comfort food. Just good living.
You can thin it some if you want. It won’t be as intensely flavoured if you do that though. Depends what you want.

Birria tacos
This is the wheelhouse for me. About the best tacos there are. In a league of their own. Crazy good.
I’m underselling here. Stupid delicious is probably the best way to describe them. I’m going with that. This is a recipe for stupid delicious tacos.
The secret is the double dip. Traditional birria tacos have you dip the tortilla in the consomé and build the taco on that. I go a little further. Take a page out of the whole quesataco thing.
Add a little oil to a non-stick skillet. Heat to medium. Dip a tortilla in the consomé. That’s the first dip. Fry that tortilla dripping in chili goodness. About a minute to 90 seconds per side is good.
Put that fried tortilla on a warm tortilla. A clean one. Makes it a little less messy. At first anyway.
Build your birria tacos on that. A little beef. A little sauce. Some finely diced onion. Sprinkle of cilantro. Some cotija cheese if you want. And a little squeeze of lime.
Then it’s time for the second dip. Pick up your taco. Dip it into the consomé. Be careful. It will fall apart if you’re not. Shove it in your face. Let the sauce drip down your hands. And your face. Lick your hands. Live a little.
It’s fun. Crazy delicious. If you haven’t had the pleasure it’s time you tried.
Birria de res con consomme. I’m no linguist but that could be Spanish for “I cannot eat enough of this stuff”.
Birria de res con consomme
Equipment
- A food mill or a coarse wire strainer. You need to strain your chili puree.
Ingredients
The chili puree
- 8 guajillo chilies
- 2 ancho chilies
- 1 morita chili
- 1 white onion coarsely chopped (about 8 ounces worth)
- 10 garlic cloves
- 10 black peppercorns
- 2 cloves
- 3 bay leaves
- 2 tsp cumin
- 1 28 oz can tomatoes with their juices. Fire roasted if you can get them
- 2 tbsp cider vinegar
- 1 tsp dried mexican oregano – this is not the same thing as mediterranean oregano. If you can’t get it leave it out.
- 1 tsp dried thyme
- 1 tbsp kosher salt – you will adjust seasoning at the end
- 3 cups water
birria de res con consomme
- 4 lbs beef chuck Short ribs are good too. Oxtail is amazing if you are down with that. You want a fatty cut suitable for braising cut about the size of a baseball. Chunks.
- 3 tbsp vegetable oil – enough to coat the bottom of the pot well. You may need more as you go.
- 4 cups beef stock – rich homemade beef stock here. Or stock from your butcher. Not bouillon cubes.
Instructions
Stem and seed your chilies
- I like a pair of scissors for seeding chilies. Rip of the stem. Use the scissors to cut the chilies lengthwise. Open up the chili halves and shake out the seeds.
Brown your beef
- Preheat a large, oven-proof dutch oven over medium heat. Add the oil.
- When it starts to shimmer add the beef. Work in batches. Leave room around each chunk. You don’t want your beef to steam. You want it to brown.
- Brown one side. Then brown the other side. Then the 4 edges as best you can. I find leaning pieces up against each other helps with this. You are after golden brown.
- Repeat until all the beef is brown. Set the beef aside.
Make the chili puree
- Remove all but about 2 tbsp of oil from the dutch oven you browned the beef in. Reduce the heat to medium low. Add the onions and garlic and cook until the onions soften.
- Add the peppercorns, cloves, bay and the chilies. Gently fry the chilies for a minute or two. Take care not to burn them or your birria will turn out bitter.
- Toss in the cumin and fry for another 30 seconds or so, stirring constantly.
- Add the water, cider vinegar, and tomatoes. Stir to combine.
- Mix in the thyme, salt and Mexican oregano if using.
- Bring to a simmer, cover and cook for 10 minutes.
- Puree the chili mixture. Work in batches of about half of what your blender will hold. Remember you are pureeing hot liquid. You need to remove the little cap in the middle of the lid to let steam escape. Cover that hole with a bar rag you don’t care about too much. This stuff stains. Empty the blender into a large bowl as you go.
- This step is critical and it’s a drag. There are little bits of chili skin in the puree. You need to get rid of them. Push the pureed chili mixture through a coarse sieve or try a food mill with the finest attachment. It will take a while with a strainer. Push it through using a soft spatula back into your dutch oven. Put something on TV. You will be at this for a while.
- At the end you should wind up with about 2/3 cup of gunk in your strainer and some wonderful chili puree in the dutch oven.
Make your birria de res
- Pre-heat your oven to 325F.
- Add that good quality beef stock to the chili puree.
- Return the beef to the pot along with any accumulated juices. Bring to a simmer over medium low heat.
- Cover the dutch oven with a layer of aluminium foil and then the lid. Place in the middle of your pre-heated oven and cook until the beef is tender. This can take 3-4 hours depending on the size of the beef chunks. Enjoy the downtime.
- Once the beef is tender let it cool enough to break it up or shred it (depending on how you want to serve) and return the beef to the consomé (the sauce). Heat through and serve it as a stew garnished with diced white onion and a bit of cilantro if you like. Or make tacos. Crazy, tasty tacos.
Notes
Nutrition
Birria de res con consomme
Equipment
- A food mill or a coarse wire strainer. You need to strain your chili puree.
Ingredients
The chili puree
- 8 guajillo chilies
- 2 ancho chilies
- 1 morita chili
- 1 white onion coarsely chopped (about 8 ounces worth)
- 10 garlic cloves
- 10 black peppercorns
- 2 cloves
- 3 bay leaves
- 2 tsp cumin
- 1 28 oz can tomatoes with their juices. Fire roasted if you can get them
- 2 tbsp cider vinegar
- 1 tsp dried mexican oregano - this is not the same thing as mediterranean oregano. If you can’t get it leave it out.
- 1 tsp dried thyme
- 1 tbsp kosher salt - you will adjust seasoning at the end
- 3 cups water
birria de res con consomme
- 4 lbs beef chuck Short ribs are good too. Oxtail is amazing if you are down with that. You want a fatty cut suitable for braising cut about the size of a baseball. Chunks.
- 3 tbsp vegetable oil - enough to coat the bottom of the pot well. You may need more as you go.
- 4 cups beef stock - rich homemade beef stock here. Or stock from your butcher. Not bouillon cubes.
Instructions
Stem and seed your chilies
- I like a pair of scissors for seeding chilies. Rip of the stem. Use the scissors to cut the chilies lengthwise. Open up the chili halves and shake out the seeds.
Brown your beef
- Preheat a large, oven-proof dutch oven over medium heat. Add the oil.
- When it starts to shimmer add the beef. Work in batches. Leave room around each chunk. You don’t want your beef to steam. You want it to brown.
- Brown one side. Then brown the other side. Then the 4 edges as best you can. I find leaning pieces up against each other helps with this. You are after golden brown.
- Repeat until all the beef is brown. Set the beef aside.
Make the chili puree
- Remove all but about 2 tbsp of oil from the dutch oven you browned the beef in. Reduce the heat to medium low. Add the onions and garlic and cook until the onions soften.
- Add the peppercorns, cloves, bay and the chilies. Gently fry the chilies for a minute or two. Take care not to burn them or your birria will turn out bitter.
- Toss in the cumin and fry for another 30 seconds or so, stirring constantly.
- Add the water, cider vinegar, and tomatoes. Stir to combine.
- Mix in the thyme, salt and Mexican oregano if using.
- Bring to a simmer, cover and cook for 10 minutes.
- Puree the chili mixture. Work in batches of about half of what your blender will hold. Remember you are pureeing hot liquid. You need to remove the little cap in the middle of the lid to let steam escape. Cover that hole with a bar rag you don’t care about too much. This stuff stains. Empty the blender into a large bowl as you go.
- This step is critical and it’s a drag. There are little bits of chili skin in the puree. You need to get rid of them. Push the pureed chili mixture through a coarse sieve or try a food mill with the finest attachment. It will take a while with a strainer. Push it through using a soft spatula back into your dutch oven. Put something on TV. You will be at this for a while.
- At the end you should wind up with about 2/3 cup of gunk in your strainer and some wonderful chili puree in the dutch oven.
Make your birria de res
- Pre-heat your oven to 325F.
- Add that good quality beef stock to the chili puree.
- Return the beef to the pot along with any accumulated juices. Bring to a simmer over medium low heat.
- Cover the dutch oven with a layer of aluminium foil and then the lid. Place in the middle of your pre-heated oven and cook until the beef is tender. This can take 3-4 hours depending on the size of the beef chunks. Enjoy the downtime.
- Once the beef is tender let it cool enough to break it up or shred it (depending on how you want to serve) and return the beef to the consomé (the sauce). Heat through and serve it as a stew garnished with diced white onion and a bit of cilantro if you like. Or make tacos. Crazy, tasty tacos.
Notes
Nutrition
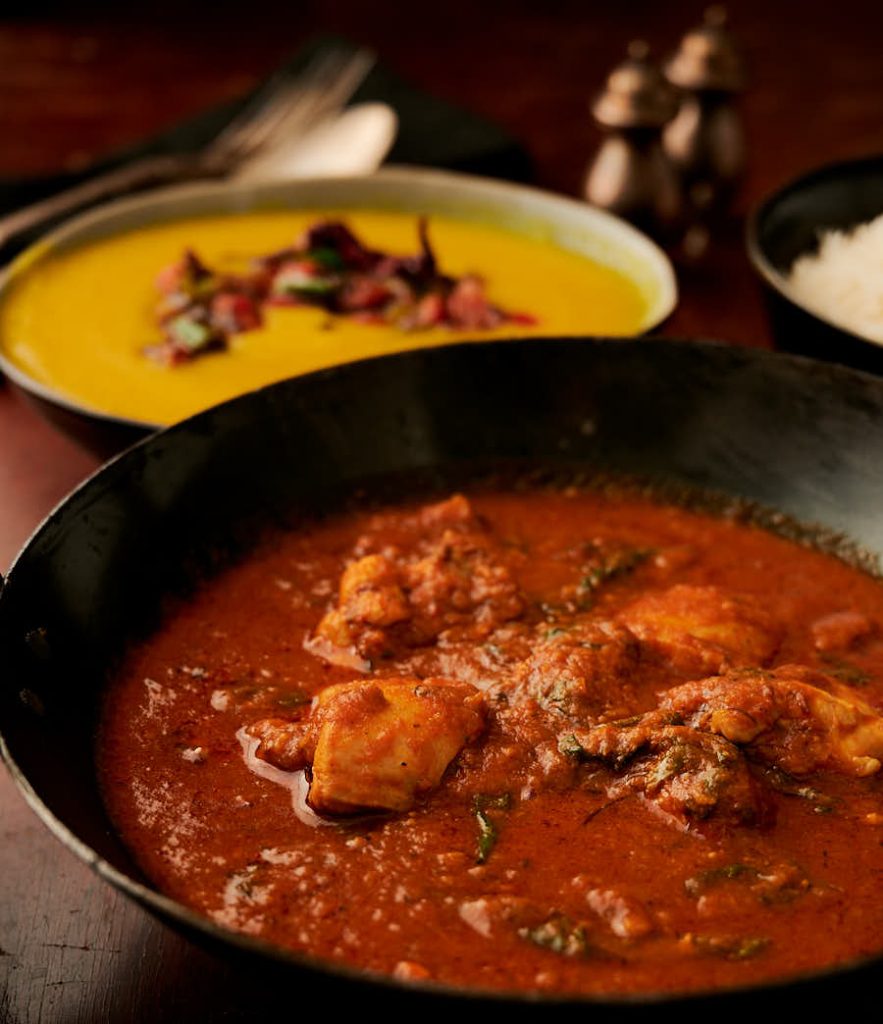
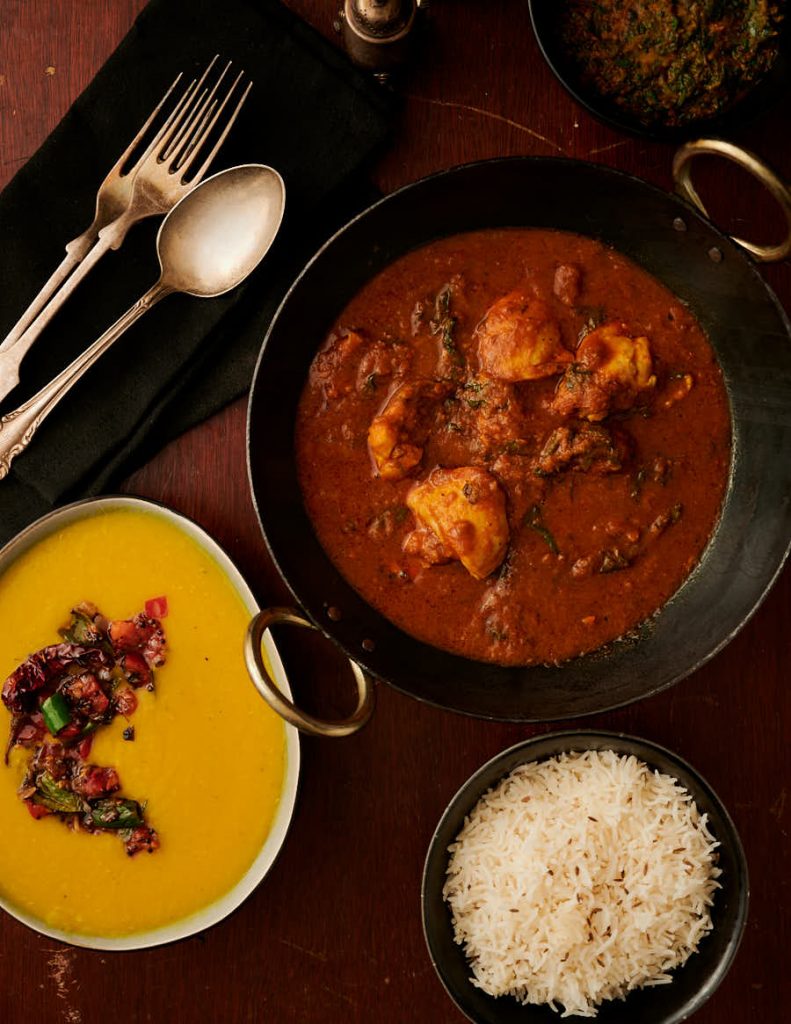
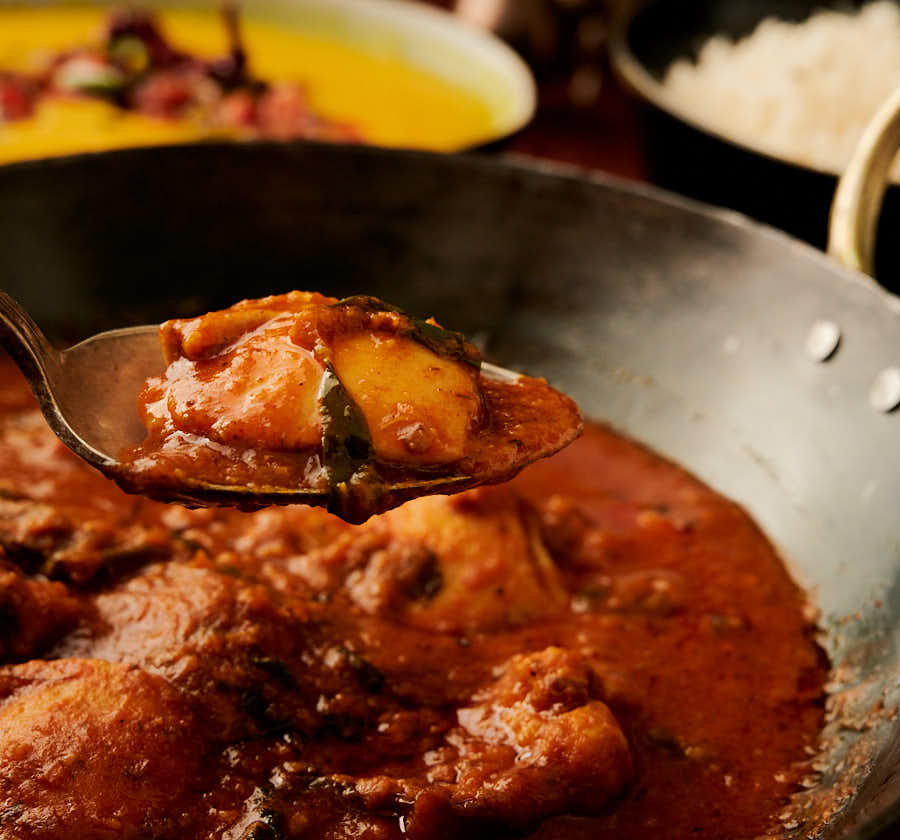
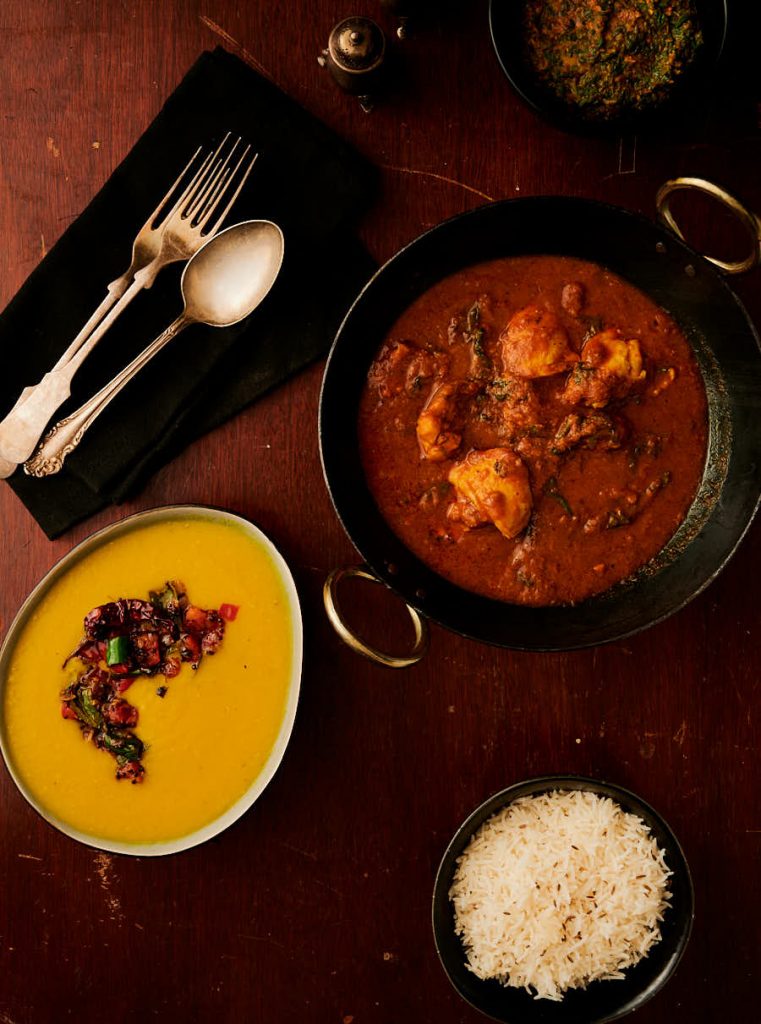
Sometimes I amuse myself. This is one of those times. Methi chicken curry. Simple. And seriously delicious.
This one is deceptive. If you look at the ingredients it’s a curry with methi leaves. You might think so what?
But that one ingredient changes everything. The fresh methi leaves add a slightly sour, herbal note. It’s surprising what a difference it makes.
Oh, and there’s hotel gravy. That changes everything too. Double curry flavour slam.
If you’ve never tried methi chicken curry you are missing out. You have to try it to understand.
I don’t know why it took me so long to get to this one. Sorry about that. Here it is. Finally.
Methi matters for methi chicken curry
Not a shocker I’m sure. Methi chicken curry has methi in the name. So methi matters.
It has to be fresh. Methi leaves. No stems. Fresh leaves. There’s no substitute. Don’t bother asking. I will just say no and point you to another dish.
There’s no conversion. There’s no – “can I substitute cilantro”. That would be cilantro chicken. It’s like asking if you can substitute pomegranates for onions. You’ll be making something. But it won’t be methi chicken curry.
I tried frozen methi. I figured spinach works. So methi could too. Then everyone could make this dish. I was wrong. Very wrong.
Turns out that stuff is just terrible. Bitter. Full of stems. At least the stuff I got.
Frozen methi is just not good. I threw it out. I really don’t like waste but there is no fixing it. Have you ever tried frozen brussel sprouts? Like that bad. Some things just shouldn’t exist.
And dried isn’t the same either. At all. Add a half cup of dried methi and you’ll get something you won’t be happy with.
So look for fresh methi. It isn’t that hard. I can get it at a grocery store where I am. Not just the Indian grocer. The plain old every day grocer.
The sign might say fenugreek leaves. That’s another name for the same stuff.
Watch for it. You will be glad you did.
There’s restaurant style cooking
If you’re after exactly what they serve at restaurants you’re in luck. There are lots of restaurant style curries on glebekitchen. Tons.
And they are really good. Great even. If I say so myself. I’m shameless. I know.
Getting Indian restaurant results isn’t that hard. You just need to cook like a restaurant. Use the same techniques. The same ingredients. It’s totally doable.
Start with this primer on restaurant style curries . You’ll learn exactly how to do it. Not sort of. Not almost. Exactly how. For real.
And then there’s hotel style
Hotel style is restaurant cooking too. But it’s not quite the same.
It’s how high end restaurants cook. Really posh restaurants. Where they can afford to deliver the absolute best.
The techniques are similar. Mostly. If you know restaurant style already you’ll understand.
The difference is in the gravy. Hotel style curry gravy is not the same as your regular curry base.
The flavours are bigger. Deeper. More intense. This is cooking to impress. This is wow factor stuff.
The work is done up front. And it’s more work. That’s why every restaurant doesn’t do it. Work costs money. Work erodes profits. Or raises prices.
It’s easier when it’s time to make dinner though. Way less messy. Piece of cake really. And you make the gravy in batches. Freeze it. And just pull it out when you need it.
It’s worth it. Try it once. You’ll see.
Hotel style methi chicken curry
This one is worth trying. It’s really surprising how good it is. If they serve it at your local Indian restaurant you probably already know that.
But if you haven’t tried it. Or if you have but you’ve never tried making it. Or if you just want to make really, really good methi chicken curry. Then give this one a go.

methi chicken curry – Indian hotel style
Ingredients
The spice mix
- 1 tsp coriander powder
- 1 -2 tsp kashmiri chili powder
- 1 tsp kasoor methi – dried fenugreek leaves
- 1/4 tsp turmeric
- 1/4 tsp garam masala – you can push this a bit if you really like garam masala but don’t go overboard
- 1/2 tsp kosher salt
methi chicken curry
- 3 tbsp neutral oil e.g. vegetable oil
- 1 tsp cumin seed
- 1 tbsp garlic ginger paste – recipe link below
- the spice mix from above
- 1 cup Indian hotel curry gravy – Recipe link in the notes. Don’t worry if it seems too thick. The juices from the chicken will thin it out.
- 3-4 boneless, skinless chicken thighs cut into 4 pieces each
- 1/4 cup chicken stock – up to 1/4 cup as needed. Add enough to get the curry to the consistency you like.
- 1/2 cup methi leaves – fresh methi leaves without any stems. Stem free zone. And not dried. Please not dried…
Instructions
Do your prep
- Measure out your spices. Prep your chicken. Measure out a cup (237 ml) of Indian hotel curry gravy.
- Remove the fresh methi leaves from the stems. Discard the stems. You want 1/2 cup of loosely packed methi leaves. Pulling the methi stalks through the hole in a colander makes quick work of this.
Make the methi chicken curry
- Heat the oil in a medium sized frying pan over medium heat until the oil just starts to shimmer.
- Add the cumin seeds. You want the oil hot enough that little bubbles form but not so hot you burn your cumin seeds. If it’s too hot lift the pan from the heat and hope you were fast enough.
- Stir in the garlic ginger paste. Gently fry until the garlic ginger paste stops sputtering. This can get a little messy.
- Turn your heat down to medium low and add your spice mix. Cook for about 30 seconds. You want to fry your spices in the oil. Don’t skimp on the oil. Bad things happen if the spices stick and burn. You cannot fix burned spices. Just start over if that happens.
- Add the Indian hotel curry gravy. Stir it really well to get the oil to combine with the curry gravy. You want everything mixed together at this point. Bring to a simmer.
- Stir in the fresh methi leaves.
- Add the chicken thigh pieces in a single layer. Nestle them down into the sauce. Cover and cook about 5 minutes. Remove the cover, flip the chicken and recover. Cook until the chicken is done. Use an instant read thermometer if you have one. You are shooting for an internal temperature of 160F. It will get to 170F as the curry finishes cooking.
- Look at the consistency. You have a decision to make. If the chicken threw a lot of liquid the sauce might be right. If not, add a tablespoon or two of chicken stock and mix it in. Look again. If you are happy with it, cover and simmer for 2 minutes. If it’s still too thick, add a bit more stock. I’ve never added more than a 1/4 cup.
- Methi chicken and rice or flatbread and a nice tarka dal or chana masala makes a fine dinner!
