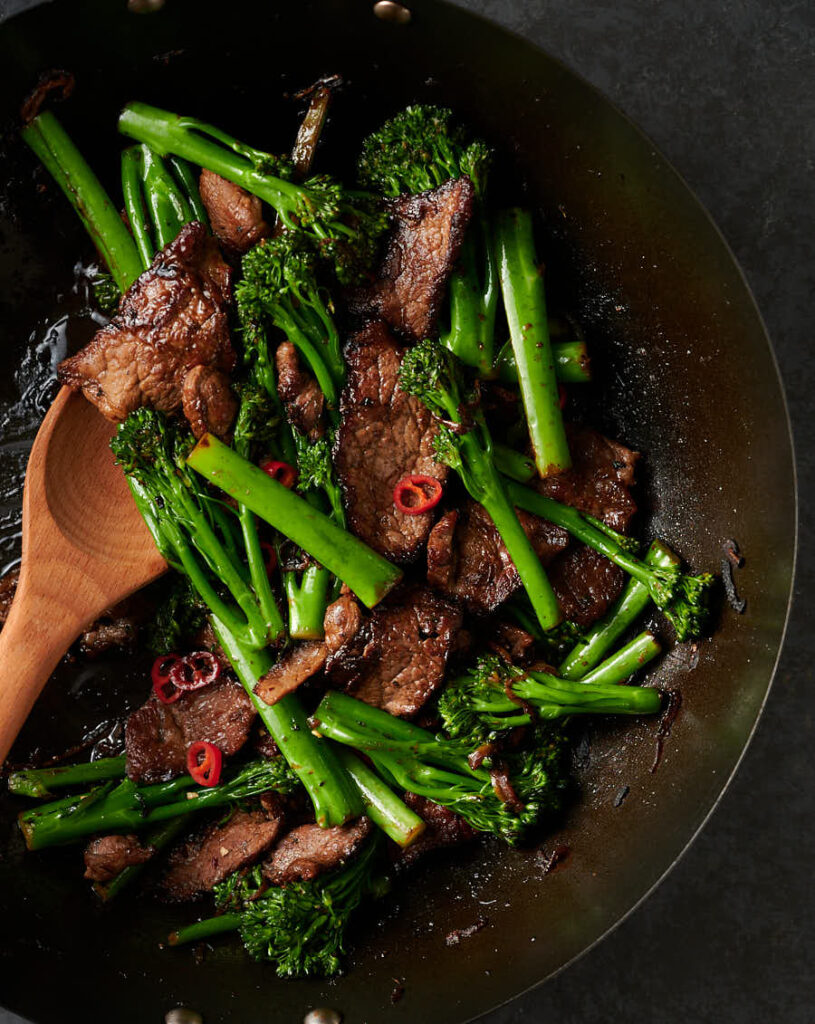
Think about beef and broccoli. Now think about what would happen if you took a classic and moved it to Thailand. That’s what this is about.
Not the usual run of the mill beef and broccoli. Not the one you grew up on. Spicier. A little less “formula” tasting.
Not that different. But not the same either. If you are looking for Chinese Canadian (or American) beef and broccoli this is not the recipe for you.
If you are looking for something delicious with big South East Asian flavours keep reading.
Beef and broccoli didn’t start out with broccoli
I don’t know if this story is true. So don’t hold me to it. It is believable though. At least to me.
It goes like this. Immigrants arrived in North America. They missed the tastes of home. So they did what they could with what they could find.
They wanted to make beef and gai lan. Broccoli was the closest thing they could find. And so beef and broccoli was born.
That story has been told a thousand times through history. People come. People adapt. Good things happen. New classics are born. Culinary evolution.
I make this dish with gai lan. But I also make it with broccolini. I like the gai lan version a little better. But I can get broccolini anywhere.
So I did it here with broccolini. Because I’m guessing you can get it anywhere too. Works pretty much the same either way.
If you can get gai lan, go for it. If not, don’t worry too much. All good.

Don’t overload your wok
You don’t have the firepower that restaurants have. So there isn’t much point trying to cook this the way they do.
If you put too much stuff in the pan it’s going to steam. Your beef won’t brown. Your broccolini won’t get that wonderful smoky char. It just won’t be as good.
So stir fry in phases. Cook half the beef. Then the other half. Beef releases water as it cooks. Water is the enemy of brown. It will take you an extra 90 seconds to do this. That’s time well spent.
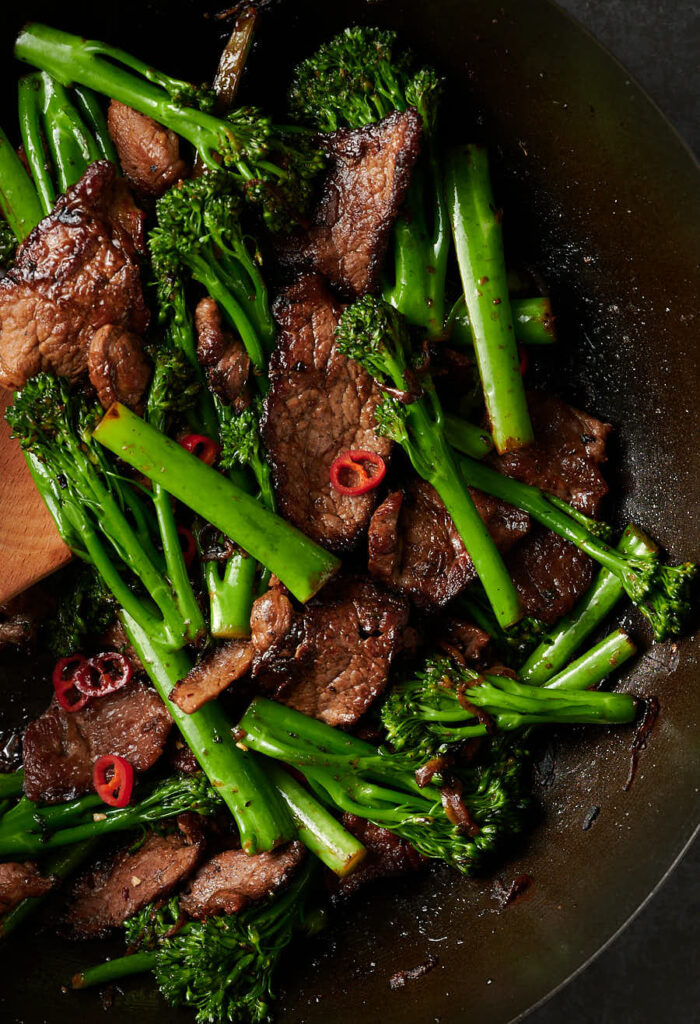
Then cook the onions and broccolini. Really crank the heat. Make sure you have enough oil in the wok. Push it. Hard. You want a bit of char on the broccolini.
Then bring everything together. Add the sauce and serve. It’s more work but it works.
Think pad see ew without the noodles
This version of beef and broccoli is like Pad see ew. Without the noodles. And with beef instead of chicken or pork. OK – it’s not that close.
But the underlying flavours are similar. Thai flavours. Chinese concept. It works.
Which is why ingredients matter so much here. Make this with Chinese soy and Chinese oyster sauce and it’s pretty much Chinese.
Thai soy is different. Thai oyster sauce is different. These things matter. You’d be amazed how much these things matter.
Of course, adding fish sauce is really different. That’s the sledge hammer here. I love sledge hammers. Mixes things up.
But if you like pad see ew think about making this. It’s beef and broccoli. But different. I surprised myself with this one. Try it and see for yourself.
beef and broccoli – thai style
Ingredients
The sauce
- 1 tbsp soy sauce – Thai light soy sauce or Golden Mountain sauce
- 1 tbsp fish sauce
- 2 tsp oyster sauce – Thai oyster sauce
- 1 tsp dark soy – Thai sweet soy (or substitute a big pinch of sugar)
- 1 tsp sambal oelek or garlic chili sauce
- 3 tbsp water
beef and broccoli
- 12 oz beef sirloin sliced thinly across the grain. Alternately, you can slice up a flank or skirt steak.
- 12 oz broccolini or gai lan if you can get it, cut into large pieces
- 1 medium onion thinly sliced (optional but tasty)
- 2 tsp garlic ginger paste
- 1/2 tsp cornstarch
- 2 tsp water mixed with the 1/2 tsp cornstarch
- 3 tbsp neutral oil you might need a bit more. Don’t skimp. Saving a few calories is not worth it here.
- 1-2 red chilies thinly sliced (optional)
- sesame seeds to garnish
Instructions
- This is an attempt to emulate the high heat stir fry techniques restaurants achieve with burners that are just slightly cooler than the sun. You don’t have this (I don’t think) so a bit of extra work is a necessary evil here.
- Combine all the sauce ingredients in a small bowl. Set aside.
- Prep your beef. If using sirloin a small roast (or baseball steak) works well. Put the sirloin in the freezer for about 20 minutes and then slice about as think as you can get (1/8") across the grain. If you are using flank or skirt slice on the vertical bias (so the slice is bigger than the steak is high).
- Use a wok for this if you can. It’s just easier. A big frying pan will do as well. Pre-heat it over medium high heat. Add 2 tablespoon of the oil.
- Turn the heat up to high. Crank it. When the oil starts to shimmer (that should happen fast) add half of the beef. Half is important. You don’t want to overload your pan. You’ll get steam if you do that and your beef won’t brown. Cook, tossing frequently, until it gets some colour. Remove.
- Add the remaining tablespoon of oil. Add the remaining beef and cook you did with the first half. Set aside.
- Turn the heat down to medium. If your wok looks dry at this point add a bit more oil. Add the onions and cook until they are well softened.
- Turn up the heat. Add the broccolini and stir fry until it starts to soften. Be vigorous. Toss stuff around. Like you were on TV. Have fun with it. This takes a couple minutes or more depending on how high your heat is.
- You want to try to get a bit of that charred flavour on the broccolini. Push it hard. Your onions will start to really shrink and darken. Like fried shallots. That’s good. After about two minutes if the onions are getting too dark add a couple tablespoons of water to the wok to cook things down a bit.
- Turn the heat down to medium and add the garlic ginger paste. Cook for about 30 seconds, then add the beef back into the wok.
- Add the sauce and toss until everything is warmed through. Add the cornstarch-water mixture and simmer until the sauce just starts to cling to the broccolini. Taste. If you think it isn’t salty enough let it cook another minute to concentrate the flavours a bit. Remove from heat. Add the red chilies if using.
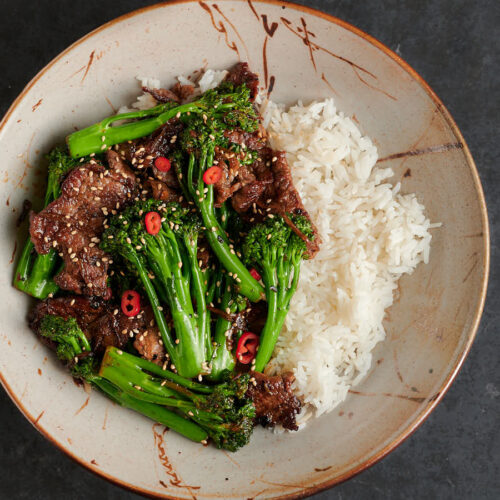
- Garnish with sesame seeds and serve with jasmine rice.
Nutrition
beef and broccoli - thai style
Ingredients
The sauce
- 1 tbsp soy sauce - Thai light soy sauce or Golden Mountain sauce
- 1 tbsp fish sauce
- 2 tsp oyster sauce - Thai oyster sauce
- 1 tsp dark soy - Thai sweet soy (or substitute a big pinch of sugar)
- 1 tsp sambal oelek or garlic chili sauce
- 3 tbsp water
beef and broccoli
- 12 oz beef sirloin sliced thinly across the grain. Alternately, you can slice up a flank or skirt steak.
- 12 oz broccolini or gai lan if you can get it, cut into large pieces
- 1 medium onion thinly sliced (optional but tasty)
- 2 tsp garlic ginger paste
- 1/2 tsp cornstarch
- 2 tsp water mixed with the 1/2 tsp cornstarch
- 3 tbsp neutral oil you might need a bit more. Don’t skimp. Saving a few calories is not worth it here.
- 1-2 red chilies thinly sliced (optional)
- sesame seeds to garnish
Instructions
- This is an attempt to emulate the high heat stir fry techniques restaurants achieve with burners that are just slightly cooler than the sun. You don’t have this (I don’t think) so a bit of extra work is a necessary evil here.
- Combine all the sauce ingredients in a small bowl. Set aside.
- Prep your beef. If using sirloin a small roast (or baseball steak) works well. Put the sirloin in the freezer for about 20 minutes and then slice about as think as you can get (1/8") across the grain. If you are using flank or skirt slice on the vertical bias (so the slice is bigger than the steak is high).
- Use a wok for this if you can. It’s just easier. A big frying pan will do as well. Pre-heat it over medium high heat. Add 2 tablespoon of the oil.
- Turn the heat up to high. Crank it. When the oil starts to shimmer (that should happen fast) add half of the beef. Half is important. You don’t want to overload your pan. You’ll get steam if you do that and your beef won’t brown. Cook, tossing frequently, until it gets some colour. Remove.
- Add the remaining tablespoon of oil. Add the remaining beef and cook you did with the first half. Set aside.
- Turn the heat down to medium. If your wok looks dry at this point add a bit more oil. Add the onions and cook until they are well softened.
- Turn up the heat. Add the broccolini and stir fry until it starts to soften. Be vigorous. Toss stuff around. Like you were on TV. Have fun with it. This takes a couple minutes or more depending on how high your heat is.
- You want to try to get a bit of that charred flavour on the broccolini. Push it hard. Your onions will start to really shrink and darken. Like fried shallots. That’s good. After about two minutes if the onions are getting too dark add a couple tablespoons of water to the wok to cook things down a bit.
- Turn the heat down to medium and add the garlic ginger paste. Cook for about 30 seconds, then add the beef back into the wok.
- Add the sauce and toss until everything is warmed through. Add the cornstarch-water mixture and simmer until the sauce just starts to cling to the broccolini. Taste. If you think it isn’t salty enough let it cook another minute to concentrate the flavours a bit. Remove from heat. Add the red chilies if using.
- Garnish with sesame seeds and serve with jasmine rice.
Nutrition
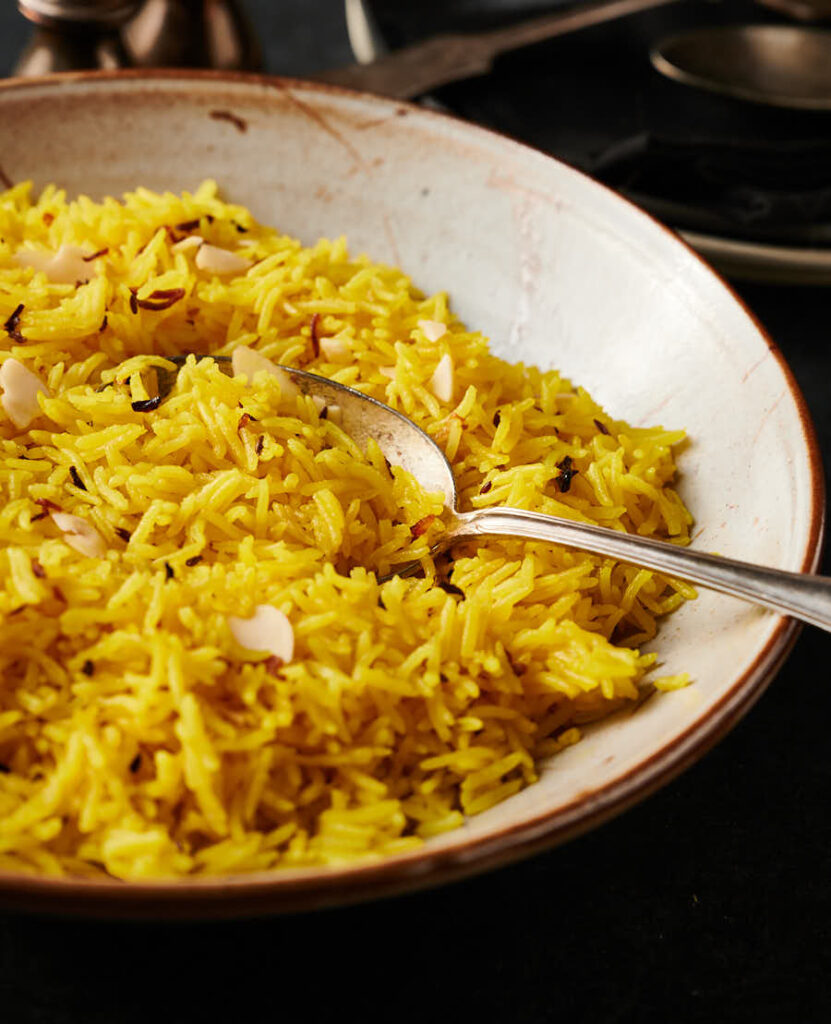
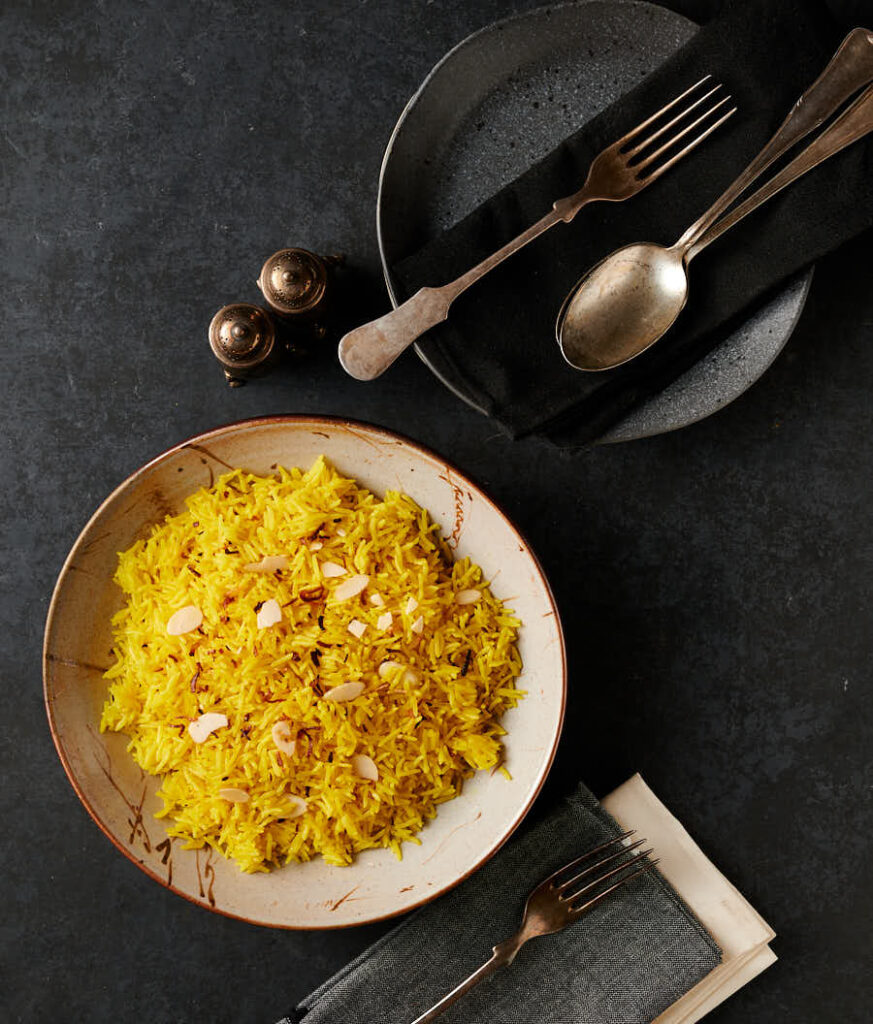
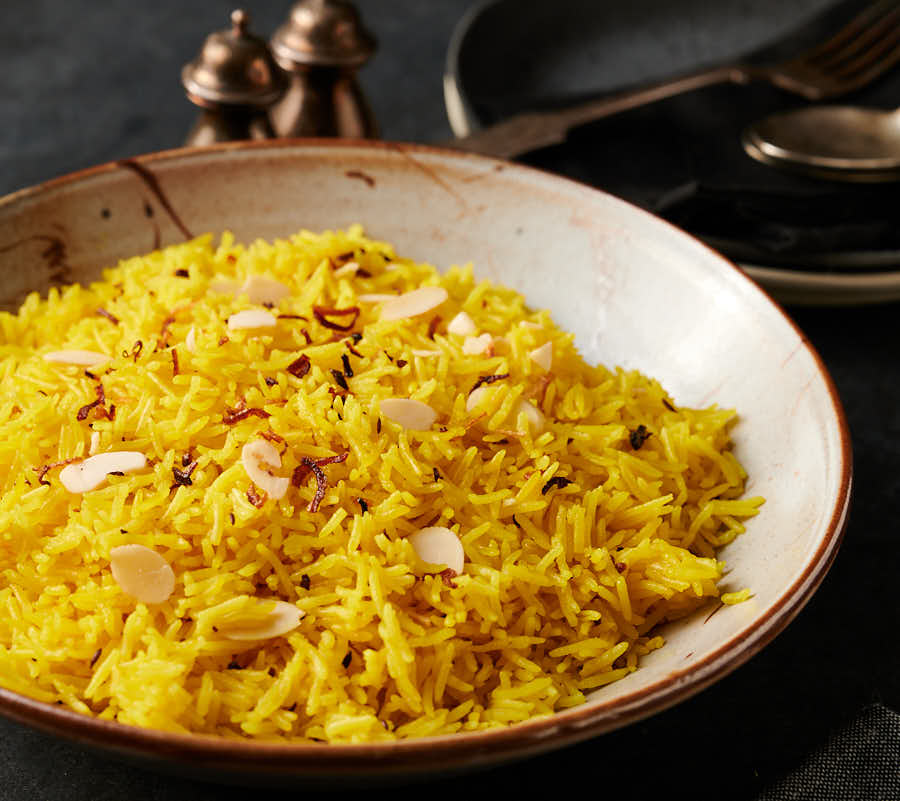
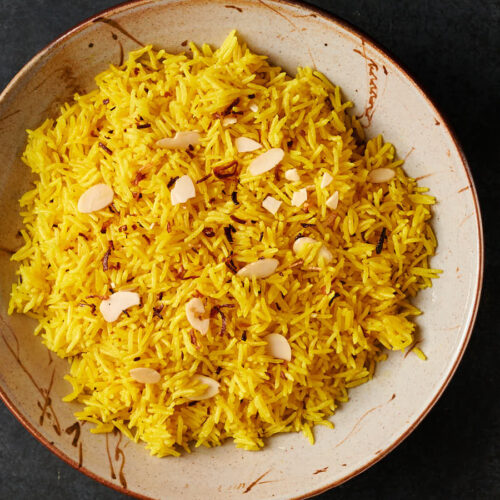
If you want crazy tasty rice to go with your curries, pilau rice is just the thing you need on the table tonight.
And it’s easy. Really easy. Like no-brainer easy. If you can boil water, you can make pilau rice.
OK – maybe it’s a little more complicated than boiling water. But not a lot. Seriously. Want to nail it every time? Read on.
Foolproof basmati rice
There are a lot of opinions on cooking rice. One mug. Two mugs. A finger deep above the surface. Up to your first knuckle.
Rinse. Don’t rinse. Soak. Don’t soak. Make it standing on one foot. But only facing east. Except Tuesdays. Tuesdays you face west.
I have a theory about that. If it works all these different ways it’s probably near bullet proof.
I don’t know that for a fact. But if everybody has a way to make rice. And they are all different. Then it’s probably pretty hard to screw up.
I have my way. And I know it works. So it’s what I go with. This has never failed me. And it’s precise. No feel. A formula. Scale it up or down. It just works.
1 cup of rice. 1 and 1/2 cups of water. A teaspoon of kosher salt. Bring to a simmer uncovered. Cover and reduce the heat to low. Set a timer for 20 minutes. Wait.
After 20 minutes turn off the heat. Reset the time for 5 minutes. When that second timer goes off you are good to go. It is just that easy.
Want 2 cups of rice? Use 3 cups of water. Two teaspoons of kosher salt. Everything else stays the same.
Pilau rice is just seasoned rice
There’s no mystery here. Rice. Water. Aromatic spices. Salt. And some ghee to make it a bit decadent. That’s it. You are just building on the foolproof basmati technique above.
You can dress it up if you want. Add peas. Top it with fried onions. Flaked almonds. Whatever you want.
But at the end of the day this is just rice. Really tasty rice. But just rice. There’s no secret. No magic. And it doesn’t need to be a big production.
I never thought I’d write this post. It actually never occurred to me that anyone would care.
But I get asked. A lot. So here it is. Happy to share.
Three simple things make pilau rice
When I make pilau rice I want three things. I want it yellow. Turmeric takes care of that.
I want the aroma to blow me away. That’s where the whole spices come in.
And I want it lush. Rich. I want every grain of rice wrapped in flavour infused buttery goodness. A little ghee takes care of that.
What I don’t want is to spend a lot of time and effort making it. Call me lazy but I don’t see the point. Nobody needs this to be more difficult than it needs to be.
If I want rice to be the star I make chicken biryani . I love a good biryani. But if it’s a supporting player, this technique does it for me. I serve pilau rice on the side. With other dishes.
Bloom your spices in ghee
The difference between pulau rice and Tuesday night white rice is one simple step. Bloom some whole spices in ghee. Before you cook you rice.
I grew up Indian. So I’m pretty happy with plain basmati rice. I think it’s the perfect counterpoint. Balanced. But I get that people want flash. And pulao rice brings a little bit of flash.
From an execution perspective rice pilau and white basmati rice are really close. So if you want rice pilau, it’s barely any extra work.
Melt some ghee. Toss in some whole spices. Fry briefly. Add the rice. Stir. Add the water. And just make rice. that’s it. Like I said. Easy.
You can make pilau rice as complicated as you want. Or you can just do this. And focus on the star of your Indian meal. Your call. I like it easy.
Easy Indian pilau rice
Ingredients
- 1 tbsp ghee
- 4 green cardamom
- 1 2" piece cassia bark
- 1/2 tsp cumin seed
- 1 tej patta Indian bay leaf (optional)
- 1 cup basmati rice
- 1 1/2 cups water
- 1 tsp kosher salt – a bit less if you are using regular sea salt
- 1/2 tsp turmeric
Instructions
- Pick a pot with a tight fitting lid. For 1 cup of rice a 2 quart saucepan is a good size.
- Heat the ghee over medium heat.
- Add the green cardamom, cassia bark and cumin seed. Little bubbles should form around the spices. Cook for around 30 seconds.
- Add the rice and stir. Add the water. For basmati using this technique the proportions are always 1 rice to 1 and 1/2 water. One tsp of kosher salt per cup of rice.
- Add the turmeric and Indian bay leaf (tej patta). Bring to a lively simmer.
- Reduce the heat to low and cover. Set a timer for 20 minutes. Do something else for a while.
- When the timer goes off (20 minutes after you covered the pot), turn of the heat. Do not uncover. Move the pot off the burner.
- Set a timer for 5 minutes. Keep doing something else. After five minutes remove the lid and gently fluff the rice. Inhale that aroma!
